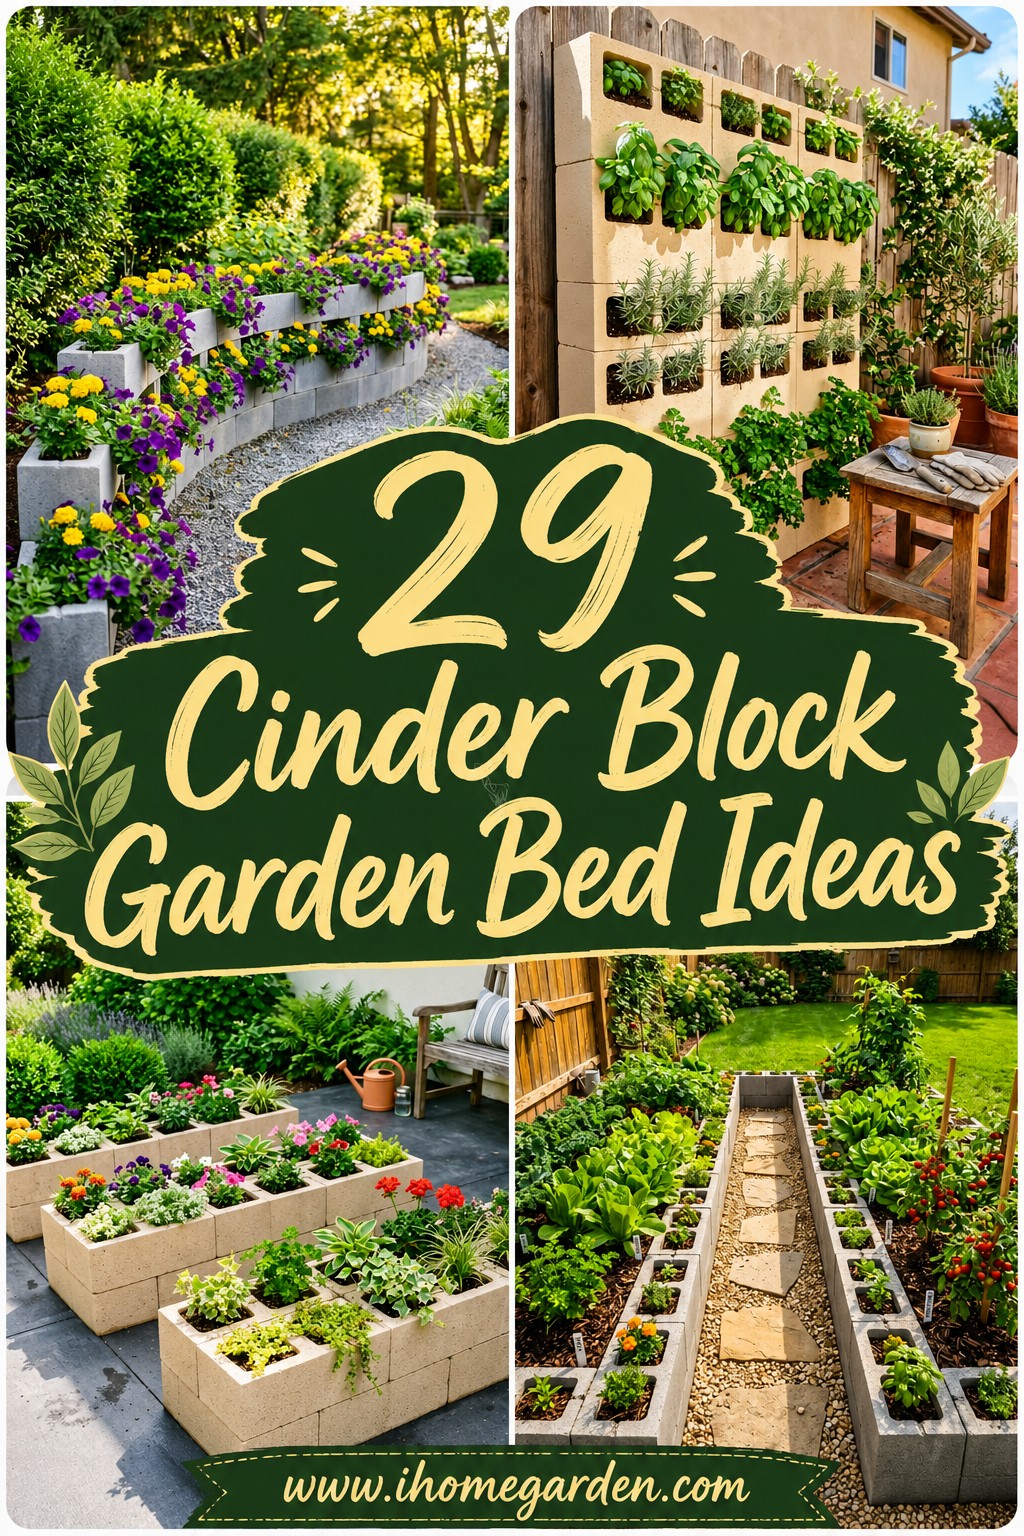
29 Easy Cinder Block Garden Bed Ideas To Build in an Afternoon
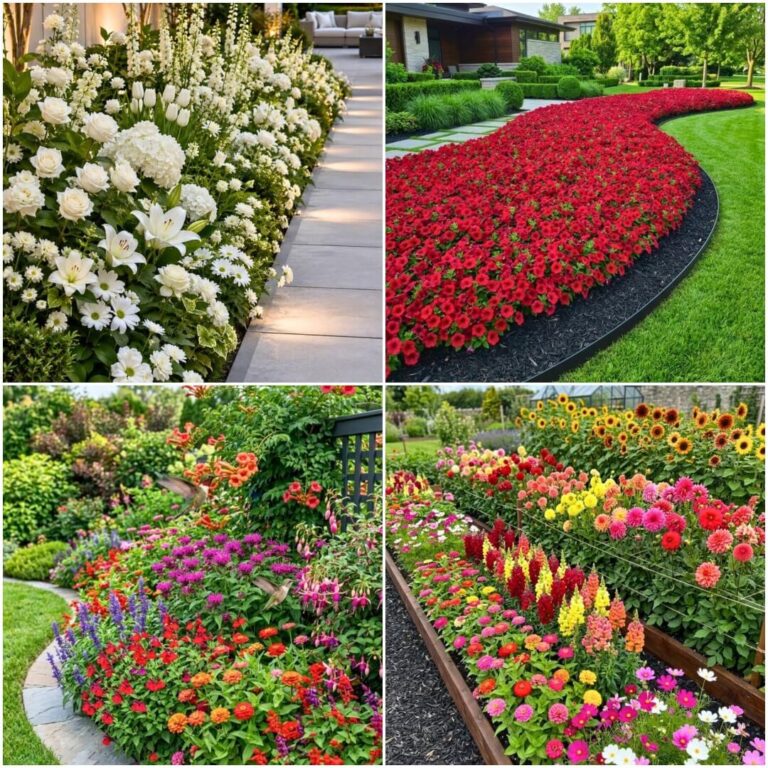
Most people walk past cinder blocks at the hardware store without a second thought — they’re the unglamorous stack sitting near the lumber aisle, priced at under two dollars each. But these 29 beautiful cinder block garden bed ideas might change how you see them entirely. Stack a few together on a Sunday morning, and by afternoon you have a raised herb garden, a tiered corner planter, or a built-in seating ledge that looks deliberately designed.
Your awkward side yard, that dead corner collecting leaves, the bare fence line you’ve ignored for two summers – cinder blocks fix all of it without a contractor, a permit, or a big budget. From spiral towers that grow eight herb varieties in three square feet to minimalist single-layer borders that clean up a messy lawn edge, there’s something here for every yard size, every skill level, and every budget.
1. Best Classic Rectangular Raised Bed Design for Your Backyard
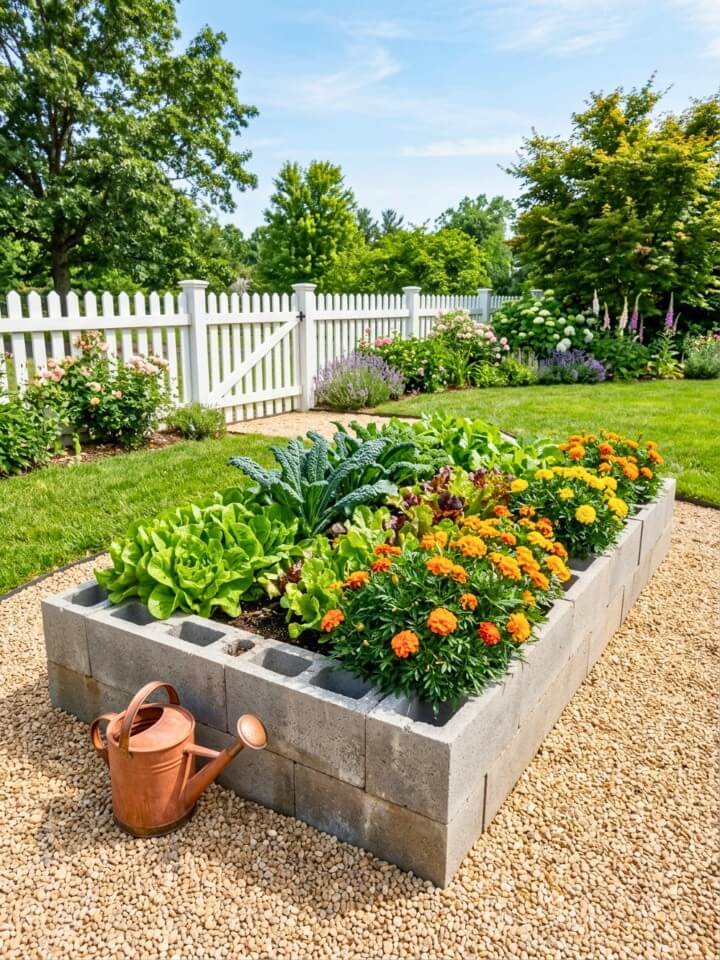
The rectangular raised bed is the most popular starting point for a reason — it’s simple, affordable, and actually works. You’ll need about 8–10 standard cinder blocks for a basic 4×8 ft bed. Stack them two layers high for at least 16 inches of soil depth, which gives roots enough room to grow strong.
Fill it with a mix of topsoil, compost, and perlite for the best drainage. This size is perfect for tomatoes, peppers, lettuce, or a mix of annuals. Place it where it gets at least 6 hours of direct sunlight daily. Lay a gravel path around the perimeter — it keeps mud off your shoes and discourages weeds from creeping in.
Quick Win: Place cardboard at the bottom before adding soil. It blocks weeds and breaks down naturally within a season.
2. Tiered Corner Garden Bed That Uses Every Inch of Space
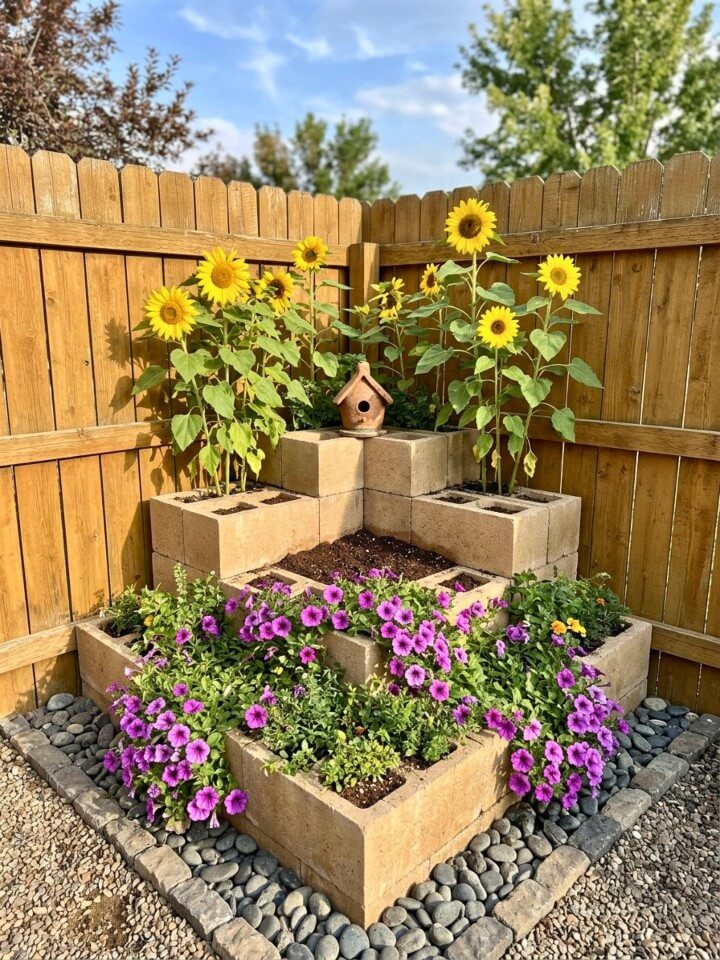
That awkward backyard corner collecting leaves and dead grass? A tiered cinder block bed fixes it fast. Build three levels — bottom tier widest, top tier smallest — using roughly 20–25 blocks total depending on corner size.
Each tier needs its own soil fill. Bottom level works great for sprawling plants like squash or trailing petunias. Middle tier suits medium herbs like sage or oregano. Top tier is perfect for compact plants like thyme or small succulents. The height difference also naturally improves drainage — water flows down through tiers instead of pooling.
Helpful Trick: Angle the tiers slightly inward so rainwater drains toward the wall, not onto your patio.
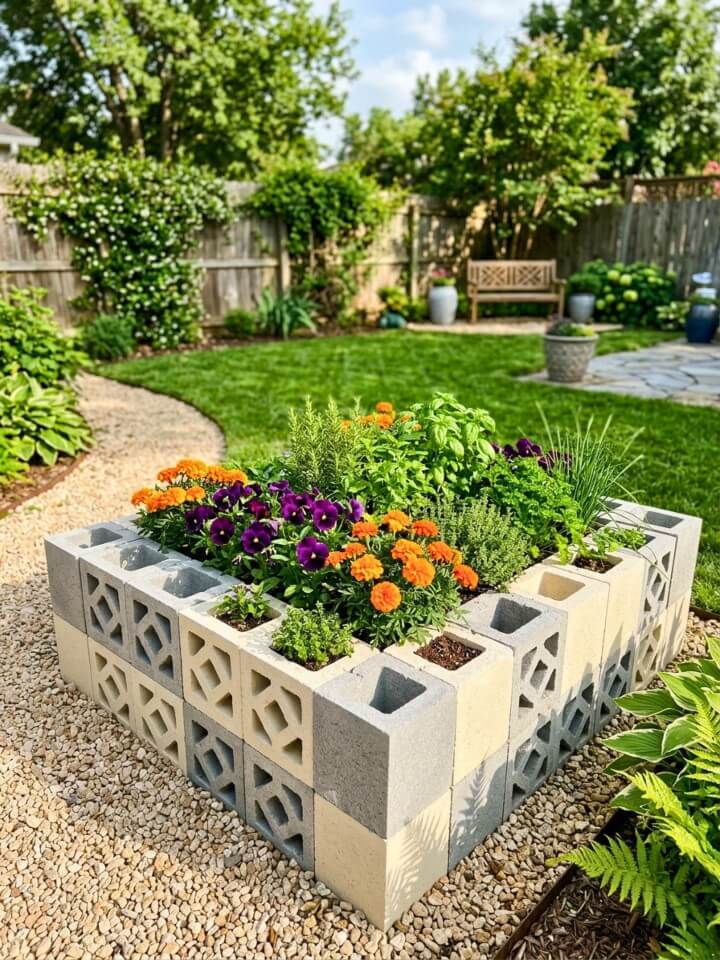
3. Circular Cinder Block Herb Garden You Can Build in an Afternoon
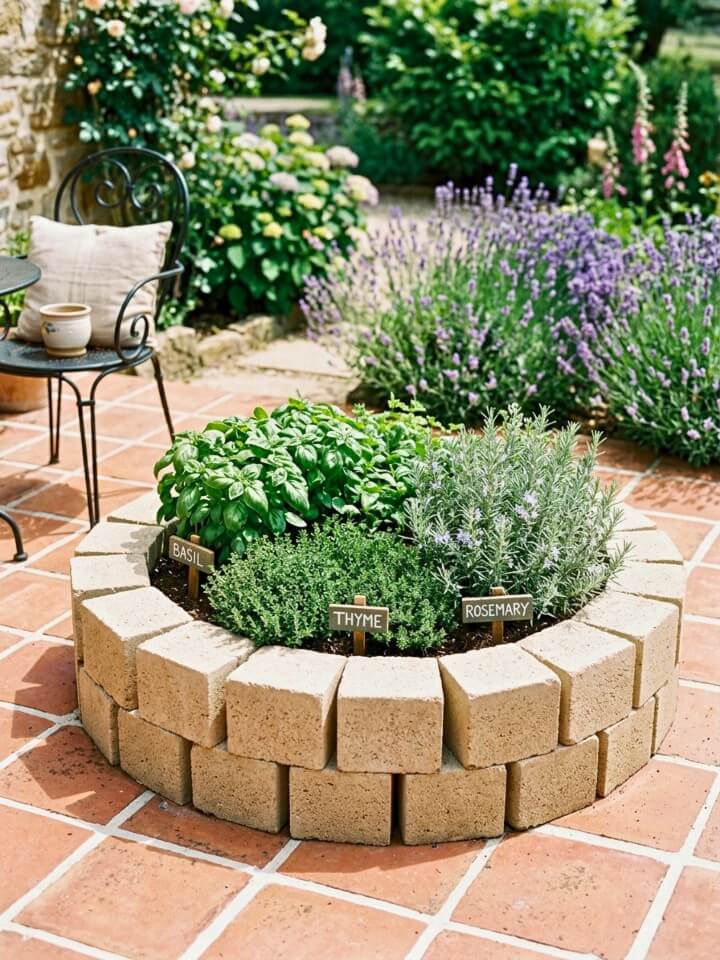
A circular herb bed is surprisingly easy to build and looks impressive for very little money. Arrange 12–16 blocks in a circle, leaving the center open and filled with soil. The standard cinder block circle fits roughly 6–8 herb varieties comfortably.
Keep taller herbs like rosemary and basil toward the center, and low-growing ones like thyme and oregano toward the outer edge. This way every plant gets sunlight without blocking another. Place it close to your back door — when you’re cooking, you want herbs within 20 steps, not 200.
Gardener’s Note: Plant mint in a separate pot inside the bed. It spreads aggressively and will take over the entire circle if planted directly in shared soil.
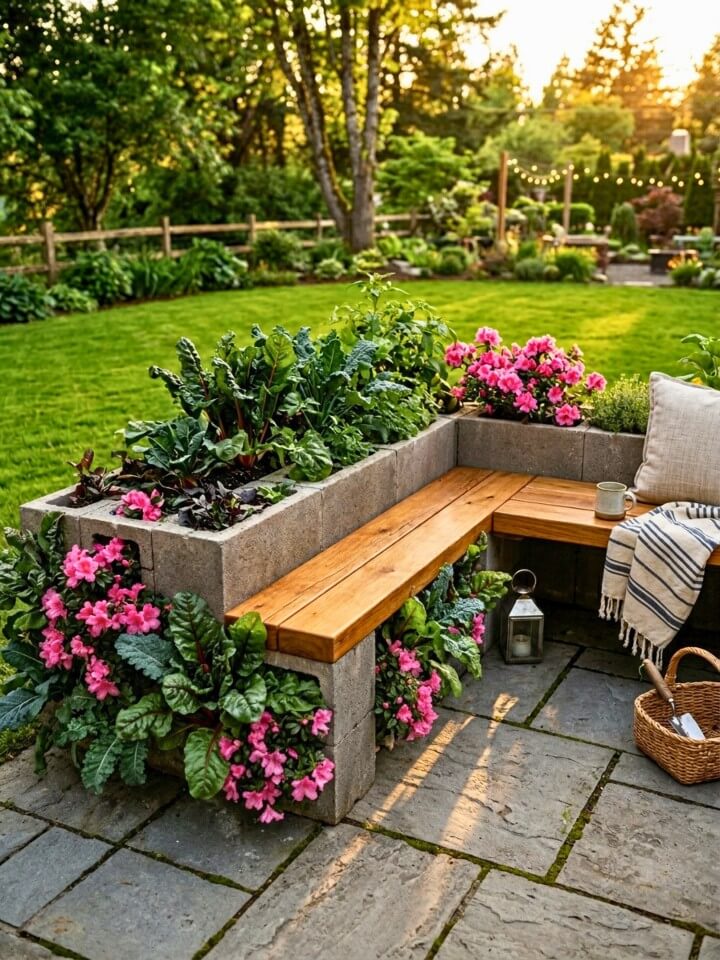
4. L-Shaped Patio Planter That Doubles as a Seating Ledge
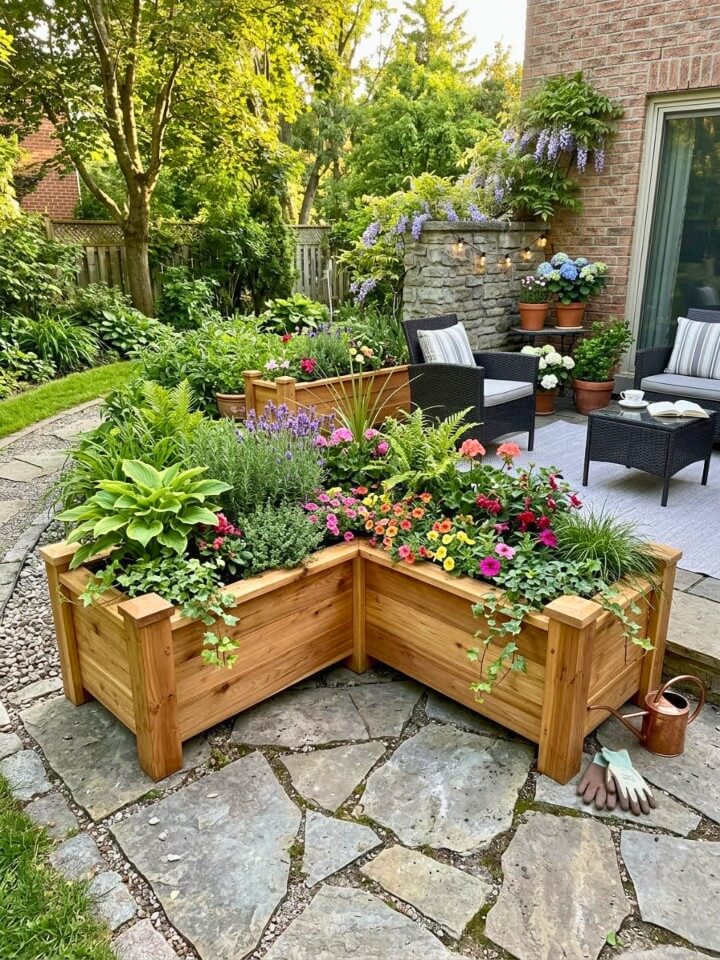
An L-shaped planter does two jobs at once – it adds greenery AND creates a natural boundary between your patio and yard. You’ll need around 16–20 blocks depending on how long each arm of the L runs.
Stack two layers high and cap the top row with flat wooden planks cut to size. This gives you a narrow ledge — useful for resting a drink, setting a pot, or actually sitting on if you use 2×6 lumber. Fill one arm with flowering plants for color and the other with herbs or vegetables for function. This combo keeps the planter interesting from every angle.
Worth Knowing: Seal the wood with outdoor wood stain before placing it on the blocks. It extends the life of the wood by several years and handles rain without warping.
5. Rustic Staggered Cinder Block Bed for a Natural Garden Look
The staggered design is the most forgiving of all — it actually looks better when it’s slightly imperfect. Place blocks at varying heights, some slightly offset, with small gaps between them. No need for precise measuring here.
Use this style along a fence line or garden path where a formal look feels out of place. Fill each block cavity individually with soil and tuck in low-maintenance plants like sedums, creeping phlox, or small ornamental grasses. The uneven heights create natural shadow and texture that flat beds simply can’t.
Smart Move: Leave a few block cavities empty and fill them with decorative pebbles instead of plants. It breaks up the green and gives the bed a more intentional, designed look.
6. Vertical Cinder Block Planter Ideas for Small Patios and Balconies
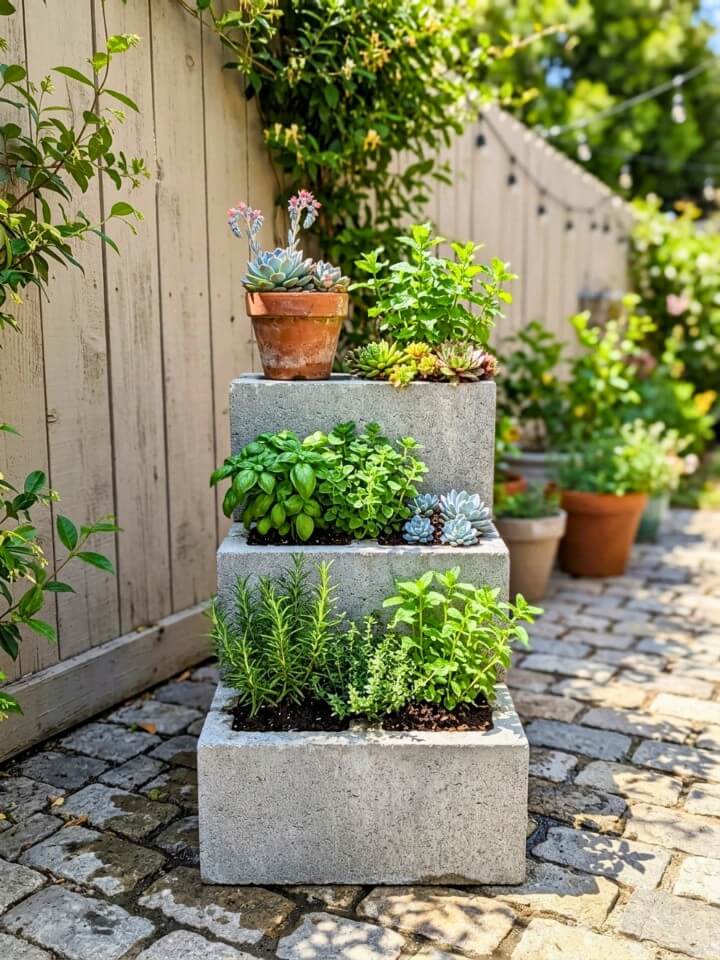
Running low on ground space does not mean running low on garden space. A vertical cinder block stack solves this instantly. Stack 3–4 blocks high and fill each opening with soil — you get multiple planting pockets without using more than 2–3 square feet of floor space.
This setup works especially well on narrow patios, apartment balconies, or tight backyard corners. Grow small herbs like chives, parsley, or thyme in upper cavities and trailing plants like sweet potato vine or lobelia in lower ones. The downward cascade makes the whole structure look intentional and full.
Keep in Mind: Water drains fast in vertical setups. Check soil moisture every day during summer — these dry out quicker than ground-level beds.
7. How to Build a Cinder Block Seating and Planter Combo for Your Patio
Why choose between seating and garden space when you can have both? Arrange blocks in an L or U shape along your patio edge — fill every other cavity with soil for plants and leave the top row open for a wood or stone cap.
Use 2×8 or 2×10 lumber for the seating surface and sand the edges smooth. Fill planted cavities with low shrubs, colorful perennials, or trailing greenery that won’t grow tall enough to brush against people sitting down. This setup works best when the planter runs at least 6–8 feet long — shorter than that and it feels more like a flower pot than a seating area.
Solid Advice: Anchor the wood cap with construction adhesive on the top block layer. It prevents shifting and keeps the seat stable under weight.
8. Curved Garden Wall That Softens Your Yard’s Hard Lines
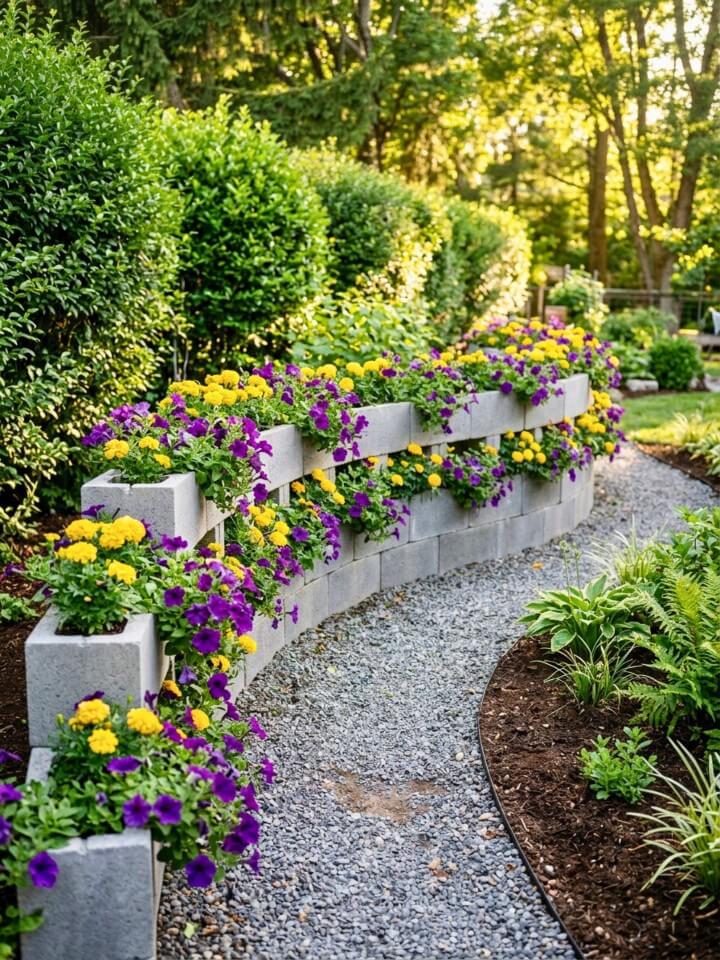
Straight lines dominate most yards — fences, driveways, house walls. A curved cinder block garden wall breaks that pattern and immediately makes a yard feel more relaxed and natural. Lay blocks in a gentle S-curve or simple arc along a garden edge or walkway.
No mortar needed for a single-layer curve. For two layers, stagger the joints like brickwork for stability. Fill each cavity with groundcover, creeping thyme, or low flowering plants. Put taller plants behind the wall and let shorter ones spill over the front edge. The layered height gives the curve depth and makes it look professionally landscaped.
One Thing to Remember: Curves shift over time without mortar. Check the alignment each spring and nudge blocks back into place before planting season starts.
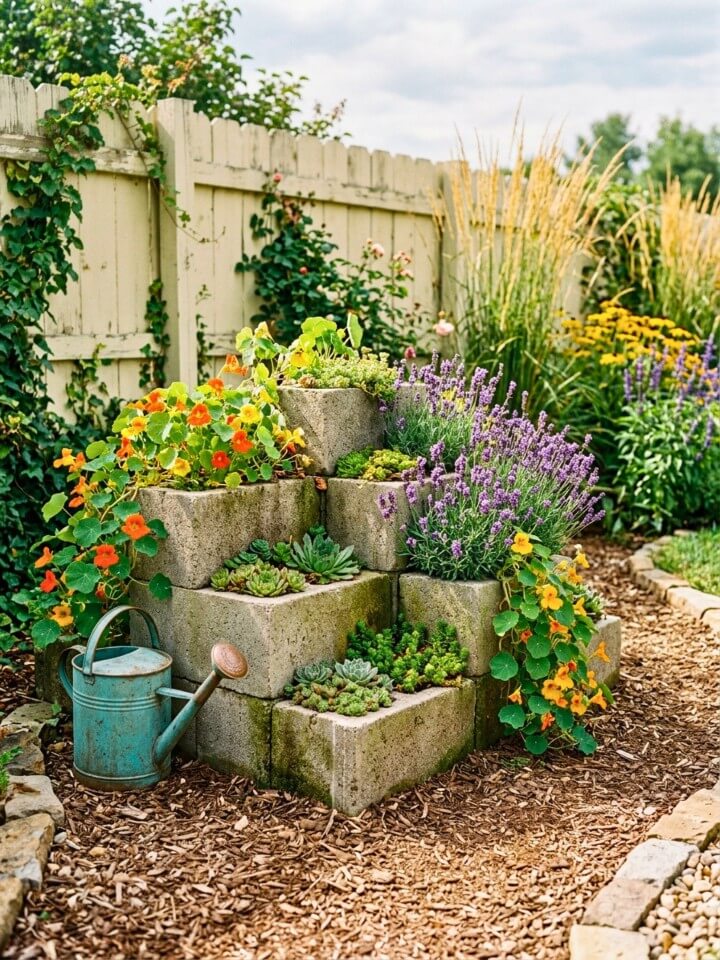
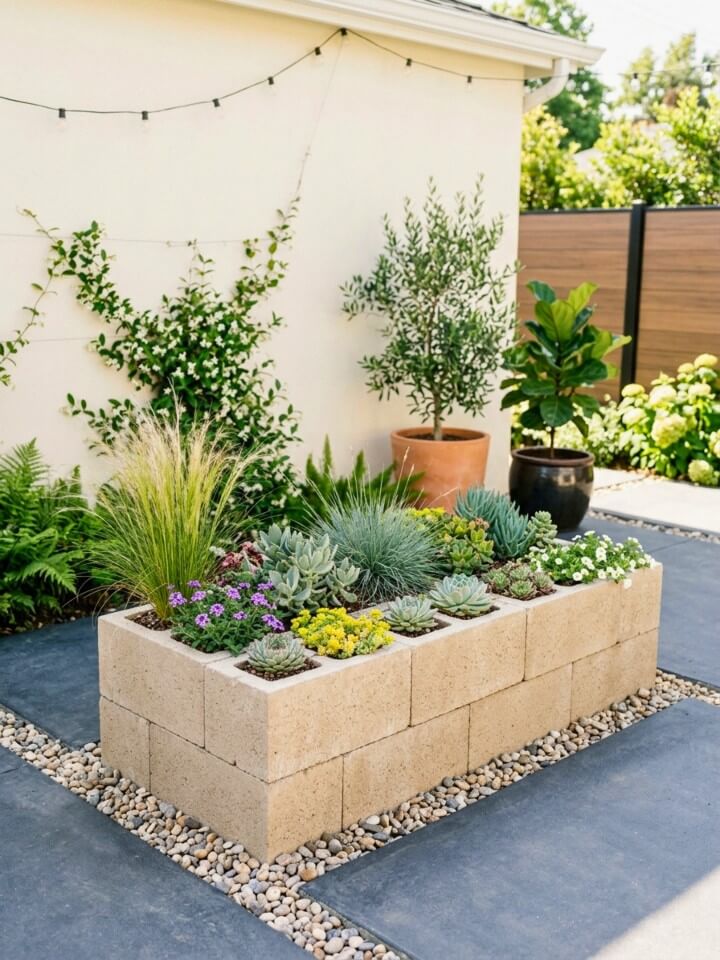
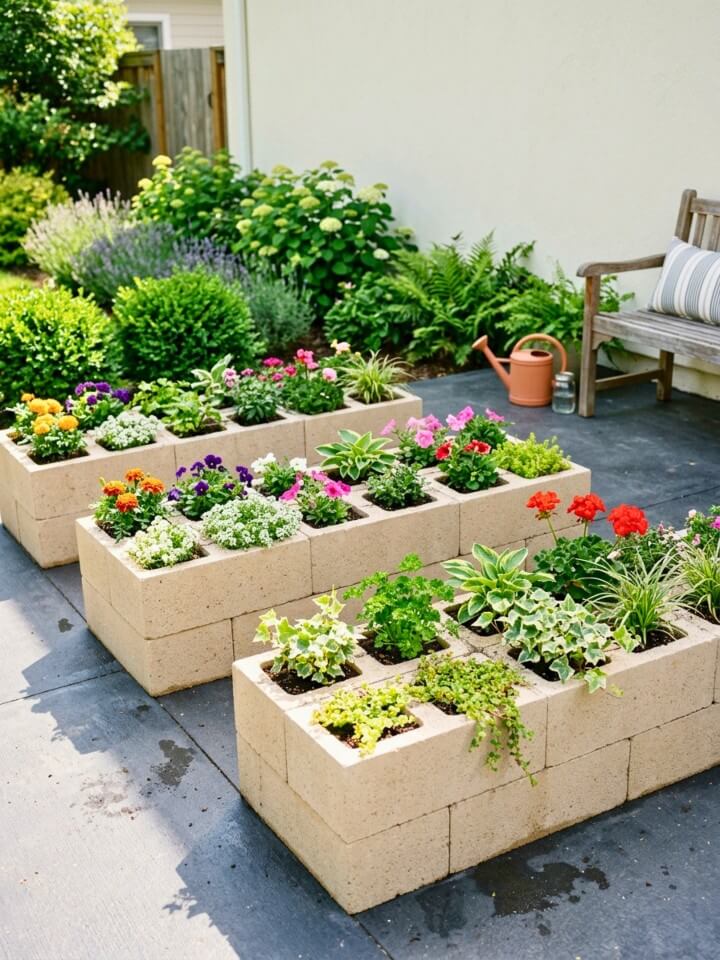
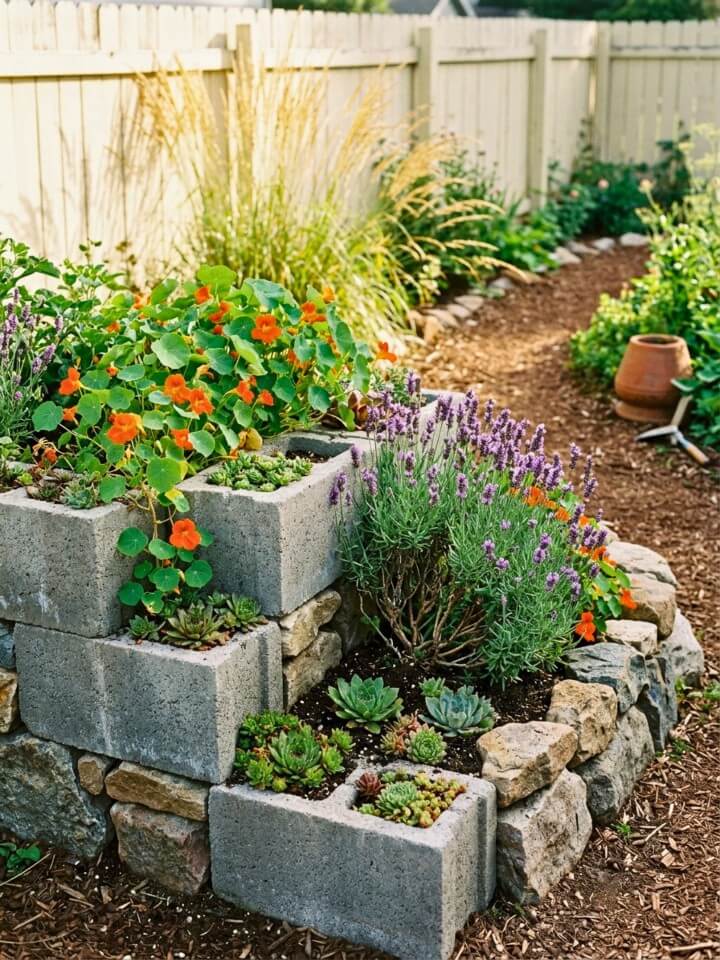
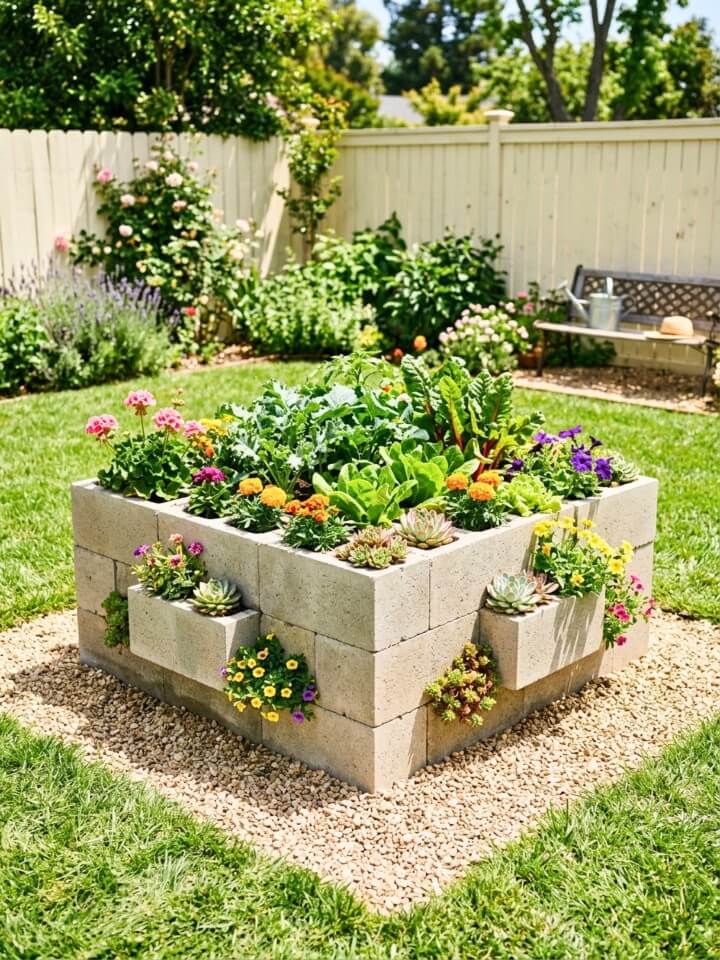
9. Multi-Level Succulent Display Using Cinder Blocks for Sunny Spots
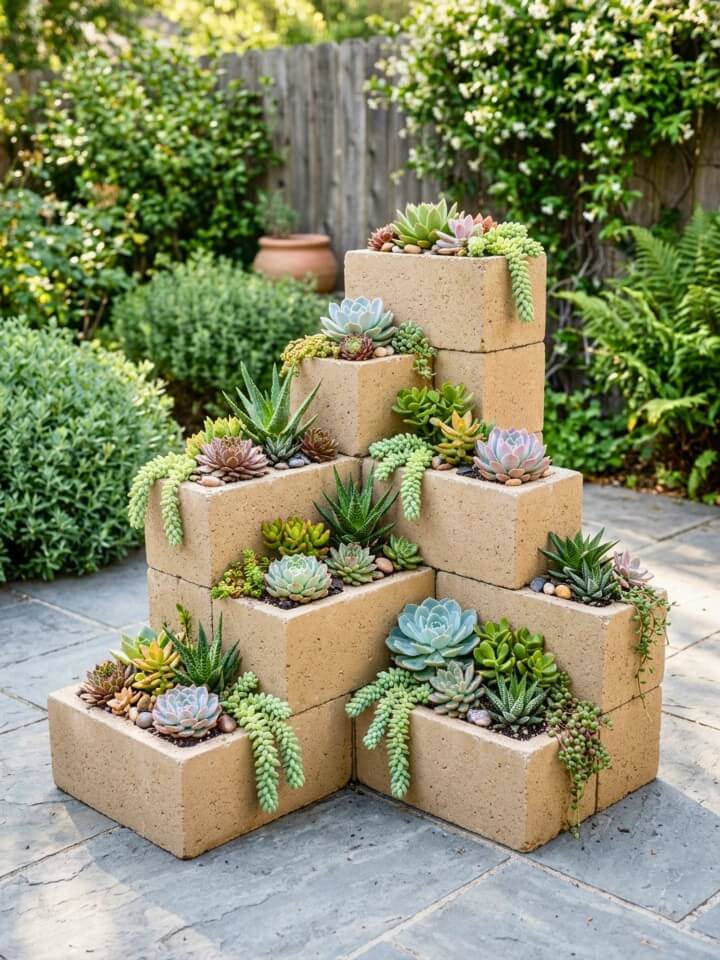
Succulents and cinder blocks are a natural match — both thrive with minimal water and maximum sun. Stack blocks in ascending steps, widest at the bottom and narrowest at the top, and fill each cavity with a well-draining cactus mix rather than regular garden soil.
Group succulents by size — larger varieties like agave or aloe on bottom tiers, medium echeverias in the middle, and tiny sedums or hens-and-chicks at the top. The tiered height ensures every plant gets direct sunlight without being shaded by its neighbor. Add a thin layer of fine gravel on top of the soil in each cavity to prevent rot around the base of each plant.
Worth Trying: Mix in a few trailing succulents like string of pearls or donkey tail along the edges. They hang down over the block face and soften the hard edges beautifully.
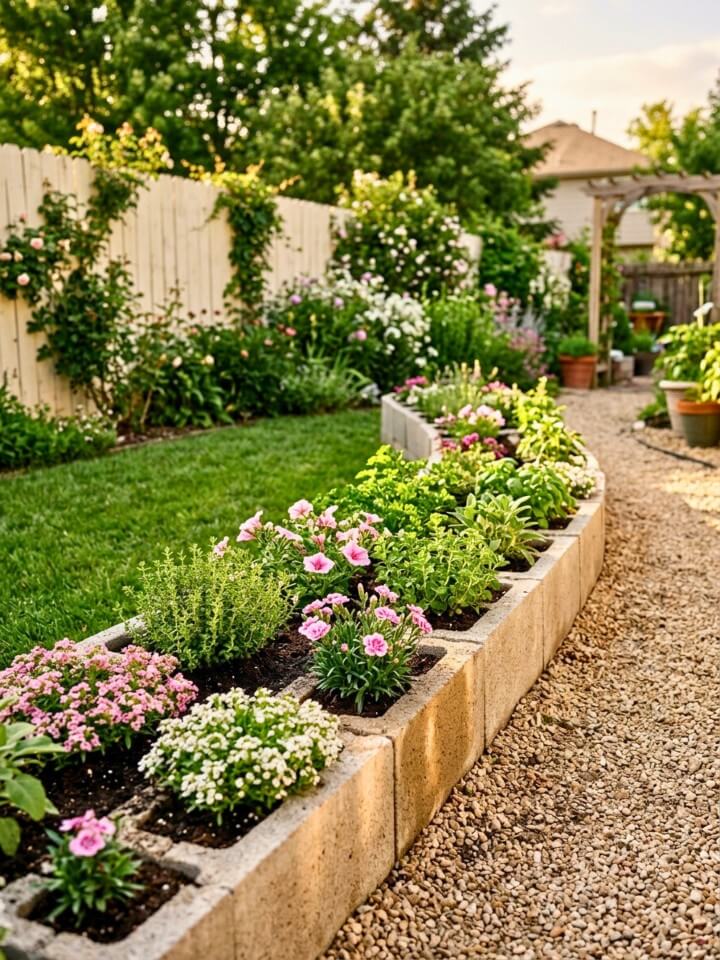
10. Border Planter Along Walkways and Driveways
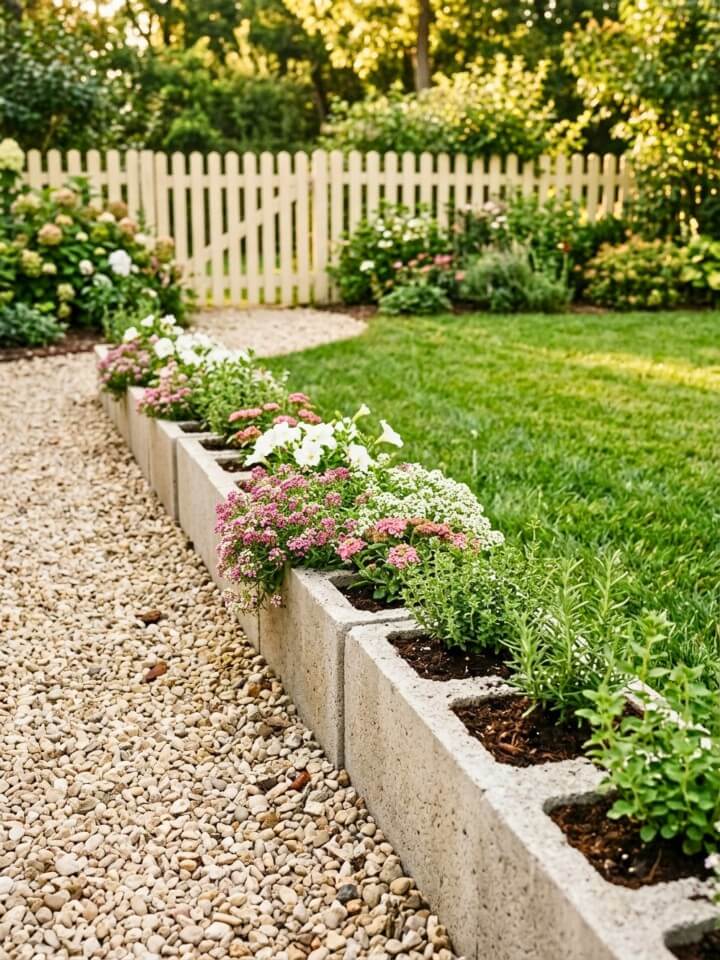
A walkway without edging always looks unfinished. Lining both sides with cinder block border planters takes about an afternoon and completely changes how your front or backyard feels. If the path connects to your parking area, these remarkable driveway landscaping ideas can help you make the whole approach look more polished. Lay blocks in a single row along the path edge, cavities facing up, and fill with low-growing plants that won’t overhang and crowd the walking surface.
Good plant choices for walkway borders include creeping phlox, marigolds, compact lavender, or ornamental kale depending on your season. Keep one side consistent in plant variety for a clean look, or alternate colors every few blocks for a more playful feel. Mix block heights slightly — some flat, some standing — for added texture without extra effort.
Easy Upgrade: Paint every other block a contrasting color before planting. It adds visual rhythm to a long walkway and takes less than an hour with outdoor masonry paint.
11. Sunken Flower Bed That Adds Depth to Flat Yards
Most raised beds go up — this one goes down, and that difference is what makes it stand out. Dig a shallow pit about 6–8 inches deep, line the walls with cinder blocks, and fill the interior with rich amended soil. The result is a cozy, contained flower bed that sits slightly below ground level.
This design works especially well in flat yards where there’s no natural elevation change. The lowered profile creates a subtle focal point without blocking sightlines across the lawn. Plant a mix of perennials around the outer edge and seasonal color in the center so something is always blooming. Edge the top rim with small river stones to prevent soil from washing out during heavy rain.
Good to Know: Sunken beds collect more rainwater than raised ones. Avoid planting drought-tolerant varieties here — they will struggle with extra moisture after storms.
12. Zigzag Garden Bed for Narrow Fence Lines and Side Yards
A straight row of blocks along a fence is fine. A zigzag pattern is far more interesting and takes only slightly more planning. Lay blocks in a repeating diagonal pattern — each group angled left, then right, then left again — creating a connected but angular bed along the fence line.
The zigzag shape naturally creates small separate planting pockets, which is perfect for companion planting. Put basil near tomatoes, marigolds near peppers, and keep aggressive spreaders like mint in their own pocket. The geometric pattern looks intentional and sharp, especially when you keep plant heights consistent across the whole bed.
Simple Suggestion: Fill the gaps between zigzag sections with dark mulch rather than soil. It defines each pocket clearly and makes the angular pattern pop visually, especially if you’re already using astounding black mulch landscaping ideas elsewhere in the yard.
13. Cinder Block Water Feature Planter for a Peaceful Backyard Corner
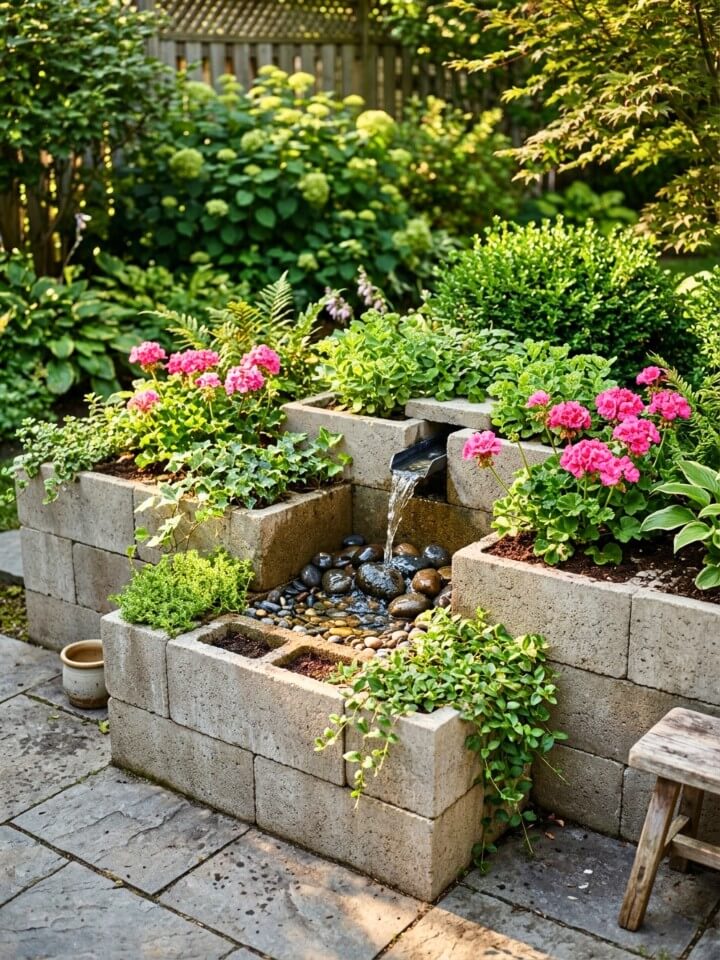
A garden that sounds as good as it looks is hard to beat. Stack cinder blocks into a raised wall three layers high, leaving one large open cavity in the center sized to fit a small submersible fountain pump and basin. Surround the water insert with soil on all sides and plant trailing vines, flowers, or small ferns around it.
The sound of moving water makes any seating area feel more private and relaxing — it naturally masks street noise and neighbor activity. Solar-powered fountain pumps are inexpensive and require no wiring, making this project genuinely beginner-friendly. Clean the pump filter monthly to prevent algae buildup and keep water levels topped off during hot weeks.
Honest Heads Up: Mosquitoes breed in standing water. Keep the pump running during daylight hours and add a mosquito dunk tablet to the basin every 30 days during warm months.
14. Raised Bed with Trellis for Climbing Vegetables and Vines
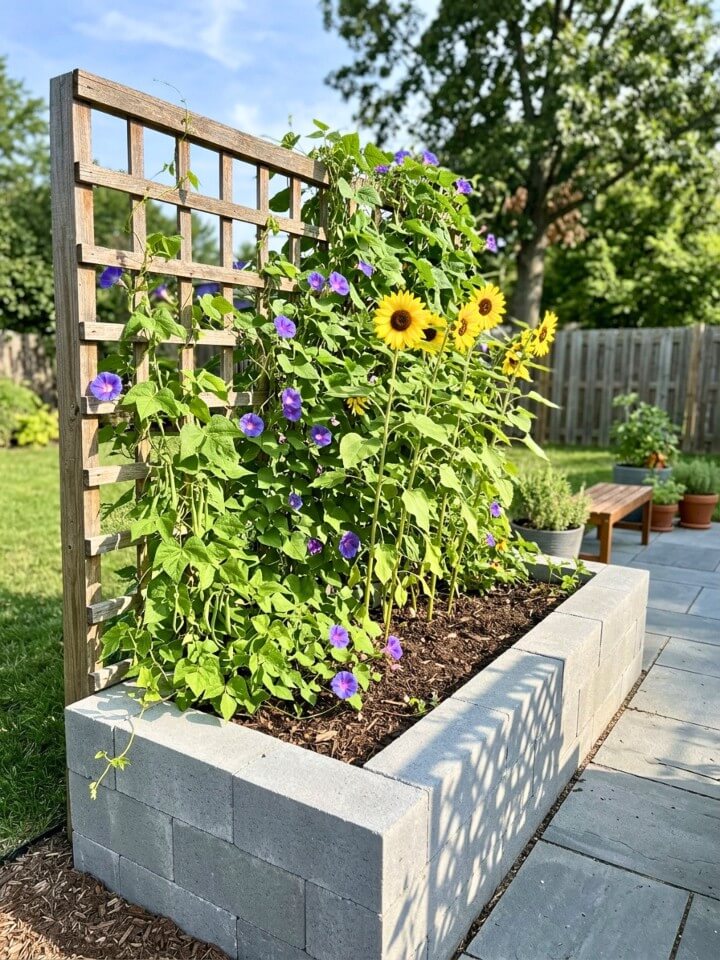
Growing vertically solves two problems at once — it saves ground space and improves airflow around plants, which reduces disease. Build a standard rectangular cinder block bed and anchor a wooden or metal trellis directly behind it before filling with soil. The trellis needs to be set before planting, not after.
This setup is ideal for beans, cucumbers, peas, or flowering vines like clematis and morning glory. Tie young stems loosely to the trellis with garden twine and they will climb on their own within a few weeks. A 4-foot trellis works for most vegetables — go 6 feet if you are growing indeterminate tomatoes or vigorous flowering vines.
Useful Detail: Use a metal T-post driven 12 inches into the ground behind the block wall to anchor the trellis. Wood stakes shift over time but metal posts stay firm through wind and rain.
15. Modern Minimalist Planter for Clean Outdoor Spaces
Not every garden needs to be busy with color and variety. A minimalist cinder block planter works on the opposite principle — fewer plants, cleaner lines, more intentional choices. Stack blocks in low single-layer rectangles and fill each cavity with one plant type only, repeated across the entire bed.
Ornamental grasses, black-eyed susans, or a single variety of succulent work perfectly here. The repetition creates calm visual rhythm rather than chaotic variety. Keep the blocks their natural gray color or paint them matte black or white for a sharper contemporary look. Place the planter on a patio with concrete or large-format pavers for the full minimalist effect.
Design Note: Odd numbers always look more natural than even. Plant 3 or 5 of the same variety per bed, never 2 or 4 — it makes a noticeable difference in how balanced the planter looks.
16. Mixed Material Garden Bed with Wood and Cinder Blocks for a Warmer Look
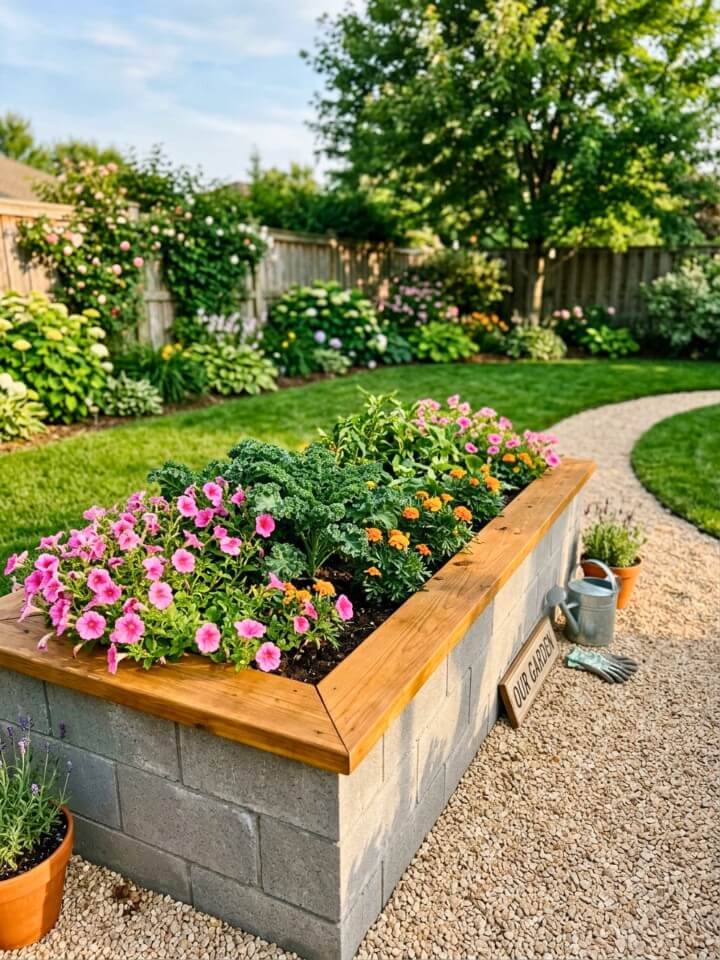
Plain cinder blocks can feel cold and industrial on their own. Adding wood changes that completely. Build your block bed in whatever shape fits your space, then cut 2×6 or 2×8 cedar planks to run along the top edges and inner walls. Cedar is the best wood choice here — it naturally resists rot and insects without chemical treatment.
Fill the bed with vegetables, herbs, or flowering perennials. The wood softens the hard block edges and adds warmth that makes the whole setup feel more intentional and less like a construction site. Cedar also weathers to a beautiful silver-gray over time if left unsealed, which actually complements the natural block color nicely.
Material Tip: Avoid pressure-treated wood in vegetable beds. The chemicals used in treatment can leach into soil over time. Stick with cedar, redwood, or black locust for food-growing areas.
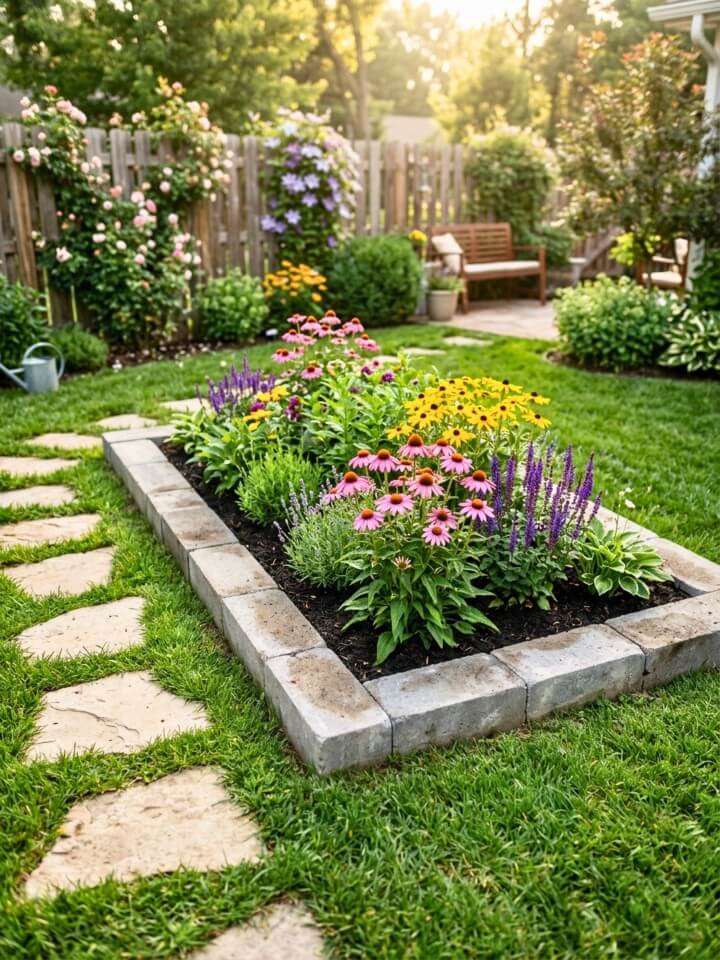
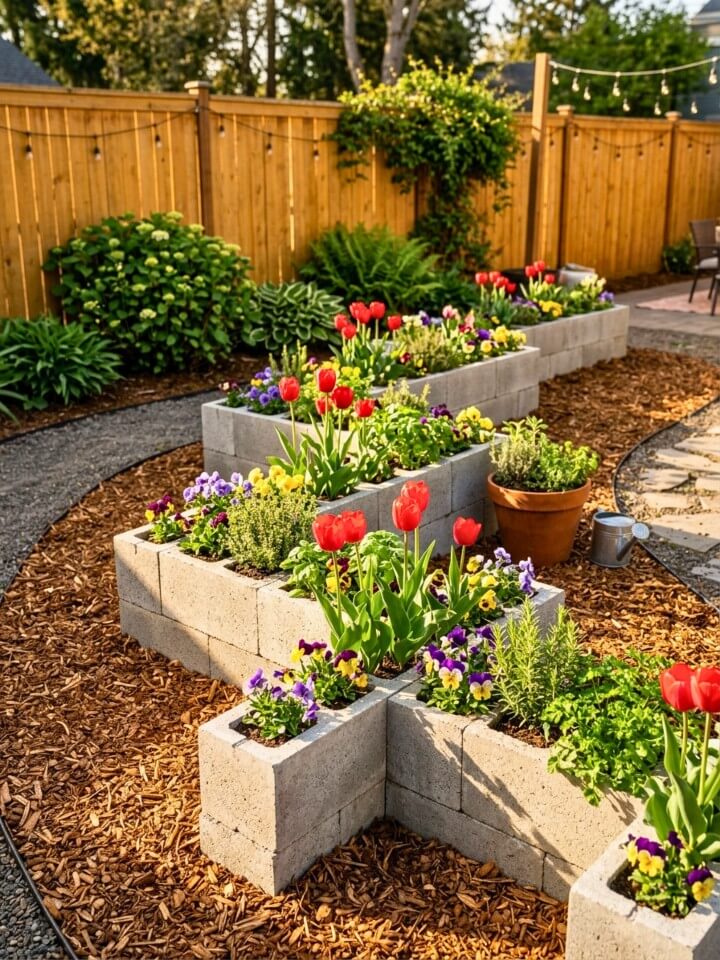
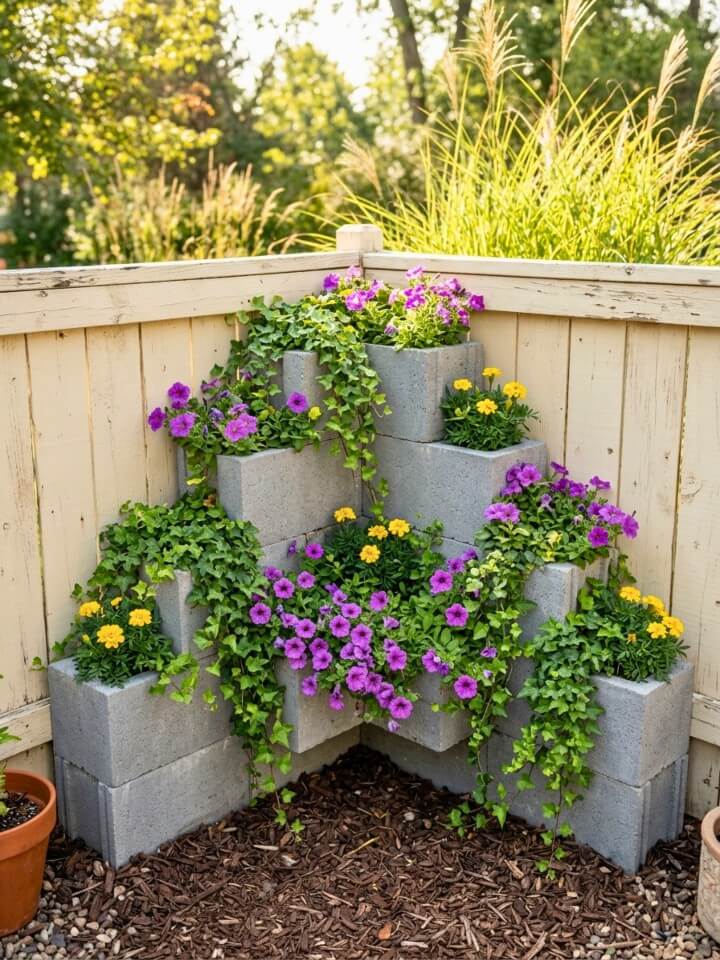
17. Corner Step-Up Planter That Creates Height Where You Need It
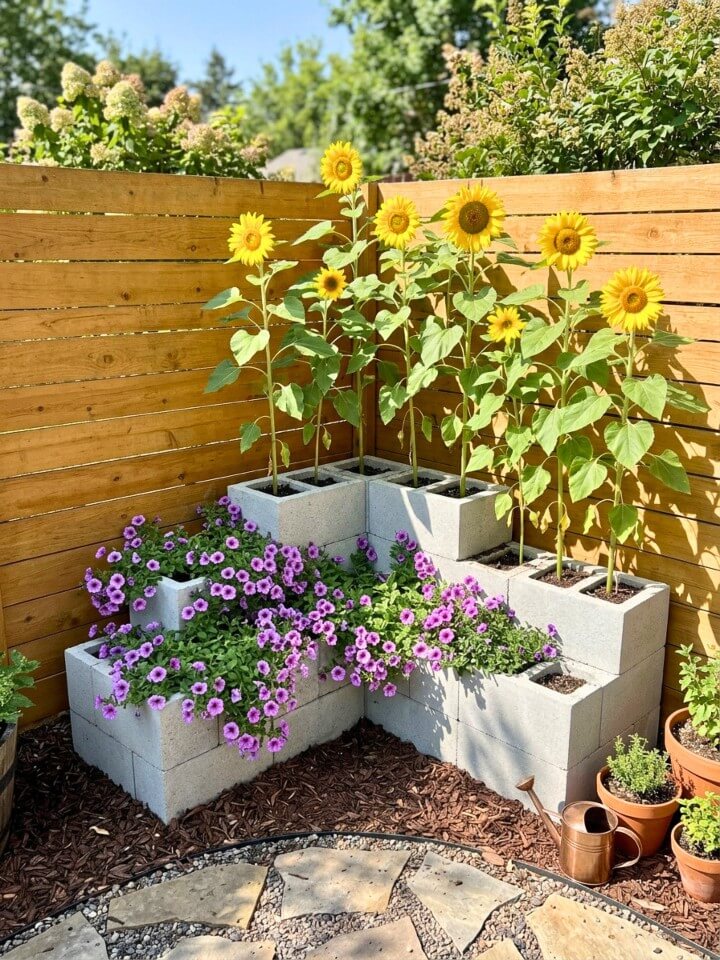
Flat corners are wasted corners. A step-up planter fills that dead space with vertical interest that draws the eye upward instead of leaving it stuck at ground level. Stack blocks in three ascending tiers — lowest tier at the front, tallest at the back corner — using roughly 18–22 blocks total.
Plant ground-hugging varieties like creeping Jenny or sedum on the front tier, medium perennials like coneflowers or salvia in the middle, and tall grasses or shrubs at the back. The graduated height creates a natural-looking hillside effect in a very small footprint. This works especially well in side yards where the space is too narrow for anything else.
Placement Reminder: Check which direction the corner faces before planting. A north-facing corner gets far less sun than a south-facing one — your plant choices need to match accordingly.
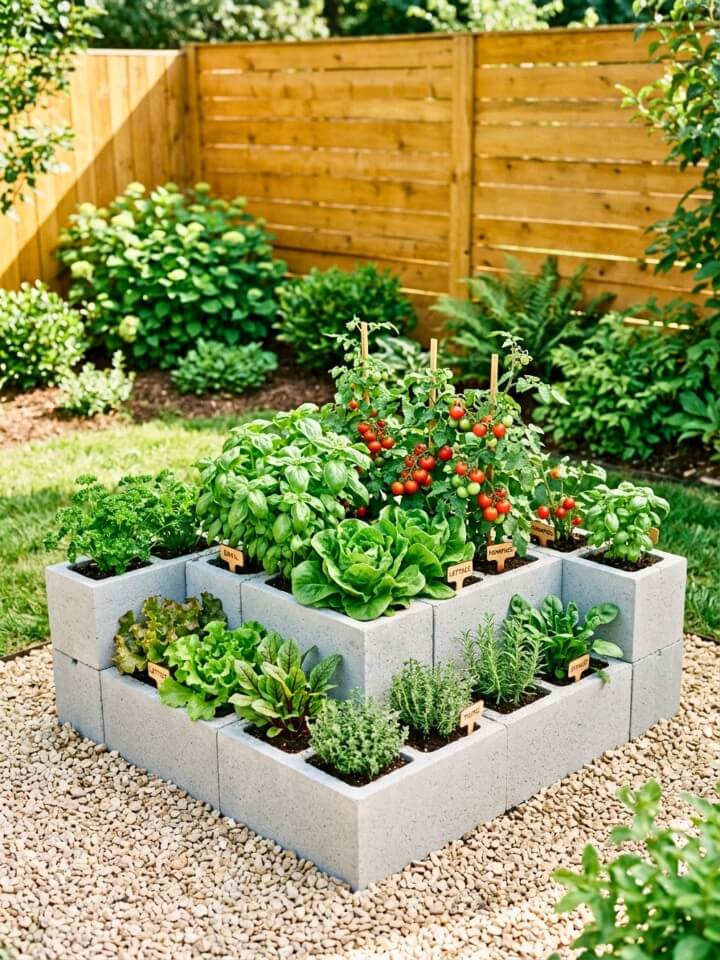
18. Patio Herb Wall for Fresh Cooking Ingredients
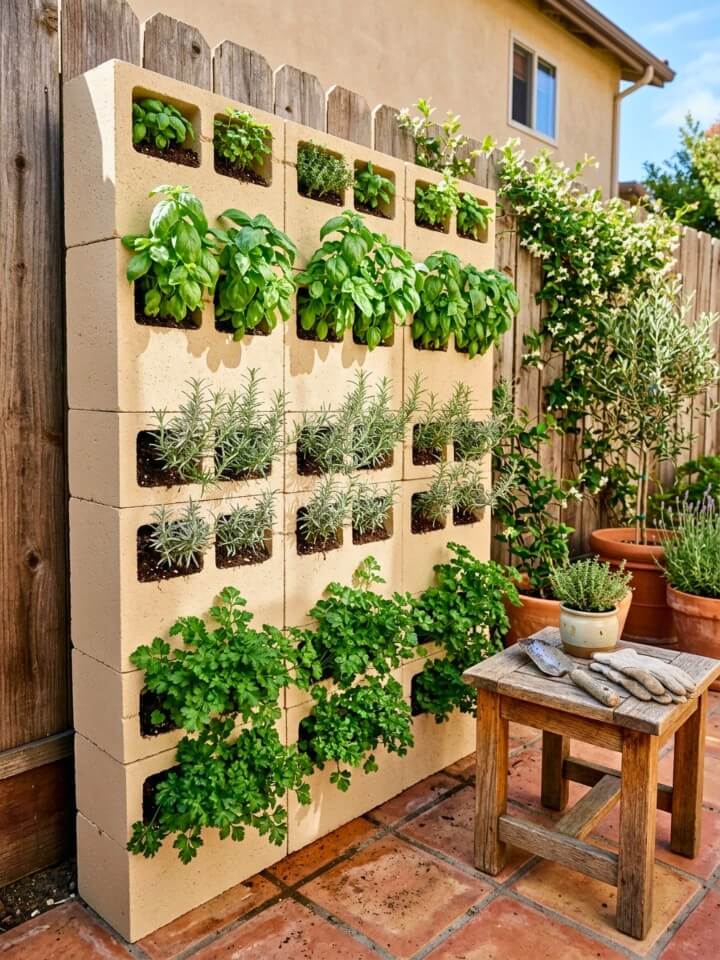
Fresh herbs on demand make cooking noticeably better. Stack cinder blocks vertically against a sunny patio wall or fence — three to four layers high — and fill each cavity with potting mix rather than heavy garden soil. Potting mix holds moisture better in wall-mounted setups where soil dries out faster.
Label each block cavity with a small chalkboard stake so you always grab the right herb without guessing. Good combinations for a 12-cavity wall include basil, parsley, cilantro, mint, chives, oregano, thyme, rosemary, tarragon, dill, sage, and lemon balm. That covers nearly every recipe you will encounter.
Honest Reality: Rosemary and mint grow much faster than the others. Trim them back aggressively every few weeks or they will crowd neighboring cavities and steal sunlight.
19. Low-Profile Ground-Level Bed for Open Lawn Areas
Sometimes the best garden feature is one that barely interrupts the view. A single-layer cinder block border laid flat keeps planting defined without adding height that blocks sightlines across your yard. This works especially well in front yards or open lawn areas where you want structure without visual weight.
Lay one row of blocks with cavities facing up and fill with low-growing groundcover, colorful annuals, or compact perennials. Creeping phlox, alyssum, or dwarf marigolds are perfect choices — they stay short, spread nicely, and fill the cavities quickly. Edge the outer perimeter with a thin line of fine gravel to give the whole bed a clean, finished boundary.
Size Reality: A single block layer only gives you about 8 inches of soil depth. Stick to shallow-rooted plants — deep-rooted vegetables like carrots or tomatoes will struggle here.
20. Modular Cinder Block Garden Bed You Can Rearrange Every Season
Most garden beds are permanent once built. Cinder block beds are not — and that flexibility is genuinely useful. Arrange blocks in whatever shape works for your current season, plant accordingly, and simply move blocks into a new configuration when seasons change. No tools, no rebuilding, no commitment.
Spring setup might be a wide rectangle for cool-season vegetables. Summer becomes a U-shape with a trellis for climbing beans. Fall shrinks down to a simple square for ornamental kale and mums. Winter blocks can be stacked and stored flat against a wall or fence. The same 20–24 blocks serve every season without buying anything new.
Seasonal Swap Idea: Take a photo of each seasonal layout before you disassemble it. Next year you will have a reference for what worked and what needed changing instead of starting from memory.
21. Spiral Herb Tower Built with Cinder Blocks for Maximum Growing Space
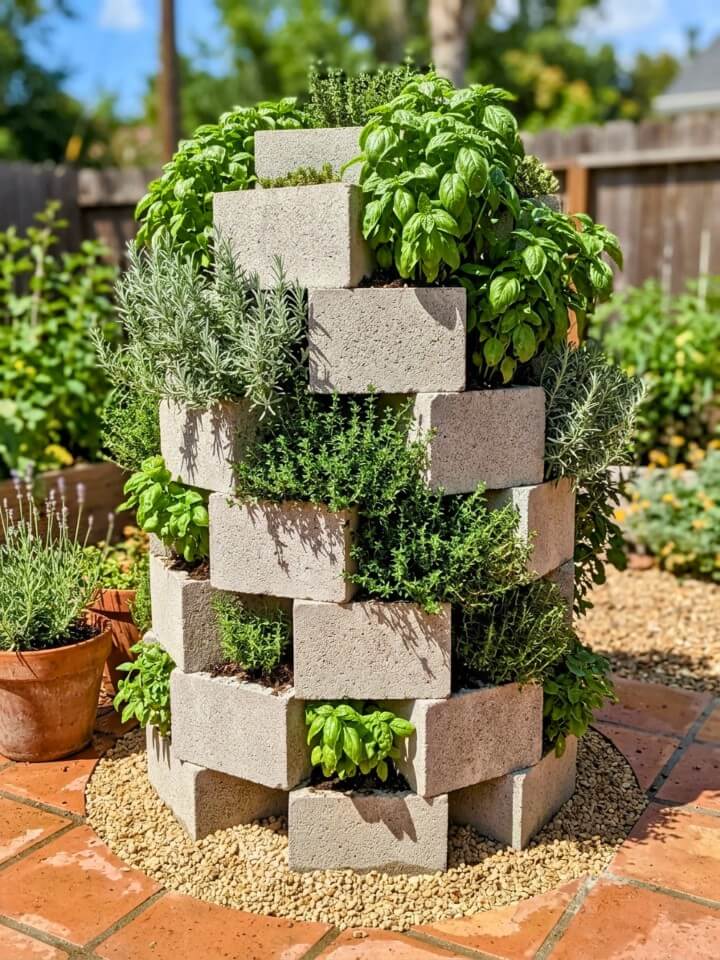
A spiral tower grows more plants in less ground space than almost any other design. Arrange blocks in an outward spiral starting from a center point, with each ring slightly lower than the one inside it. The finished structure looks like a snail shell from above and stands roughly 3 feet tall at the center.
The spiral design creates microclimates naturally — the sunny south-facing side suits Mediterranean herbs like rosemary and thyme, while the shadier north side works better for parsley and cilantro. Fill the entire spiral with a mix of garden soil and compost, packing each cavity firmly before planting. Water from the top and let it trickle down through the layers.
Building Note: Start from the outside ring and work inward when assembling. Building from center outward makes it harder to keep the spiral tight and evenly spaced.
22. Pocket Planter Cinder Block Wall for Fences and Narrow Spaces
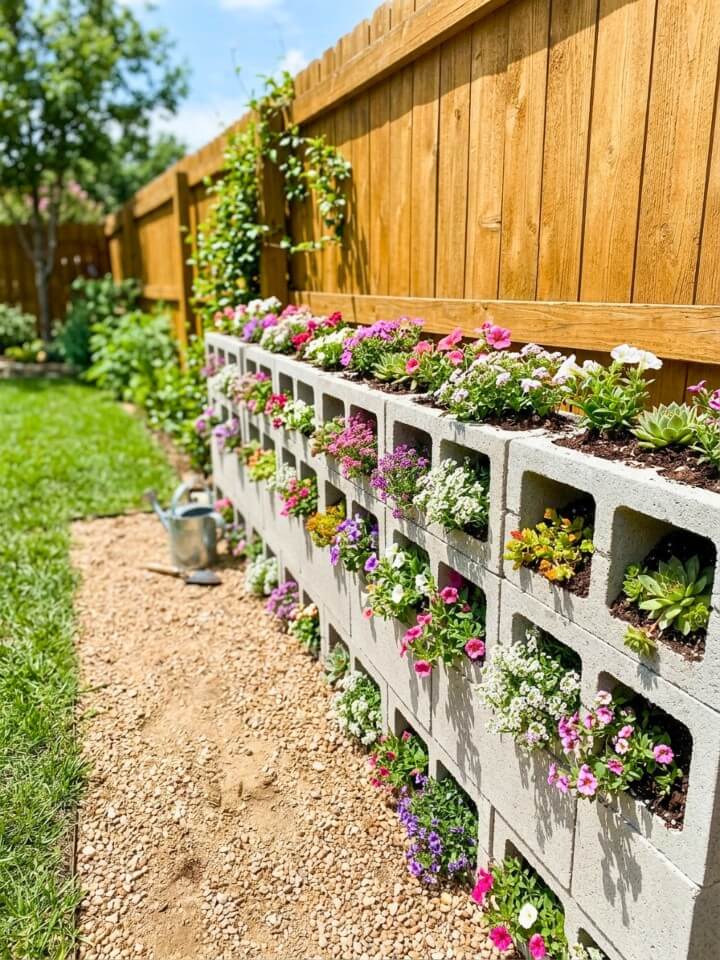
Individual block cavities become individual mini-gardens in a pocket planter setup. Lay blocks in staggered horizontal rows against a fence or wall — alternating the direction of cavities between rows creates a checkerboard of planting pockets that looks far more interesting than a straight grid.
Each pocket gets its own soil and its own plant, which means you can mix sun-lovers and partial-shade varieties in one structure by rotating which cavities face which direction. Small trailing flowers like bacopa, calibrachoa, or lobelia work beautifully here — they spill over the block edges and soften the hard structure within a few weeks of planting.
Watering Reality: Individual pockets dry out fast, especially in summer heat. A drip irrigation line threaded behind the block wall with emitters dripping into each cavity saves significant time and keeps plants consistently watered without daily checking.
23. Rustic Cinder Block and Natural Stone Garden Bed for Country-Style Yards
Cinder blocks alone have a manufactured look. Pair them with natural fieldstone or river rock and the whole bed shifts toward something that feels like it grew there naturally. Use blocks as the structural backbone and fill gaps between them with stones of varying sizes, pressing them firmly into the soil behind the block wall.
Plant a mix of old-fashioned perennials that suit the rustic aesthetic — black-eyed susans, coneflowers, yarrow, catmint, and even shrubs inspired by jaw-dropping lilac bush landscaping ideas all work well around this style. Let a few plants spill over the stone gaps rather than trying to keep everything neat and contained. The slightly wild, overgrown look is exactly the point with this style.
Stone Sourcing Idea: Check local landscape supply yards for “reject” fieldstone sold by the pound. It is significantly cheaper than display stone and looks identical once placed in a garden bed.
24. Raised Vegetable Bed with Built-In Gravel Path for Easy Harvesting
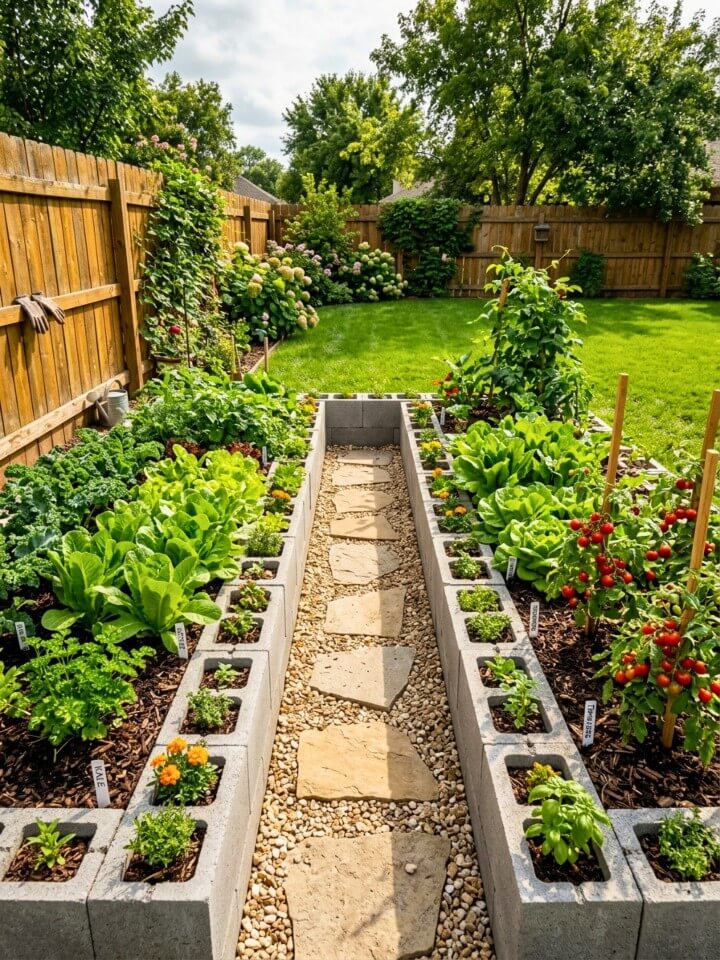
A raised bed without a path becomes difficult to maintain the moment plants fill in. Building the path into the original design solves this permanently. Arrange cinder blocks in a wide rectangle — at least 8 feet long — and leave a 18-inch gravel or wood chip path running through the center so you can reach every plant from both sides without stepping on soil.
Compact the path base with a tamper before adding gravel to prevent sinking over time. Line the path with landscape fabric underneath the gravel to stop weeds from pushing through. This setup is especially valuable for vegetable gardens where you are harvesting regularly — muddy shoes and compacted soil are constant frustrations without a proper path.
Yield Improvement: Never step inside the planting area even when the path makes it tempting to reach that extra inch. Compacted soil reduces vegetable yields significantly — roots need loose, aerated soil to grow deep and strong.
25. Angled Corner Planter That Breaks Up Boring Yard Geometry
Every yard has the same basic geometry — square house, rectangular lawn, straight fence. An angled planter cuts across that predictability and immediately makes the space feel more dynamic. Stack blocks at a 45-degree diagonal across a corner rather than following the fence lines, creating a diamond-shaped growing area that stands out from every angle.
Fill the angled bed with plants that have strong visual presence — ornamental grasses, tall salvias, or bold dahlias work well. The diagonal lines draw the eye across the yard rather than straight to the fence, making the whole space feel larger. This trick is commonly used by landscape designers to add perceived depth to small yards.
Layout Suggestion: Before placing a single block, lay a garden hose in the diagonal shape you want and step back to look at it from your main viewing point — usually the back door or patio. Adjust the angle until it looks right, then stack blocks along the hose line.
26. Semi-Enclosed Garden Bed That Creates Backyard Privacy
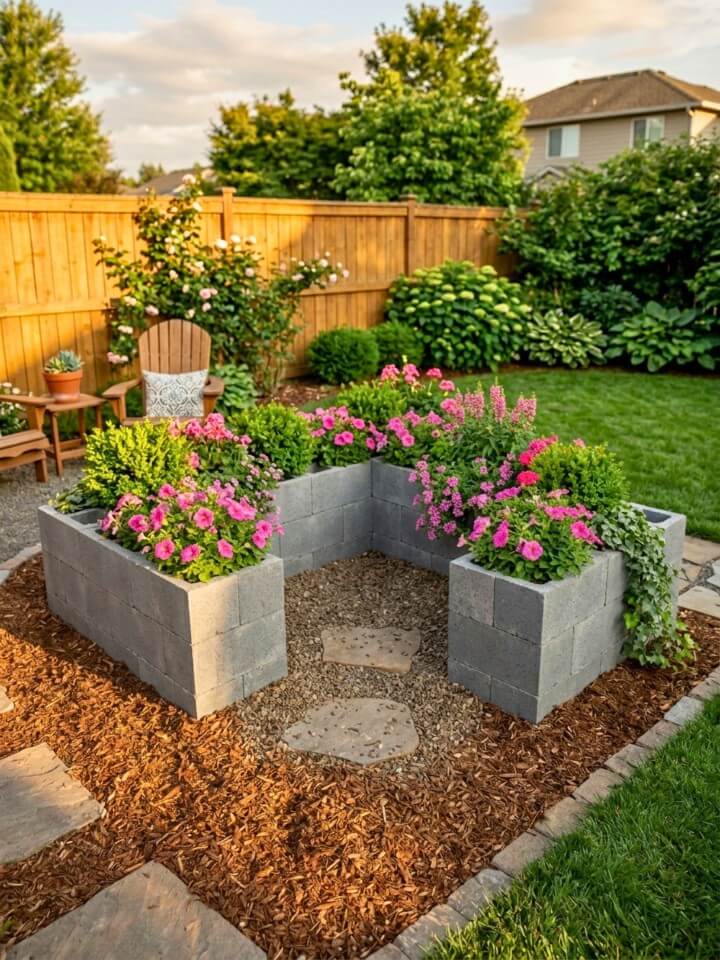
A low cinder block wall filled with plants does something a plain fence cannot — it creates privacy while adding beauty rather than just blocking a view. Arrange blocks in a U-shape or partial enclosure three layers high around a patio seating area or backyard corner. Fill cavities with shrubs, tall ornamental grasses, or climbing vines on a simple wire trellis attached to the back row.
Russian sage, Karl Foerster grass, or knockout roses are excellent choices — they grow dense enough to block sightlines within one season and look intentional rather than like a barrier. For larger screening projects, these incredible privacy landscaping ideas can help you choose plants and layouts that feel softer than a wall. The interior of the enclosure immediately feels more private and sheltered, which makes outdoor seating far more comfortable and usable.
Growth Timeline: Most screening plants reach useful height in their second year, not their first. Plant one season early if privacy is a priority — do not wait until you are already sitting outside frustrated by the open view.
27. Painted Garden Bed with Contrasting Colors for Bold Curb Appeal
Natural gray cinder blocks blend into the background. Painted blocks become part of the design. Choose two colors that complement your house exterior — a neutral base like white or tan with an accent color that matches your front door or shutters creates a cohesive look that feels intentional rather than random. If you already have a dark entryway, these wonderful black front door ideas can help guide the accent color so the garden bed feels connected to the house.
Use masonry paint, not regular exterior paint — it bonds to the porous block surface properly and lasts several seasons without peeling. Paint blocks before assembling the bed and let them cure fully for 48 hours before stacking. Fill cavities with plants that contrast the paint color — purple salvia against white blocks, yellow marigolds against charcoal gray, or red petunias against cream.
Color Advice: Stick to two colors maximum per bed. Three or more colors starts looking chaotic rather than designed, especially when flowering plants add their own color to the mix.
28. Multi-Section Companion Planting Bed Built from Cinder Blocks
Companion planting works significantly better when plants are physically separated into organized sections rather than randomly mixed together. Divide a large cinder block bed into four to six distinct sections using single block dividers running across the interior. Each section gets its own dedicated planting combination.
Classic companion pairings that actually work: tomatoes with basil and marigolds, beans with carrots and cucumbers, and brassicas with dill and nasturtiums. Keep aggressive spreaders like mint and oregano in their own walled section with no soil connection to neighbors. Rotate which section gets which plant family each season to prevent soil depletion and reduce pest buildup.
Record Keeping: Stick a painted popsicle stick at the corner of each section with the plant name and date planted written in permanent marker. At season end, photograph the whole bed before clearing it — that photo becomes your rotation guide for next year.
29. Freestanding Cinder Block Garden Island for Large Yards and Open Patios
A freestanding garden island works on a completely different visual principle than border beds — instead of defining an edge, it creates a destination. Place it in the center of a large lawn or open patio where it can be viewed and accessed from all four sides. Stack blocks in a square or rectangular shape two layers high using 24–30 blocks depending on desired size.
Plant the center with something tall and structural — a dwarf ornamental tree, a large ornamental grass clump, or a bold perennial like agapanthus or Russian sage. Surround the tall center planting with medium perennials, then edge the outer block cavities with trailing plants that spill down over the block faces. The three-tier planting approach — tall center, medium middle, trailing edge — works for any island bed regardless of size or shape.
Final Thought: An island bed needs mulch around its base where it meets the lawn. Without it, mowing right up to the block edges becomes difficult and the grass that grows into block cavities is genuinely tedious to remove by hand.
FAQs About Cinder Block Garden Beds
Two dollar blocks, one afternoon, and suddenly your yard looks intentional – but a few real questions deserve straight answers before you get started. Here’s what most gardening guides don’t bother telling you.
Do Cinder Blocks Leach Harmful Chemicals Into Garden Soil?
Older cinder blocks made before the 1980s sometimes contained fly ash with trace heavy metals. Modern concrete blocks sold today are generally considered safe for vegetable gardens, but if you’re unsure about block age, line the interior walls with plastic sheeting before filling with soil.
How Do You Keep Cinder Block Garden Beds From Shifting or Collapsing Over Time?
Stagger each block layer like brickwork so joints never align vertically. For beds taller than two layers, consider filling some block cavities with gravel and inserting steel rebar through stacked cavities for added structural stability without using mortar.
What’s the Best Way to Winterize a Cinder Block Garden Bed?
Drain soil moisture before freezing temperatures arrive and remove annual plants completely. Cinder blocks handle cold well but repeated freeze-thaw cycles can cause surface cracking over years. Covering the top layer with burlap during harsh winters noticeably extends the lifespan of your blocks.
Can You Build a Cinder Block Garden Bed Directly on Concrete or a Paved Patio?
Yes, absolutely. Place a weed barrier between the concrete and first block layer, then fill with quality potting mix rather than heavy garden soil. Ensure adequate drainage holes or gaps between bottom blocks so excess water escapes freely without pooling underneath.
How Many Cinder Blocks Do You Actually Need to Start a Basic Garden Bed?
A simple 4×4 foot single-layer bed needs roughly 16 blocks. A two-layer rectangular bed around 4×8 feet requires approximately 32 blocks. Starting smaller than you think makes sense — most gardeners expand their beds after the first successful season anyway.
Conclusion:
That stack of rough gray blocks collecting dust at the garden center? It’s closer to a thriving herb wall, a tiered succulent display, or a patio seating planter than most people realize — just needs someone willing to see past the ugly. The satisfying part about building with cinder blocks isn’t the finished photo. It’s moving blocks around on a Tuesday evening, figuring out what fits, and waking up Wednesday to something that genuinely changed how your yard feels. Start with one corner. One bad spot. Twelve blocks. The rest has a way of building itself.