21 Tiered Retaining Wall Ideas That Turn Slopes Into Showstoppers
A sloped yard doesn’t have to be a headache. Tiered retaining walls turn awkward hillsides into usable, good-looking outdoor space — extra planting room, better drainage, and a yard that actually feels finished. The right design also protects your home from soil erosion and water pooling, which saves real money down the road.
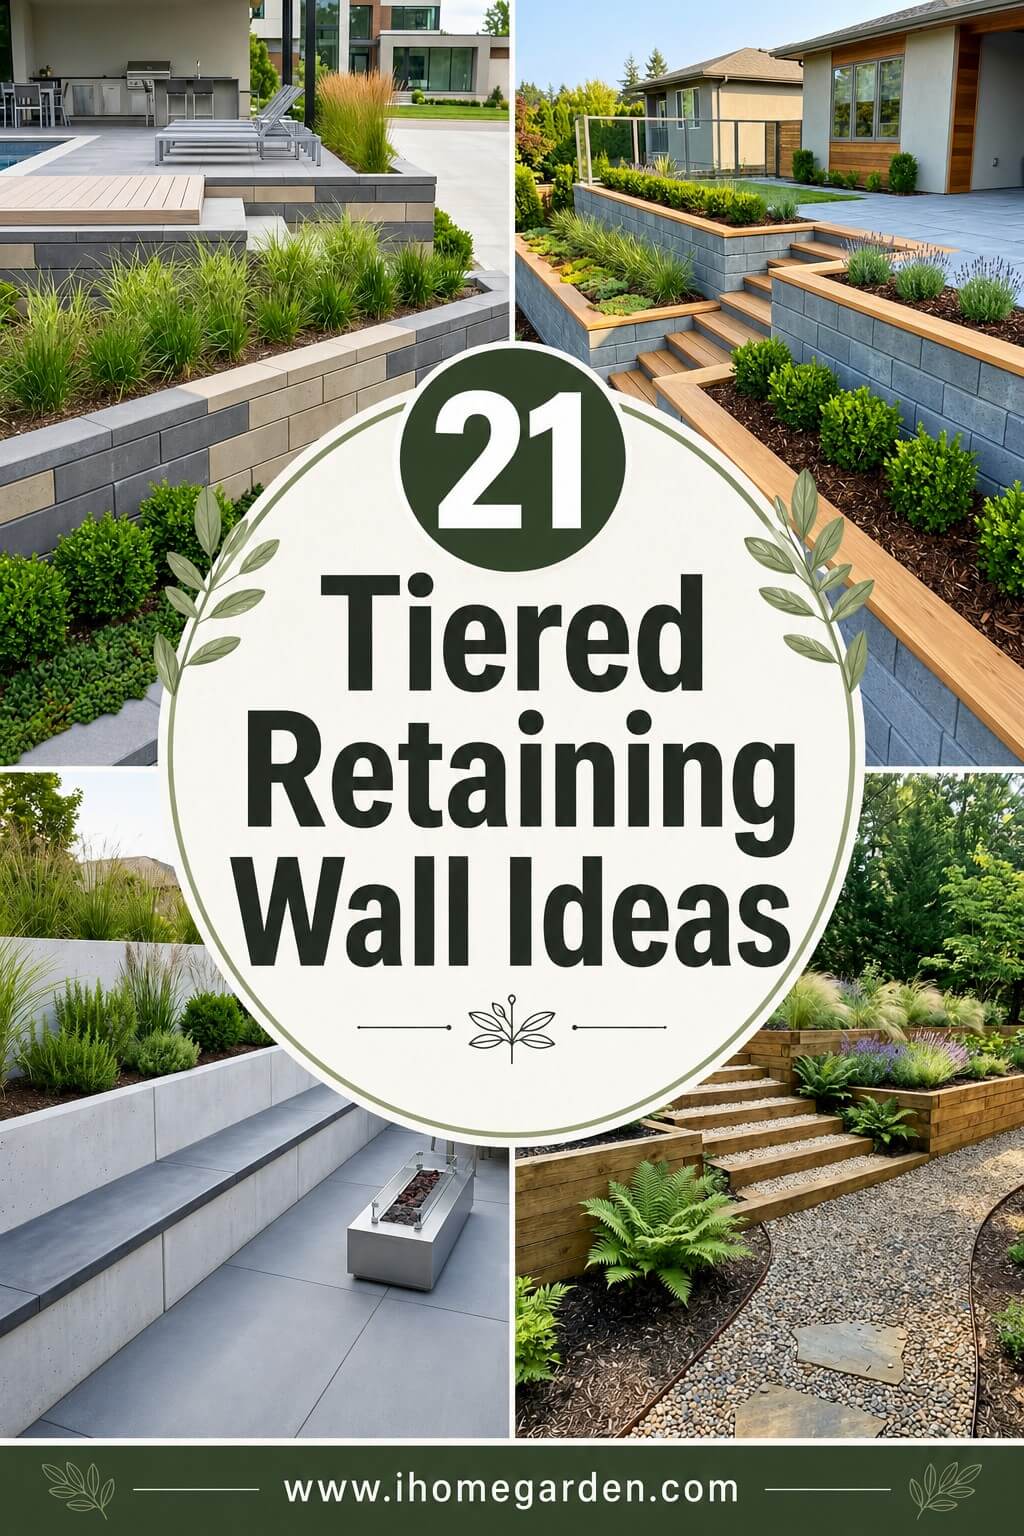
Before you start, keep a few practical rules in mind. Walls taller than 4 feet almost always need a permit and an engineer’s stamp. Every tier needs drainage behind it (usually 12 inches of crushed gravel plus a perforated pipe), and skipping geotextile fabric between the soil and gravel is the fastest way to end up with a bulging wall two winters later. Match the material to your home’s style, your budget, and how much maintenance you actually want to do.
These 21 clever tiered retaining wall ideas, from budget DIY weekend projects to statement features worth hiring a pro for.
1. Stone-Stacked Garden Terraces
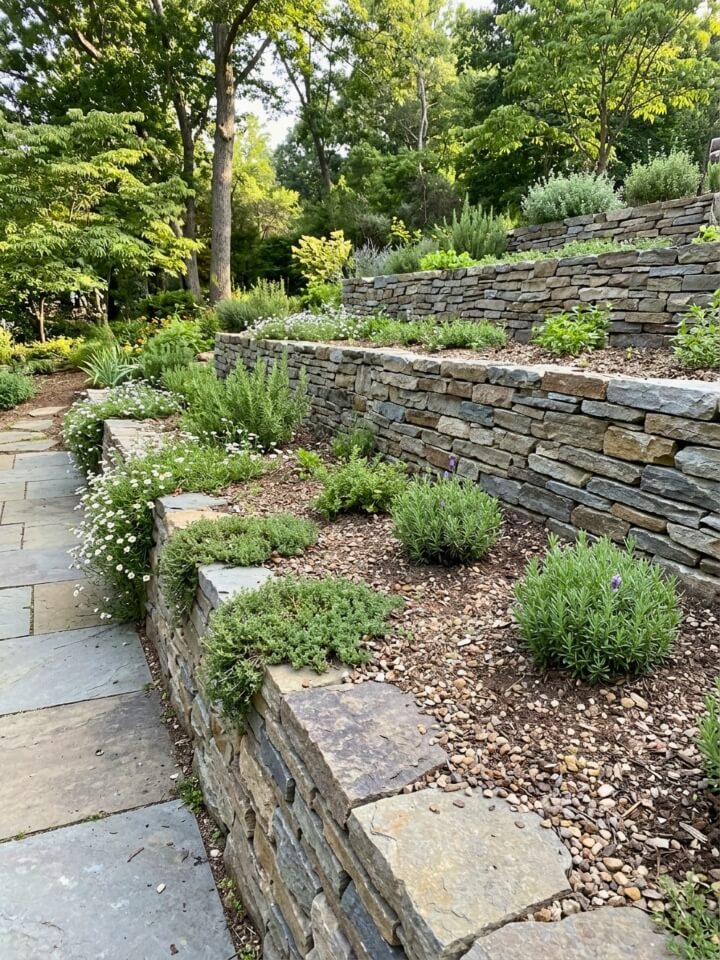
There’s a reason dry-stacked stone walls have held up farmland for centuries — done right, they’ll outlast almost anything else in your yard. The trick lives in the sorting. Before you place a single stone, separate your pile into three groups: heavy foundation pieces, mid-course workers, and flat toppers. Your foundation stones sit below grade on 6 inches of compacted gravel, and each row above leans back into the hill about an inch per foot of height.
Skip the mortar. Gravity and friction do the holding, and the small gaps between stones let water escape instead of pushing the wall outward. Creeping thyme, wooly sedum, and hens-and-chicks colonize those gaps beautifully within a season or two. Keep DIY builds under 3 feet.
2. Modern Concrete Block Tiers
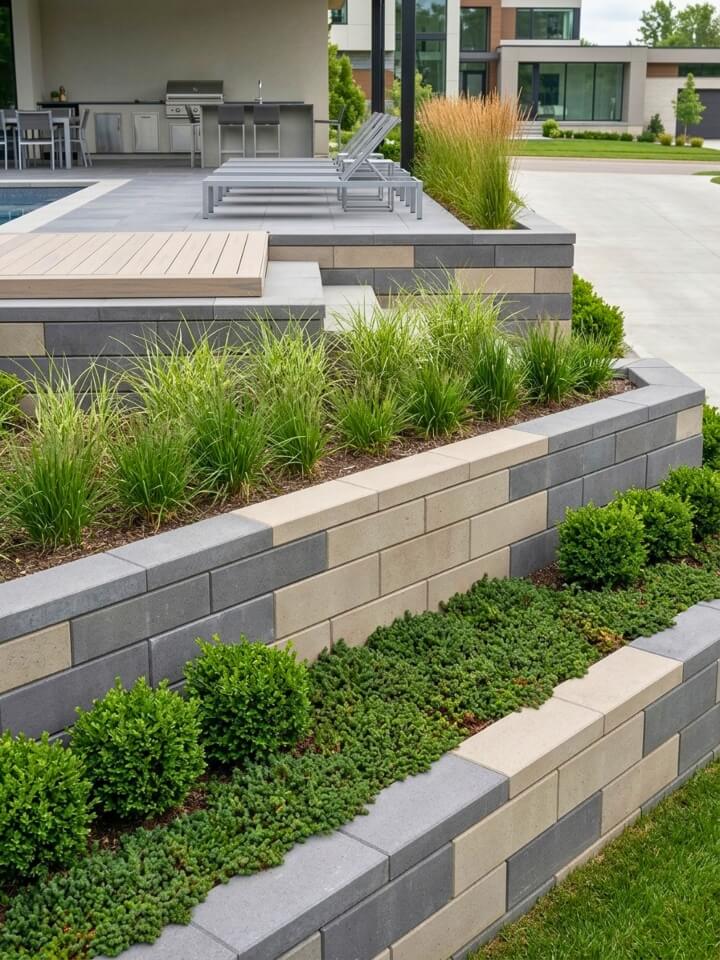
Budget: $8–$15 per square foot in materials. Skill level: intermediate DIY. Timeline: a long weekend for a 20-foot run at 2 feet tall.
Manufactured interlocking blocks from Belgard, Pavestone, or Allan Block basically foolproof the geometry — the lip on the back of each block automatically creates the correct setback as you stack. That’s why this system dominates suburban front yards. Charcoal reads sophisticated against white or gray siding. Greige works with warm-toned brick homes. Sand tones disappear into desert landscaping.
One warning worth taking seriously: manufacturers rate these systems for specific maximum heights, usually 3 to 4 feet without geogrid reinforcement. Go taller, and you must install geogrid mesh extending 4 to 6 feet back into the slope every few courses. Ignoring this is how walls fail.
3. Timber Sleeper Steps
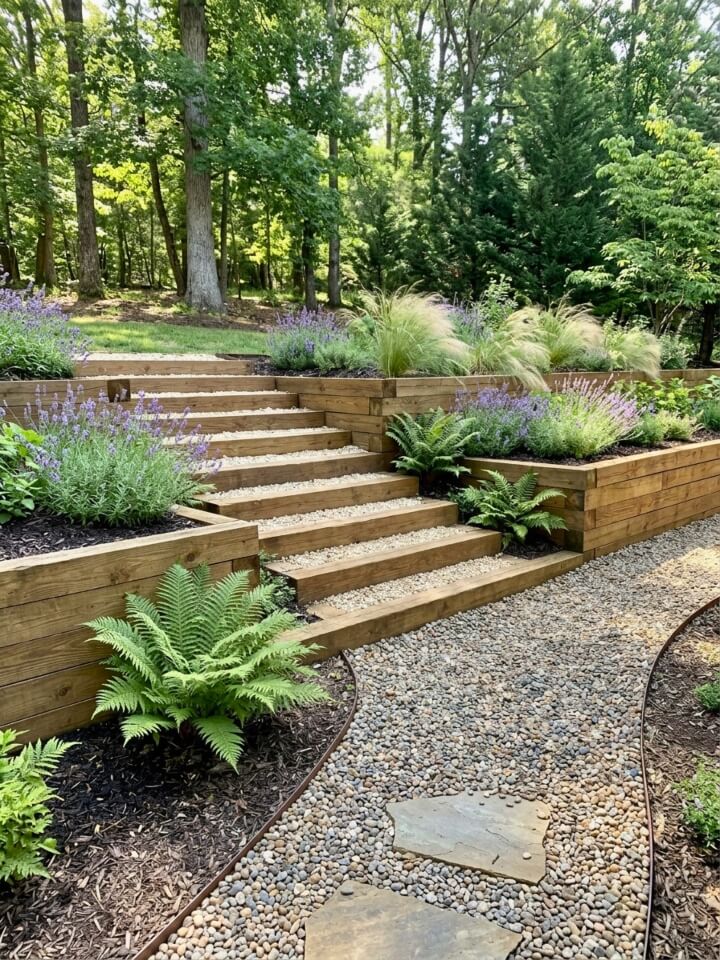
Explore stunning 2 tier retaining wall ideas that transform sloped yards into stylish, functional spaces. Wood on a hillside feels different than stone or concrete — softer underfoot when you walk between tiers, warmer to look at from a kitchen window in winter. That warmth comes with a tradeoff you should understand before committing.
Pressure-treated pine gives you 8 to 12 years. Cedar stretches that to 15 to 20. Black locust and white oak push past 25 but cost roughly triple. Whichever you pick, the failure point is almost never the wood itself — it’s the connection to the ground. Standard practice calls for 24-inch rebar spikes driven through pre-drilled holes into undisturbed subsoil, plus timber screws or landscape spikes locking each course to the one below.
Ferns, hostas, hellebores, and Japanese forest grass belong in the beds behind timber walls. Roses do not — the humidity trapped near the wood shortens its life.
4. Gabion Cage Walls
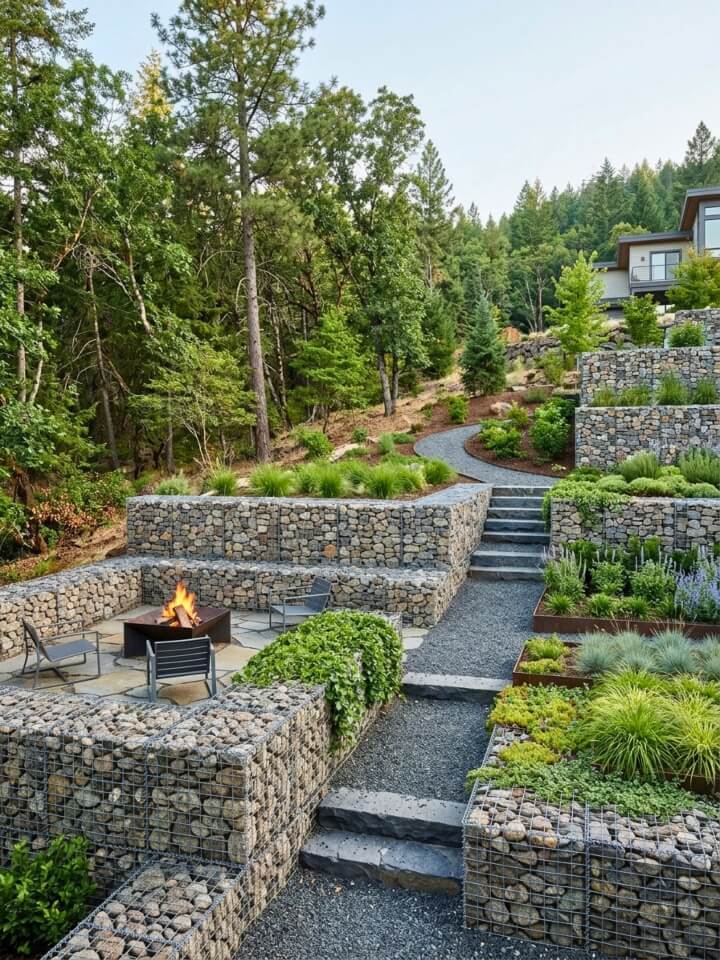
Highway engineers have trusted gabions for over a century. The wire cages flex slightly under load instead of cracking, which is exactly what you want on unstable slopes or in freeze-thaw climates where rigid walls develop stress fractures.
What Goes in The Cage Matters More than Most People Realize:
- River cobble — rounded, softer visual, best for cottage or naturalistic yards
- Angular quarry stone — sharp edges lock together, most stable choice for taller walls
- Mixed local rock — cheapest option, ties the wall to the surrounding landscape
- Recycled concrete chunks — sustainable and free if you can source it locally
Assembly is genuinely doable for a determined homeowner. Cages ship flat, unfold into shape, and close with hog rings or spiral binders. The tedious part is hand-placing the outer stones so the visible faces look intentional rather than dumped.
5. Curved Brick Tiers
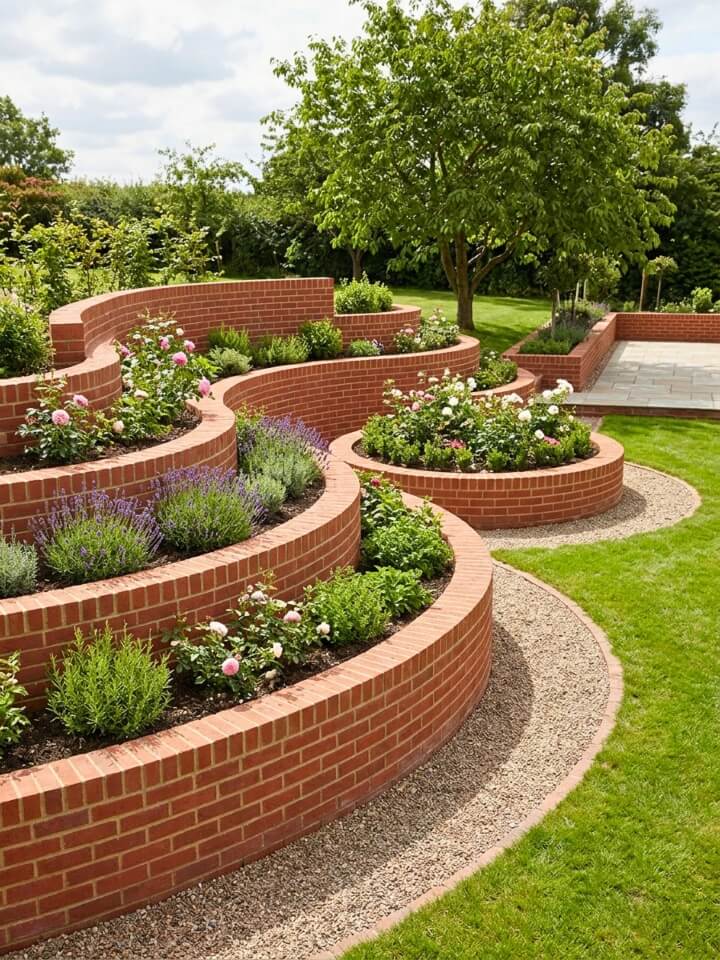
Straight walls argue with a landscape. Curved walls agree with it.
The math changes when you introduce a curve, though, and this is where most DIY brick projects go wrong. A straight wall can sit on a simple gravel footing. A curved wall pulls against itself as temperatures shift, so it demands a poured concrete footing — 12 inches wide, extending below your local frost line, reinforced with two runs of #4 rebar.
Above the footing, build in a running bond pattern with Type S mortar (Type N cracks in freeze zones). Standard red clay brick reads traditional. Tumbled brick softens the look toward English cottage. Buff and cream bricks pair well with stone homes or lighter stucco.
The reward for the extra footing work? Deep, sweeping planting pockets that hold roses, catmint, lavender, and Russian sage — and a wall that curves gracefully around whatever tree, patio corner, or garden feature you’re building around.
6. Dry-Stacked Boulder Walls
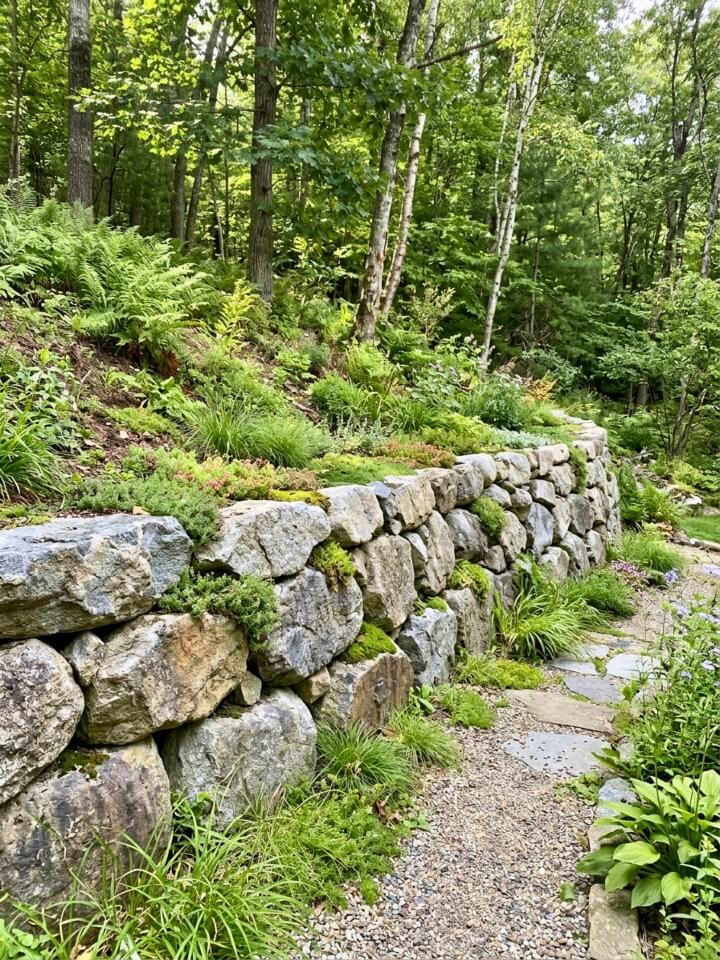
Boulders change the scale of a yard the moment they arrive. A single 400-pound stone reads as permanent, sculptural, almost architectural — and stacking them into a tiered wall creates the kind of feature that adds real value to a property.
Sourcing comes first. Local quarries sell boulders by the ton, typically $100 to $300 depending on stone type and how far it has to travel. Granite, limestone, and basalt all work; the key is buying stones with at least one relatively flat face so they’ll actually stack. Round boulders look great scattered in a garden but fight you constantly in a wall.
Placement almost always requires equipment. A skid steer or mini excavator runs about $300 a day and turns a two-week backbreaking project into an afternoon. Set the largest boulders first, wedge smaller stones into gaps for stability, and pack soil pockets between them for creeping phlox, ice plant, or native sedums.
7. Corten Steel Tiered Planters
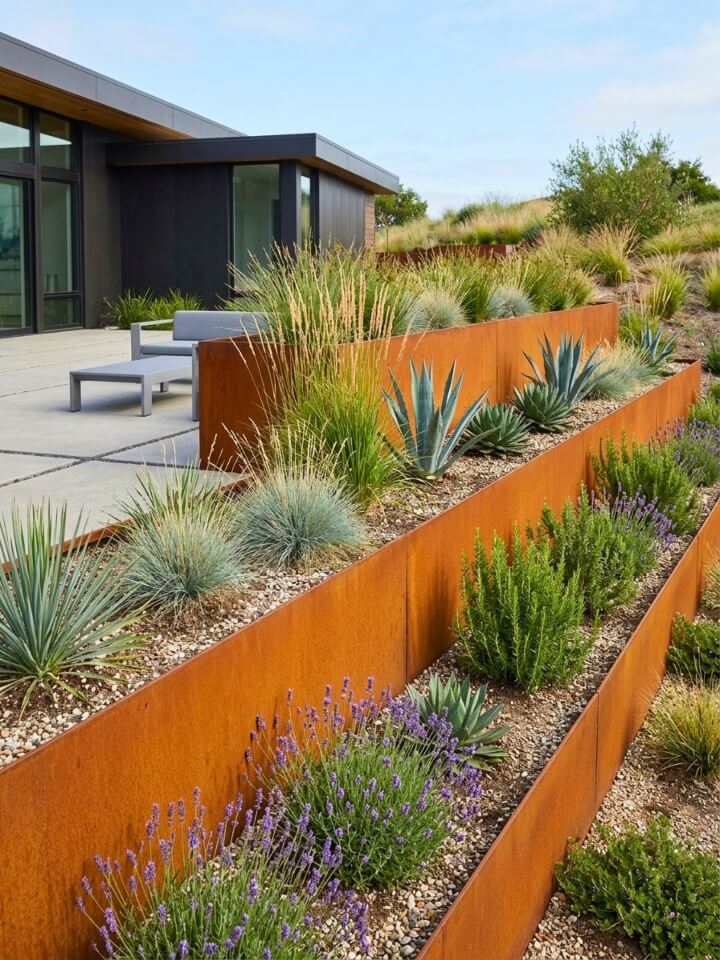
Corten is the design world’s favorite paradox — steel that rusts on purpose and never fails.
The weathering process forms a stable oxide layer that seals the metal underneath, so those rich orange-brown panels you see in architecture magazines aren’t decaying, they’re protecting themselves. Full patina takes 6 to 18 months depending on your climate. Humid regions develop the color faster; dry western states take longer but produce deeper tones.
For tiered planters, quarter-inch plate steel is the standard. Anything thinner warps under soil pressure once the beds are full. Panels arrive pre-cut from fabricators for around $30 to $50 per square foot, and installation involves setting them into concrete footings with rebar stakes welded to the back for lateral support.
Plant selection should lean into the rust tones. Blue fescue, purple sage, and silver artemisia create striking color contrast. Chartreuse sedums glow against the orange background. Avoid whites and pale pinks — they get lost.
8. Recycled Concrete Urbanite Tiers
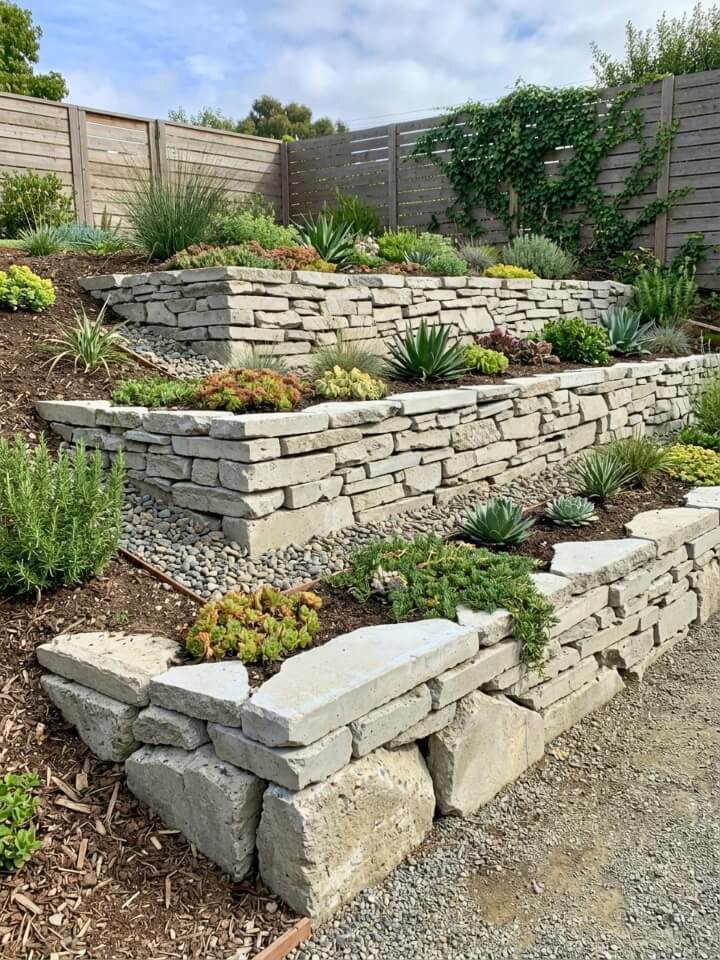
Every demolished driveway in America gets called “urbanite” once someone decides to reuse it, and this material deserves more respect than it gets. Broken concrete is essentially free stone. It stacks beautifully, drains well, and develops moss and patina over time that softens the industrial edges.
Finding it is the fun part. Craigslist’s free section, Facebook Marketplace, and neighborhood teardown sites all yield endless supply. Contractors will often deliver a truckload rather than pay dump fees. Look for pieces 3 to 5 inches thick with at least one straight edge from the original slab — those become your visible face.
Stack like natural stone: biggest chunks on the bottom, flat faces outward, staggered joints between courses. Pack soil into the gaps as you go and press in trailing plants immediately. Creeping Jenny, Corsican mint, and thyme root into the crevices within weeks and camouflage the concrete’s origins. Within two seasons, most visitors assume it’s actual stone.
9. Mixed-Material Tiers
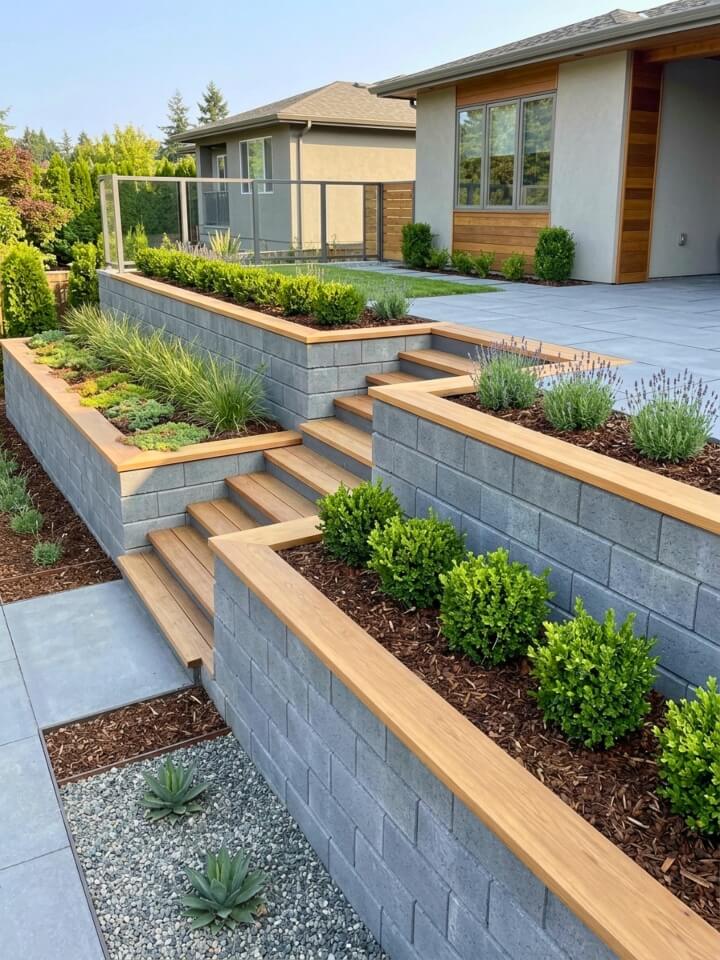
Discover creative tiered retaining wall ideas to add depth, drainage, and drama to your backyard slope. Combining materials is where tiered walls stop looking like a landscaping catalog and start looking designed. But there’s exactly one rule that separates thoughtful mixed-material walls from chaotic ones: repeat something.
That repetition can be color, texture, or geometry — pick one and let it thread through the whole composition. A stone lower tier with a corten steel middle tier and a concrete cap? Repeat the warm gray tone across all three. Timber and gabion together? Match the wood tone to the rock color inside the cage. Brick with modern block? Choose block and brick in the same tonal family.
The most successful combinations follow a hierarchy. The dominant material (60% of visible surface) sets the overall character. The secondary material (30%) adds contrast without competing. The accent material (10%) shows up in caps, steps, or edging.
Skip that hierarchy and the yard reads as indecisive.
10. Living Wall Tiers with Built-In Planters
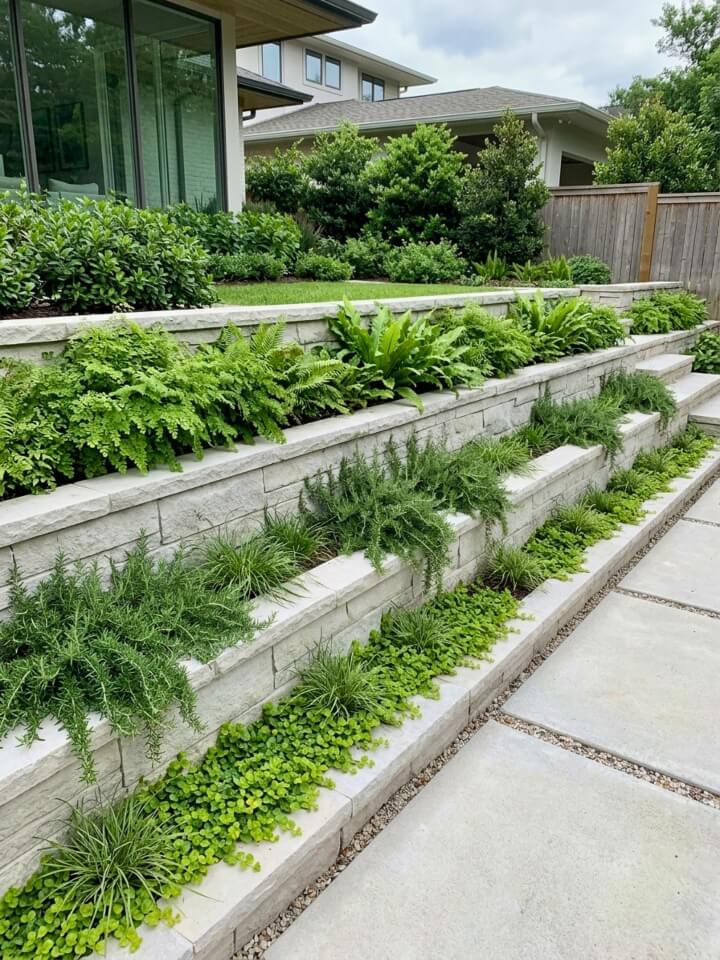
A living wall solves two problems at once — it holds back a slope and gives you dramatically more planting real estate than a flat garden bed ever could. Vertical square footage suddenly matters.
The engineering starts with waterproofing. Any wall holding soil against a house foundation, garage, or basement needs a proper moisture barrier: two coats of foundation sealant, dimple board over the sealant, and a drainage mat behind the planting pockets. This is non-negotiable. Skip it and you’ll be replacing drywall inside your home within a few years.
Pocket Depth Determines What Will Thrive:
| Pocket Depth | What Grows Well |
|---|---|
| 4–6 inches | Sedums, sempervivums, alpine strawberries |
| 8–12 inches | Herbs, lettuces, compact perennials |
| 14–18 inches | Small shrubs, cascading roses, dwarf grasses |
| 20+ inches | Small trees, larger shrubs, deep-rooted perennials |
Irrigation almost always requires a dedicated drip line running across each tier — hand watering vertical walls is impractical after the novelty wears off in the first month.
11. Tiered Vegetable Garden Walls
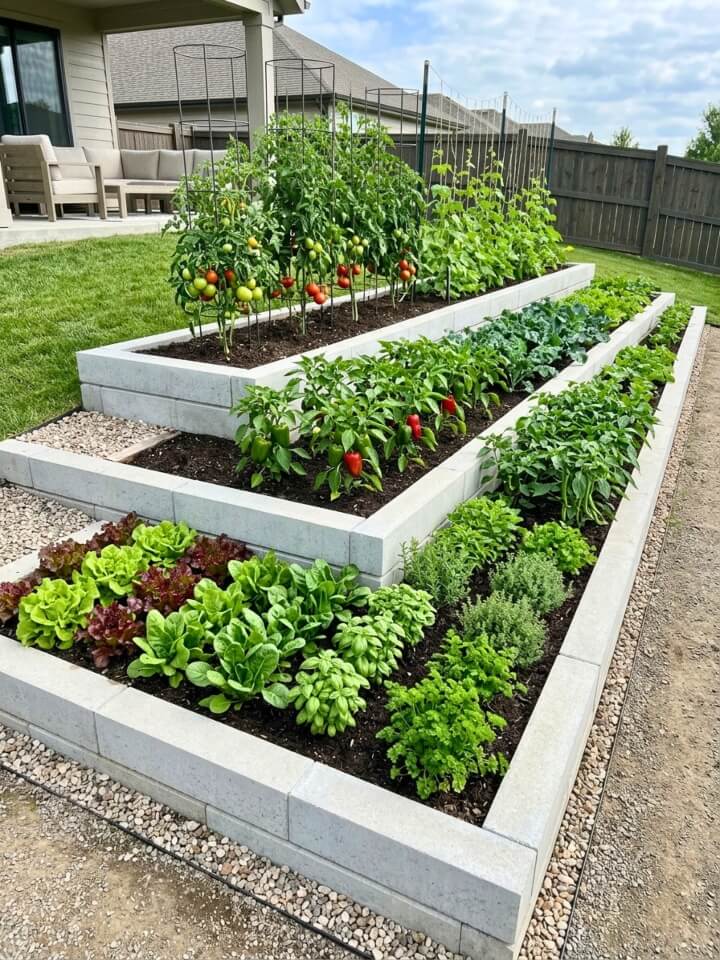
A sloped backyard is actually a gift for vegetable growing — every tier gets its own sun exposure, and harvesting becomes easier because crops sit at different heights instead of all bending distance.
Orient the walls east-west whenever possible. This puts each tier in full sun without shading the one below. Reserve the back (highest) tier for pole beans, tomatoes, and trellised cucumbers. Middle tiers work for peppers, bush beans, and eggplant. Front tiers belong to lettuces, herbs, radishes, and strawberries that benefit from easy reach.
Soil depth matters more than most beginners realize: 12 inches minimum for roots and lettuce, 18 inches for tomatoes and peppers, 24 inches for potatoes and carrots. Line each tier with hardware cloth if gophers live in your area.
12. Stucco-Finished Mediterranean Tiers
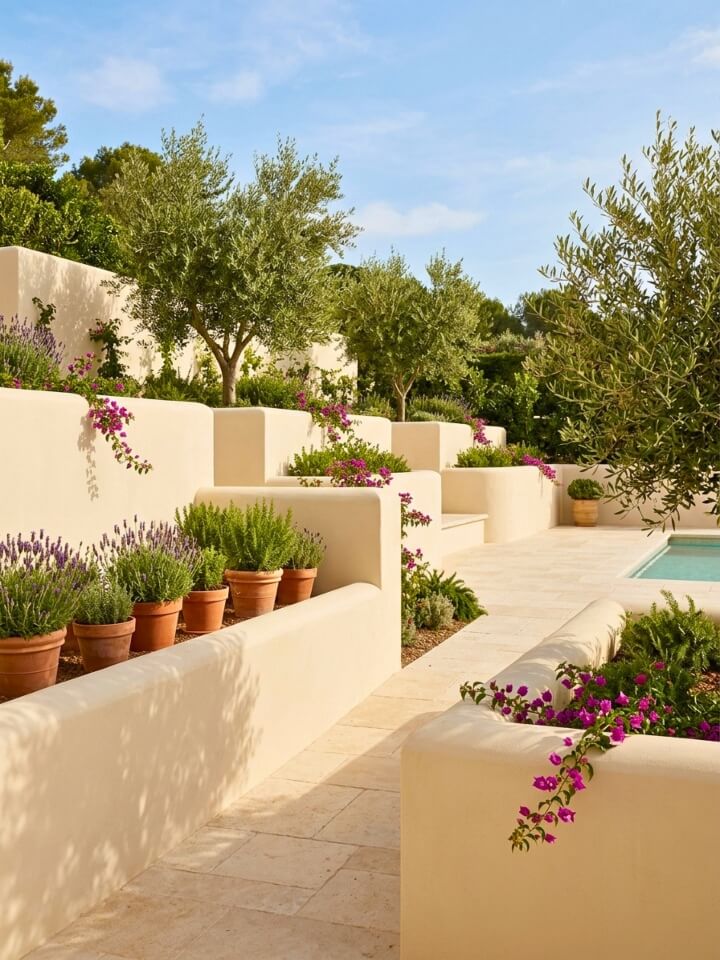
Warm climates practically demand this style — the smooth white surfaces reflect harsh sun, stay cooler to touch, and create that unmistakable Southern European courtyard feel.
Construction starts with a concrete block core, wrapped in metal lath, then finished with a three-coat stucco system: scratch coat, brown coat, and finish coat. Skip any layer and cracks appear within a year. Warm off-whites (Benjamin Moore’s Swiss Coffee, Sherwin-Williams Alabaster) age more gracefully than pure white, which shows every water stain.
Terracotta pots along the caps, olive trees anchoring the corners, and lavender or rosemary spilling between tiers complete the look. Add a wrought-iron detail — a gate, a lantern, a wall-mounted fountain — and the composition suddenly feels centuries old rather than newly built.
13. Tiered Water Feature Walls
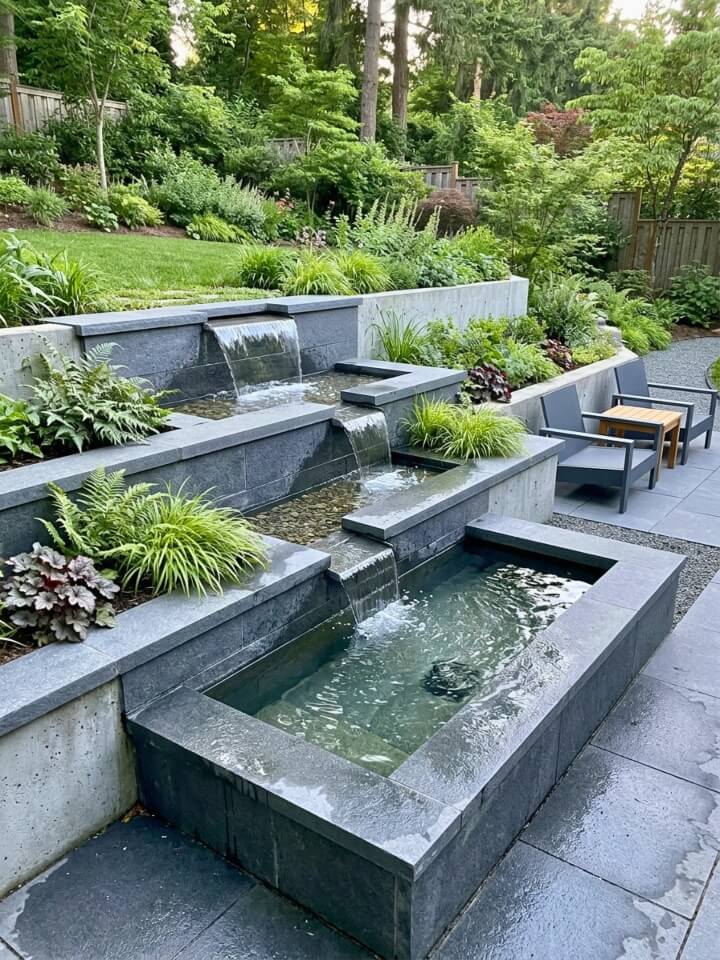
Moving water changes a backyard completely. It cools the air around it by several degrees, masks street noise and neighbor conversations, and gives visitors something to focus on when conversation lulls.
The plumbing is simpler than most homeowners expect. A submersible pump ($150 to $400) sits in the lowest basin, pushes water through flexible tubing up to the top tier, and gravity handles the rest. Size the pump to move roughly 100 gallons per hour per inch of spillway width — undersized pumps produce a sad trickle, oversized ones splash everywhere.
Line each drop with dark slate, bluestone, or copper sheeting. Dark surfaces make water visually pop. Add underwater LED lights on a timer, and the wall performs equally well at midnight as it does at noon. For more ways to make water the focal point, compare this approach with pretty pool fountain ideas that use similar movement, sound, and lighting effects.
14. Hexagonal or Geometric Modular Blocks
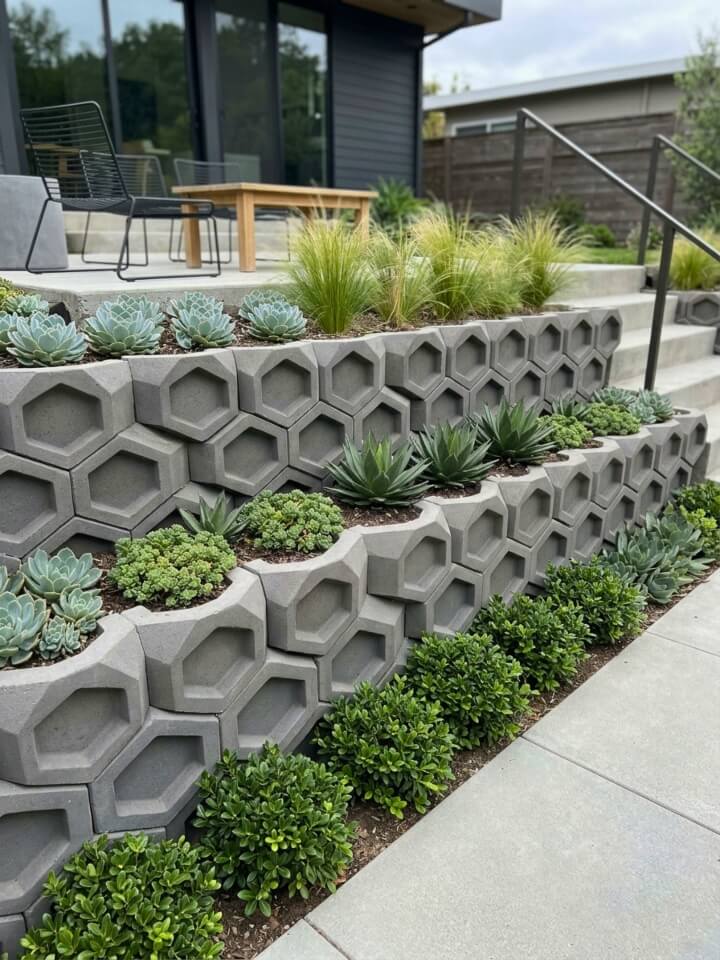
Six-sided blocks create pattern where standard rectangles create rhythm — a subtle but important distinction. The eye tracks hexagonal walls differently, reading them as intentional geometry rather than utilitarian stacking.
These blocks come from specialty manufacturers like Techo-Bloc and Rosetta Hardscapes, priced at $18 to $28 per square foot. That’s roughly double standard block, but the visual payoff justifies it for feature walls where the surface stays exposed.
Restraint wins here. The block pattern already carries the visual weight, so plant beds should stay quiet: monochromatic sedum carpets, single-variety ornamental grass drifts, or clipped boxwood spheres at regular intervals. Mixed cottage plantings fight the geometry and make everything look busy. Uplighting from below dramatically emphasizes the hexagonal shadows after dark.
15. Tiered Seating Walls
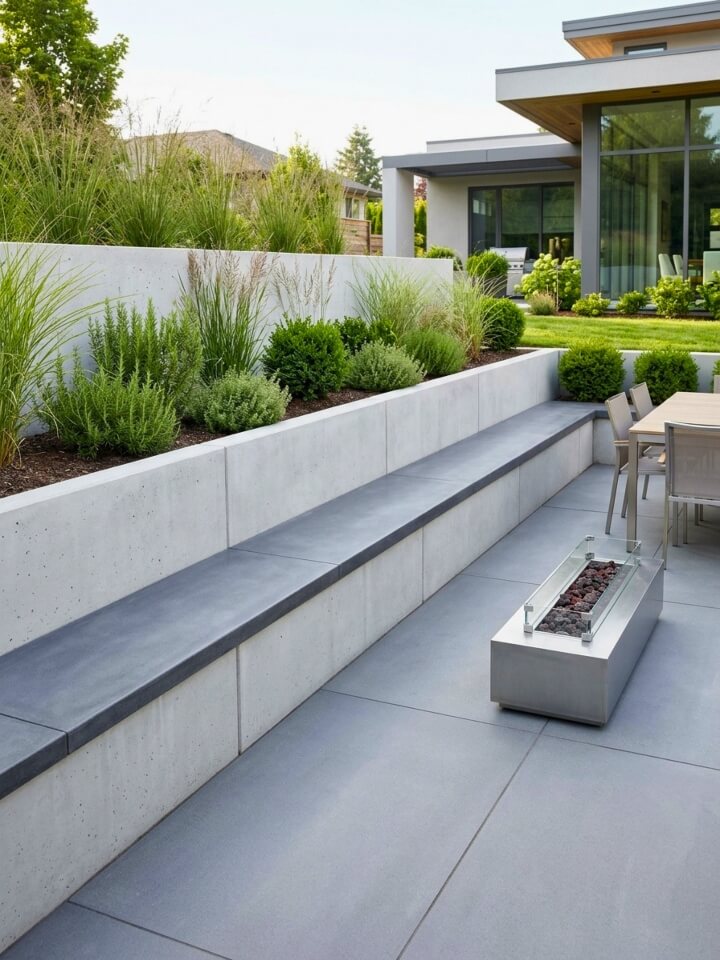
Build a tiered retaining wall that boosts curb appeal while taming tricky slopes with lasting strength. The best backyard features earn their space twice. A seating wall holds back soil during the day and hosts guests during the evening — no separate benches to buy, store, or move around.
Seat height is where amateurs stumble. Comfortable sitting requires 17 to 19 inches from ground to top surface. Anything shorter forces knees up awkwardly; anything taller leaves feet dangling. Seat depth needs 14 inches minimum for actual comfort, 18 inches if people will lean back against planters behind them.
Cap the seating surface with something that won’t stay hot in summer sun. Bluestone, limestone, and thermally modified wood all work. Avoid dark granite and black concrete — they become genuinely painful to sit on by mid-afternoon. Position seating walls to face fire pits, views, or gathering spots.
16. Tiered Walls with Integrated Lighting
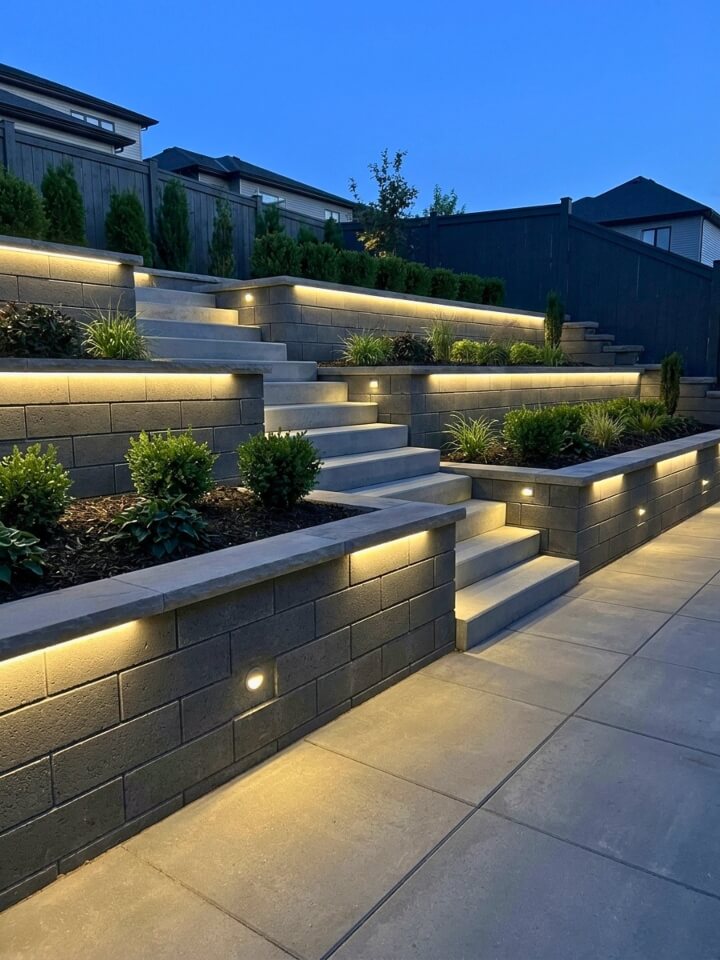
Nightfall shouldn’t retire your best landscape feature. Built-in lighting extends the wall’s usefulness by five or six hours a day and transforms how the entire backyard reads from inside the house after dark.
Three lighting positions handle almost every situation. Under-cap lighting washes down the wall face and highlights texture. Recessed step lights guide foot traffic without glare. Uplights hidden in planting beds throw dramatic shadows against the wall itself.
Stick with low-voltage LED systems (12V) rather than line voltage — safer to install, easier to modify later, and no electrician required for most homes. Warm color temperatures between 2700K and 3000K flatter stone and wood. Anything cooler than 3500K makes natural materials look clinical and dead.
For trees or taller plantings near the walls, attractive outdoor tree lighting ideas can help extend the same layered lighting effect upward.
17. Cinder Block Walls with Decorative Facing
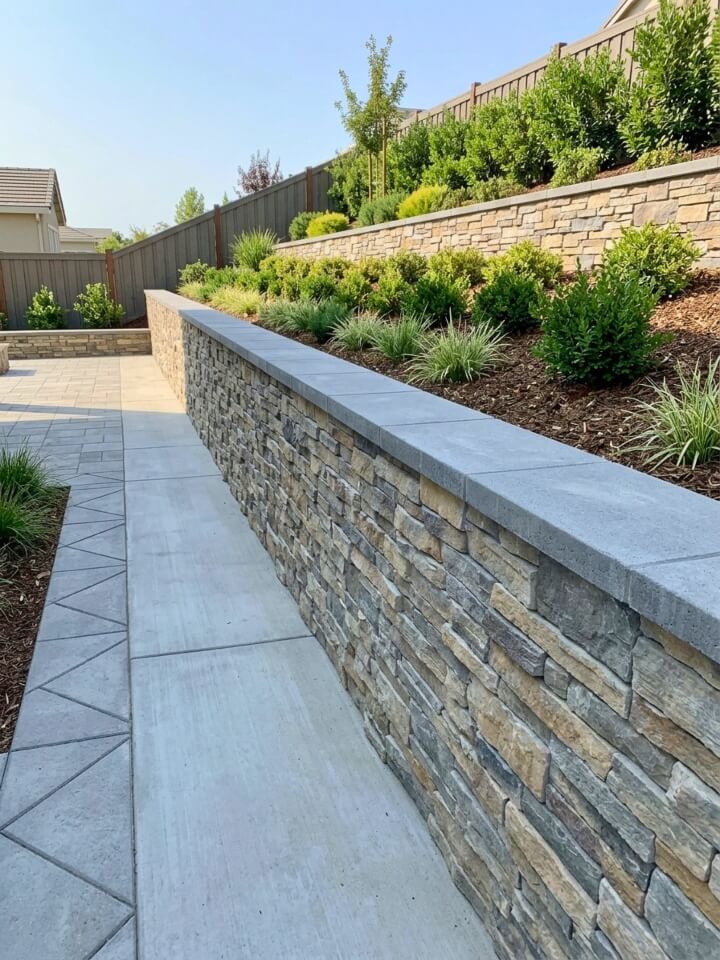
The two-part approach. Standard concrete masonry units (CMUs) handle the structural work — they’re cheap, strong, and boring. Then a decorative veneer transforms the visible face into whatever aesthetic your home demands.
Veneer Options and What They Cost Installed:
- Stacked stone veneer — $15 to $30 per square foot
- Thin brick — $12 to $22 per square foot
- Manufactured stone panels — $10 to $18 per square foot
- Porcelain tile — $18 to $35 per square foot
- Smooth stucco — $8 to $14 per square foot
Critical construction notes. The CMU wall needs proper reinforcement first: vertical rebar in filled cells every 4 feet, horizontal bond beam at the top, poured concrete footing below frost line. Veneer attaches with either mortar over metal lath or mechanical clips depending on the material chosen. Cap the finished wall with bluestone, limestone, or precast concrete to shed water away from the veneer joints.
18. Tiered Walls with Built-In Stairs
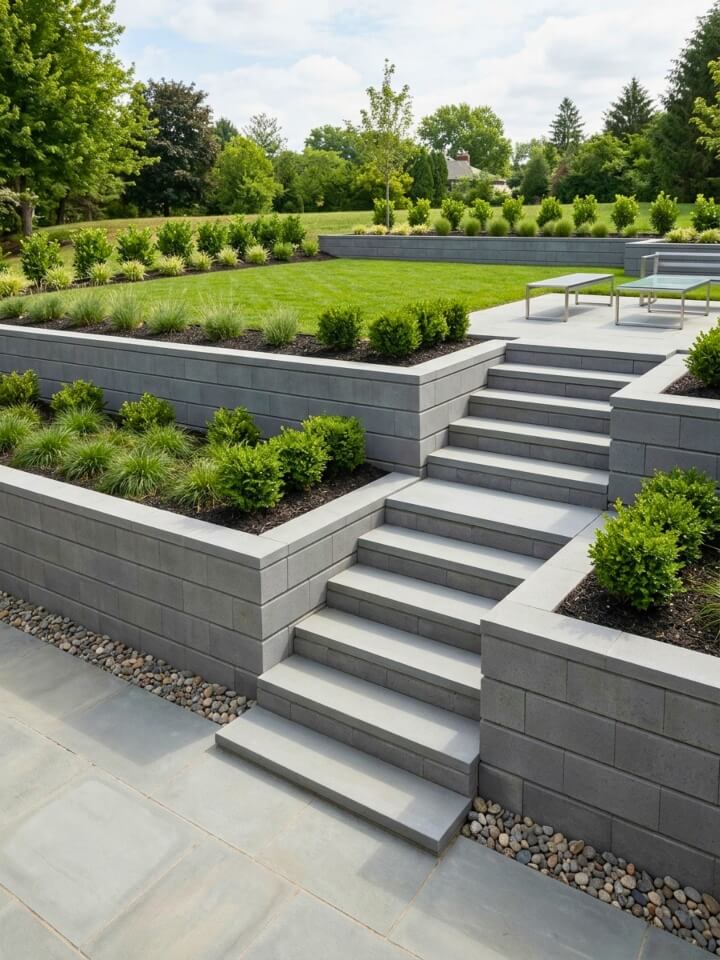
Stairs threaded through a tiered wall solve the biggest complaint homeowners have about hillside yards — that the upper areas feel disconnected and rarely get used.
Building code sets the geometry, and violating it creates genuine tripping hazards. Rise between 6 and 7.5 inches per step. Run between 11 and 14 inches deep. Consistency matters more than exact numbers — a single mismatched step is where people fall. If total elevation change exceeds 30 inches, a handrail becomes both code-required and genuinely useful for older visitors carrying anything.
Material continuity ties the composition together. Stone stairs in a stone wall. Timber steps in a timber wall. Mixing feels awkward unless the transition is deliberate and repeated somewhere else in the design. Widen the treads at landings for planters, sculpture, or a spot to pause and look back at the view.
19. Japanese-Inspired Zen Tiers
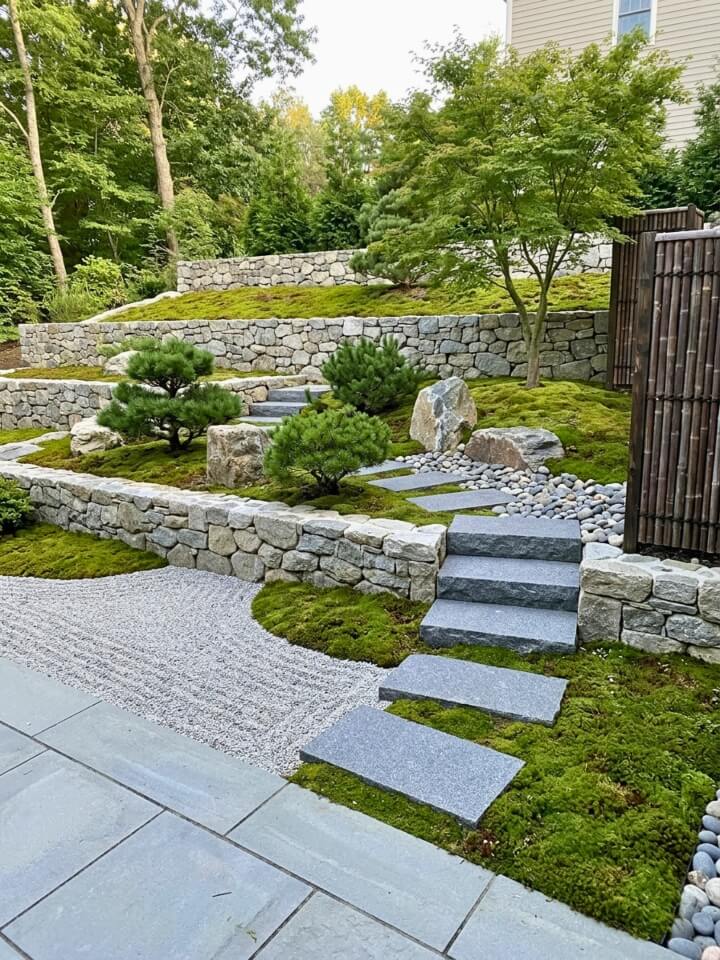
Japanese garden design operates by subtraction, not addition. Every stone, plant, and empty space earns its place through deliberate placement, and the whole composition depends on what you choose to leave out.
Three principles guide the work. Asymmetry over symmetry — group elements in threes and fives, never pairs or fours. Suggestion over statement — a single boulder implies a mountain, a raked gravel bed implies water. Age over newness — moss, weathered wood, and lichen-covered stone belong; freshly cut materials look wrong.
Plant palette stays deliberately narrow. Japanese maples, mondo grass, moss, dwarf pines, and hakone grass cover most situations. A stone lantern, a bamboo water spout, or a single specimen boulder becomes the focal point per garden view. Rake gravel weekly. Prune everything twice a year with hand shears.
20. Wildflower Meadow Tiers
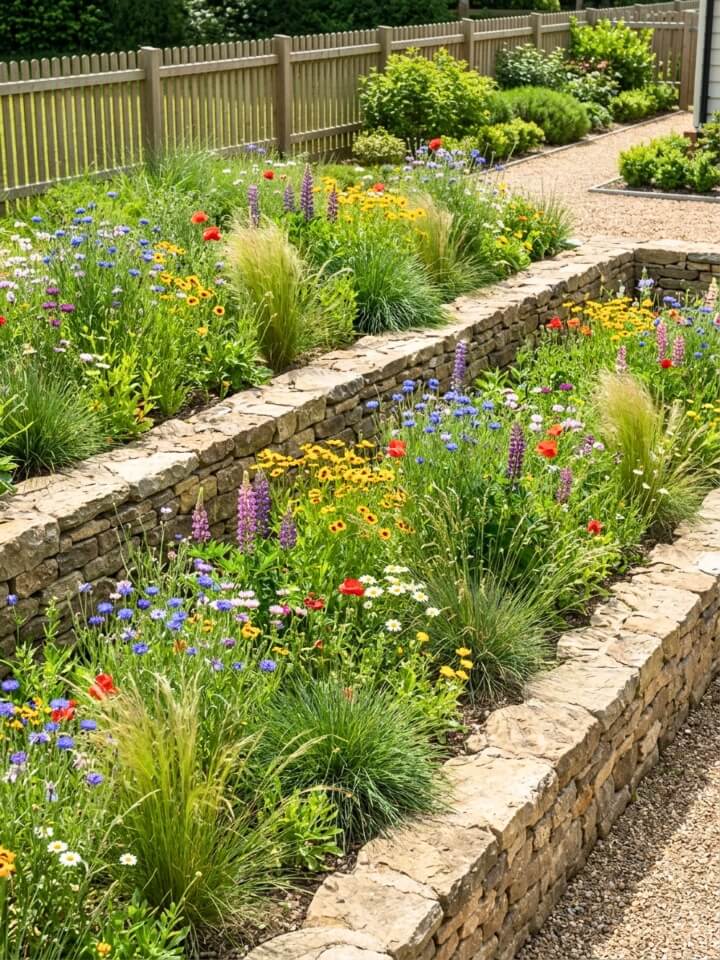
Design tiered retaining walls that blend beauty and function, turning hillsides into layered garden art. Meadow-style tiered walls are the sustainability answer to sloped yards. Once established, they need almost no water, no fertilizer, no pesticides, and one annual mowing — while feeding pollinators through the entire growing season.
Native seed mixes tailored to your ecoregion perform dramatically better than generic “wildflower” blends from big box stores. Prairie Moon Nursery, American Meadows, and Ernst Seeds ship regional mixes matched to soil type and rainfall patterns. Expect $30 to $80 per pound, covering roughly 1,000 square feet.
Establishment takes patience. 1st Year produces mostly grasses and pioneer species. Year two brings the first significant flowering. Year three delivers the meadow you actually wanted. Skip synthetic fertilizers entirely — rich soil favors aggressive weeds over native wildflowers. Cut back every February before new growth emerges to prevent woody plants from taking over.
For a more structured flowering look near the house, pair meadow tiers with stunning hydrangea landscaping ideas in the shadier or more formal sections of the yard.
21. Tiered Walls with Vertical Trellises
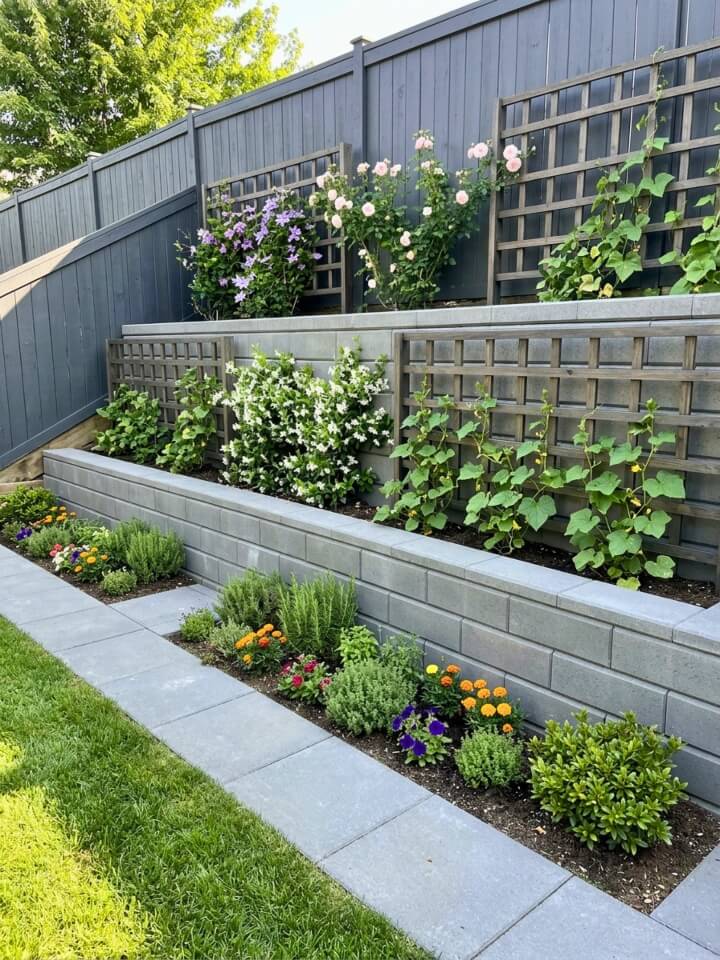
Adding trellises to tiered walls essentially doubles the growing space without expanding the footprint — an unbeatable move for smaller yards where every square foot has to work hard.
Trellis placement changes what you can grow. Attached directly to the wall face, trellises work for lightweight climbers: clematis, sweet peas, morning glories. Freestanding trellises anchored into the planting bed behind the wall handle heavier producers: pole beans, cucumbers, indeterminate tomatoes, hardy kiwi, wisteria trained as a small tree.
Material choice affects both aesthetics and lifespan. Cedar and black locust weather beautifully and last 15+ years. Powder-coated steel disappears visually and outlasts everything. Galvanized cattle panels are the budget hack — $30 each, industrial look that works surprisingly well in modern gardens. Skip vinyl trellises entirely. They warp within three summers and look cheap immediately.
Frequently Asked Questions
Common questions about permits, drainage, cost, materials, and DIY-friendly tiered retaining wall builds.
How Tall Can a Retaining Wall Be without A Permit?
Most jurisdictions allow walls up to 3 or 4 feet without permits or engineering, but this varies significantly by city and county. Always check with the local building department before starting. Tiered walls have an additional catch — if the vertical distance between tiers is less than twice the height of the lower wall, code often treats them as a single tall wall for permit purposes.
Do Tiered Retaining Walls Actually Need Drainage?
Yes, without exception. Water pressure behind a wall (called hydrostatic pressure) is what causes 90% of wall failures. Every tier needs a minimum of 12 inches of clean crushed gravel behind it, a perforated drain pipe at the base, and geotextile fabric separating soil from gravel. Skip any of these and the wall will eventually bulge, crack, or collapse.
Which Retaining Wall Material Lasts Longest?
Natural stone and properly reinforced poured concrete last 100+ years. Segmental concrete blocks last 40 to 75 years. Corten steel lasts 40 to 60 years. Pressure-treated timber lasts 8 to 12 years. Longevity always depends more on drainage and installation quality than material choice.
What’s the Cheapest Tiered Retaining Wall Option?
Recycled concrete urbanite tops the list at essentially free if sourced from demolition sites, followed by timber sleepers at $15 to $25 per linear foot in materials, then dry-stacked local stone if available regionally. Manufactured concrete blocks typically run $25 to $45 per linear foot installed as a DIY project.
Can I Build Tiered Retaining Walls Myself?
Walls under 3 feet with straightforward materials (segmental blocks, timber, dry stone) fall within reach of a determined homeowner willing to rent a plate compactor and learn proper drainage. Anything taller, involving mortar, requiring engineered footings, or built on unstable soil should go to a licensed contractor. The cost of failure — collapsed walls, damaged foundations, injured people — far exceeds any DIY savings.
Conclusion:
The right tiered retaining wall does more than just hold back a slope. It creates outdoor rooms, expands growing space, controls water, and adds lasting value to the property. Whether the budget calls for recycled urbanite and sweat equity or a fully engineered corten steel installation, the principles stay the same — solid drainage, appropriate materials for the climate, and a design that matches the home’s existing character.
Start small if uncertain. A single 2-foot tier along one side of a walkway teaches more about drainage, backfill, and plant selection than any article can. That knowledge scales up when the confidence arrives to tackle the whole hillside. Match the ambition to actual skill level, respect the code requirements, and the wall built this season will still look right thirty years from now.