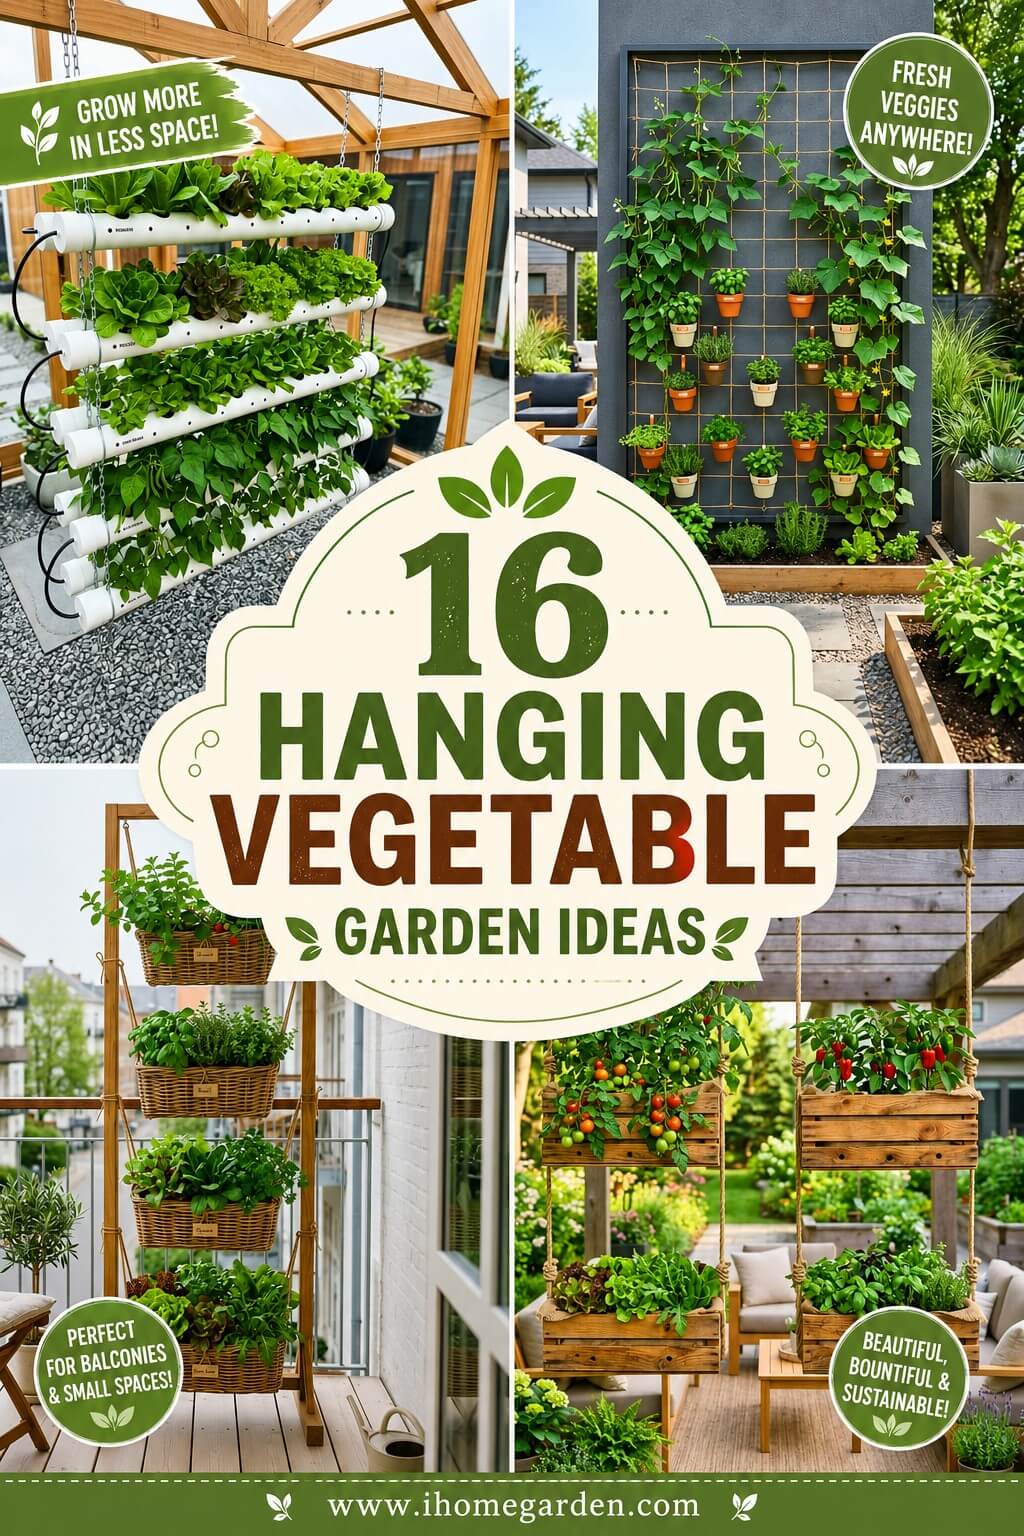
16 Hanging Vegetable Garden Ideas You Can Build This Weekend
Growing vegetables doesn’t require a backyard anymore. If you have a balcony, a sunny wall, or a fence with sturdy hooks, you already have what you need to start a productive hanging garden. Vertical growing solves two big problems: limited floor space and poor soil. Moving crops into the air also reduces pest pressure, improves airflow, and makes harvesting easier on your back. I’ve tested most of these 16 smart hanging vegetable garden ideas personally, and the ones below actually delivered food, not just looked good in photos.
1. Repurposed Colander Planters
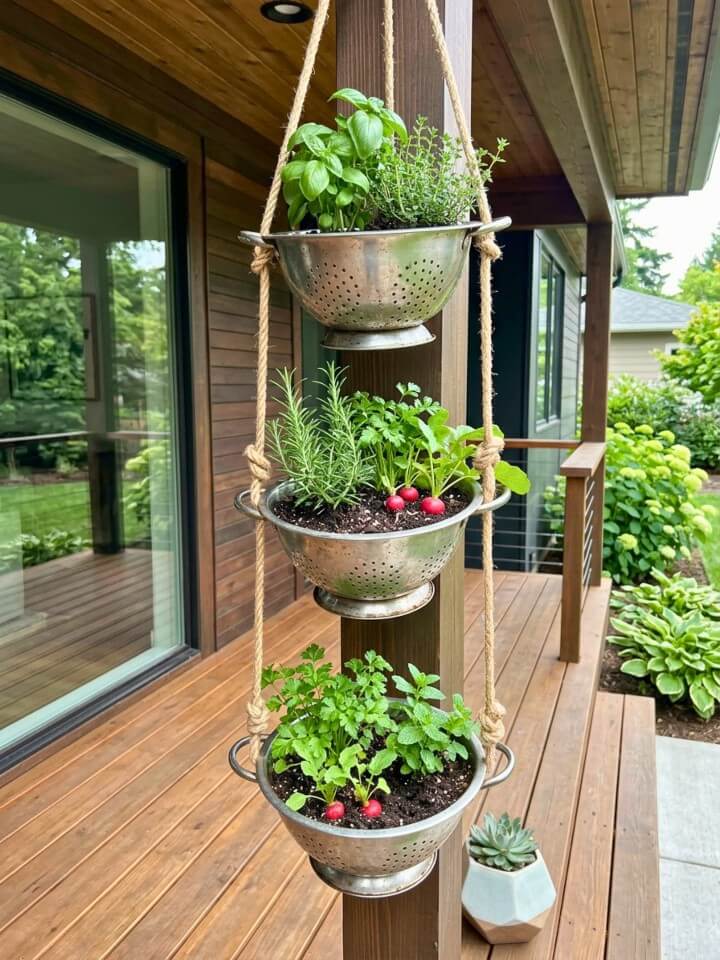
There’s something quietly satisfying about turning a thrift-store colander into a working planter. The drainage holes are already there, the shallow bowl matches the root depth of fast-growing greens, and the whole project costs less than a fast-food meal.
Hang them from jute rope, copper chain, or leather straps depending on the look you want. Radishes, baby spinach, chives, and parsley all root happily in the four to five inches of soil a colander holds.
Line the bottom with a coffee filter before adding soil. Without it, your first few waterings wash soil straight through the holes. Total cost: $3 to $8 thrifted, plus rope.
2. Tiered Hanging Basket Tower
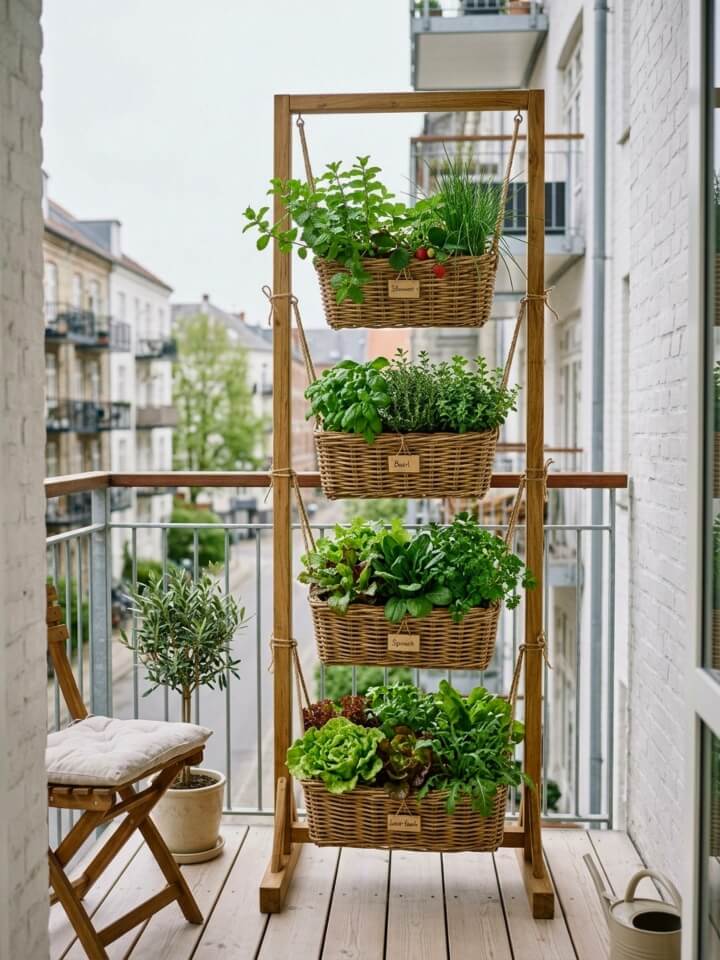
A tiered basket tower stacks three to five wire baskets on one sturdy chain, giving you a vertical growing column from a single ceiling hook. It works brilliantly on covered porches where horizontal space runs out fast.
Loose-leaf lettuce and arugula thrive in the shaded lower tiers, while strawberries and trailing thyme love the sunny top basket.
Standard ceiling hooks are rated for only 20 to 25 pounds. Three baskets of wet soil easily hit 50 pounds. Upgrade to a heavy-duty swag hook drilled into a ceiling joist. Budget $35 to $55 for the full kit.
3. Hanging Terracotta Pot Cascade
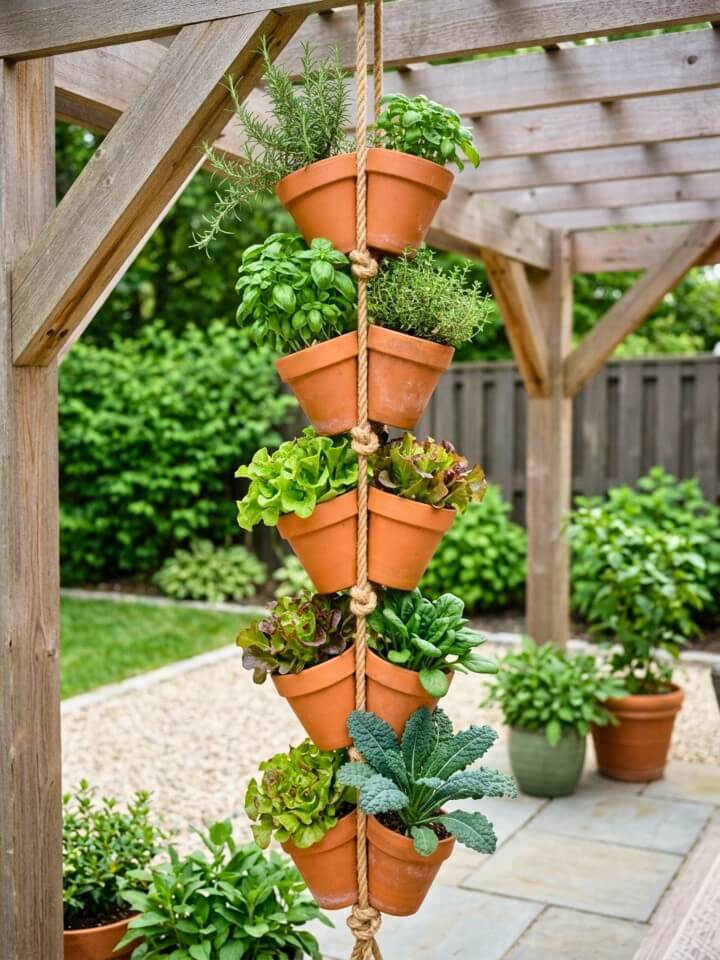
Threading terracotta pots onto a single rope creates a vertical cascade that ages beautifully over the years. Clay breathes, regulates soil temperature, and develops a weathered patina that plastic never matches. The classic Mediterranean look suits brick walls and stucco exteriors perfectly.
Building the Cascade:
- Choose pots with drainage holes large enough for thick rope
- Thread rope through the bottom of each pot and tie a large knot under
- Space pots 8 to 10 inches apart vertically
- Anchor the top to a heavy-duty ceiling hook
Herbs go on top, leafy greens in the middle, trailing strawberries on the bottom. Four 6-inch terracotta pots plus rope: $20 to $30.
4. Upside-Down Planter Bags
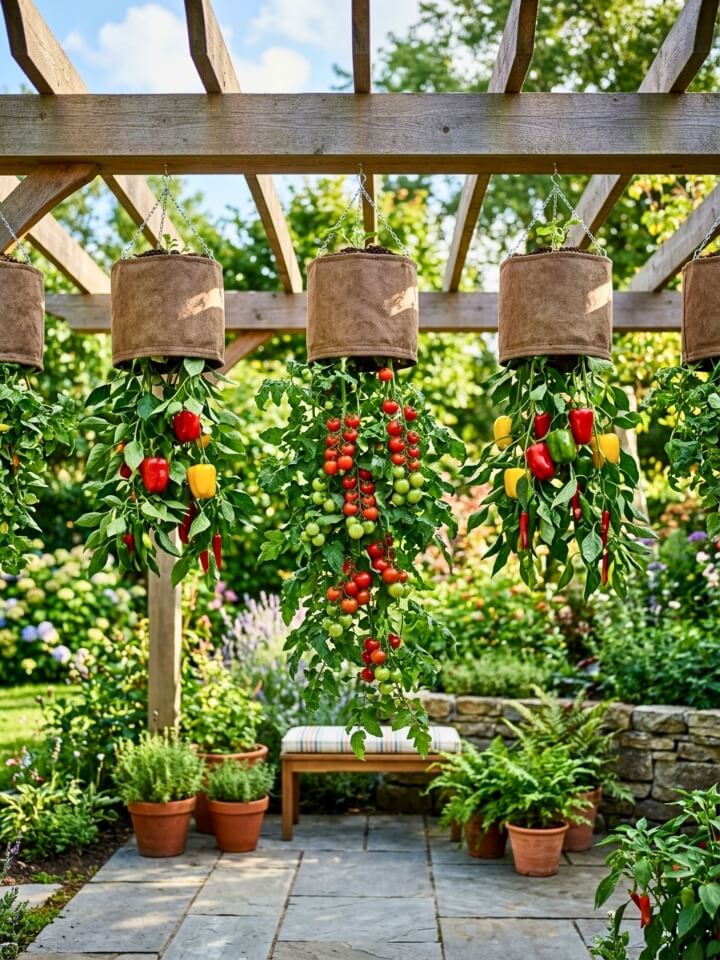
Inverted planter bags flip the traditional pot on its head. Plants grow downward through a hole in the bottom while roots stay anchored in soil above. The advantage? You skip staking entirely, and the elevated position keeps blight away from leaves.
Best Varieties to Try:
- Tumbler or Tiny Tim cherry tomatoes
- Mini bell peppers and shishitos
- Pickling cucumbers with short vines
- Fairy Tale eggplant
These bags dry out twice as fast as ground containers because air circulates on all sides. During July and August, water every single morning and mix water-retaining polymer crystals into your potting mix at planting time. Cost runs $12 to $20 per bag.
5. Pallet Wood Pocket Wall
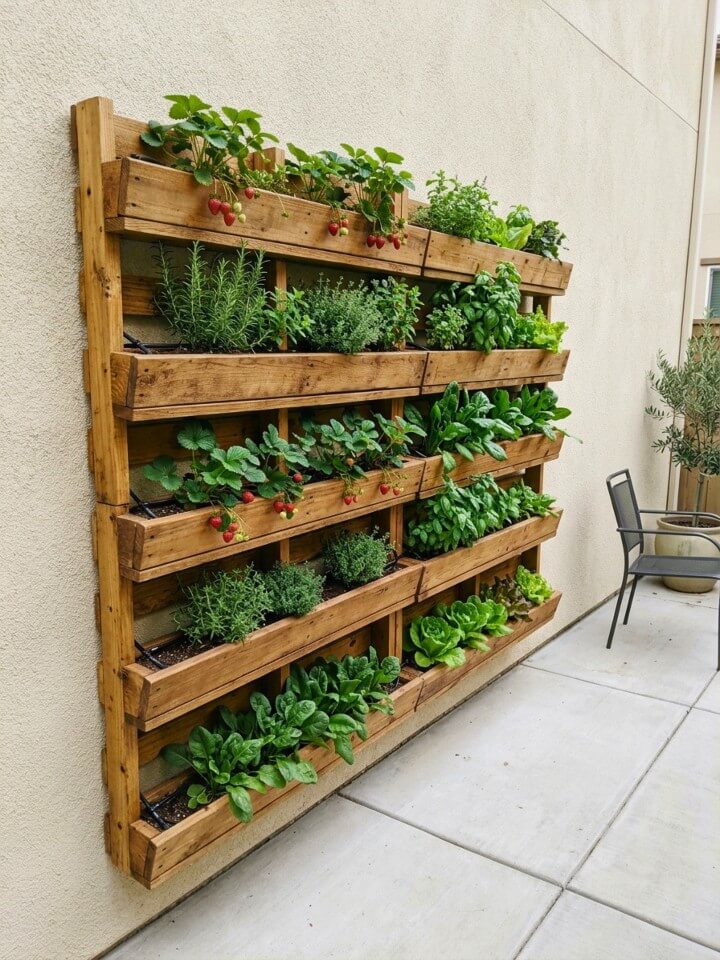
A reclaimed pallet leaned against a fence and fitted with fabric pockets turns a blank vertical surface into a growing wall in one afternoon. The weight spreads across the entire frame instead of pulling on a single anchor, which makes it far safer long-term.
Pallet Safety Stamps to Check
- HT = heat-treated, safe for food
- KD = kiln-dried, also safe
- MB = methyl bromide, never use for edibles
- No stamp = unknown chemicals, skip it
Strawberries, basil, oregano, and leaf lettuce all thrive in pocket walls. Add dwarf marigolds to deter aphids naturally. Total cost runs $0 to $25 if you source a free pallet from local listings.
6. PVC Pipe Vertical Planter
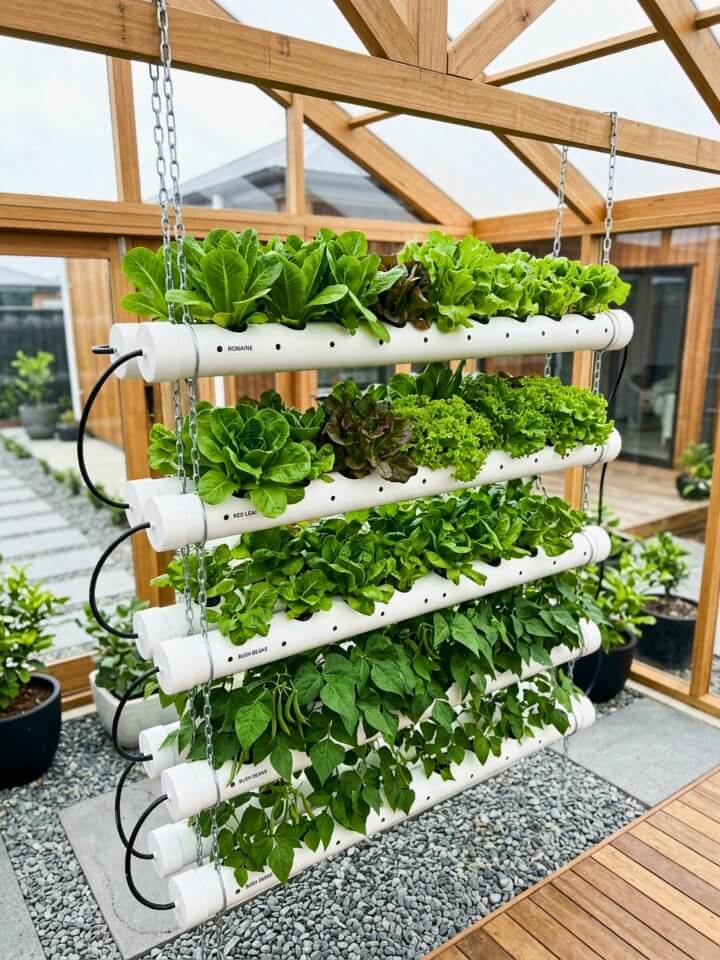
For maximum plants in minimum floor space, this technique wins. A four-inch PVC pipe drilled with staggered holes holds 15 to 20 plants in less than one square foot. One morning watering reaches every plant through gravity alone. Bonus: the smooth plastic stops slugs from climbing up to your greens.
Drilling Rules that Matter
- Make holes two inches across, not one. Bigger openings give roots room.
- Stagger them in a spiral, six inches apart vertically.
- Drill on the upper curve of the pipe, never the side.
Lettuce, bok choy, strawberries, and bush beans all perform well. Budget $20 to $35 for pipe and brackets.
7. Hanging Grow Bags on a Ladder Frame
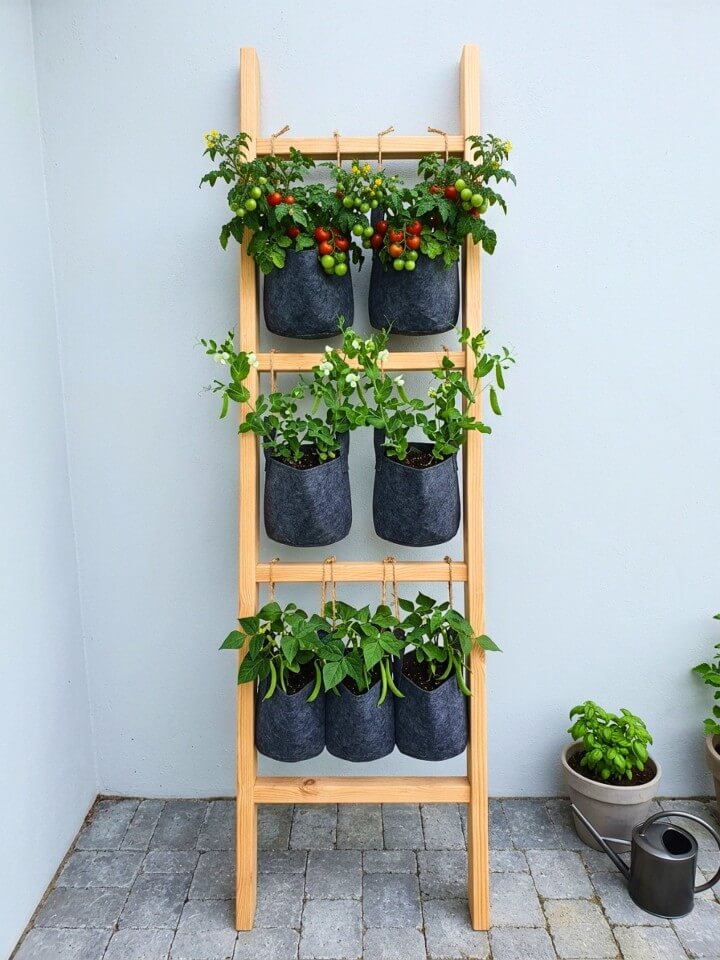
Lean an old wooden ladder against a sunny wall and hang fabric grow bags from each rung. You get four to five planting levels without drilling anything into the wall, which makes this perfect for renters. The angled design also means lower bags catch sun the upper ones miss.
Why Fabric Bags Beat Plastic Pots Here
Fabric breathes, so roots air-prune naturally instead of circling and choking themselves. Plants stay healthier through the full season.
Cherry tomatoes, sugar snap peas, and dwarf bush beans all produce well in five-gallon bags. A weathered wooden ladder costs $10 to $20 at estate sales, plus $25 for six grow bags.
8. Macrame Rope Planters
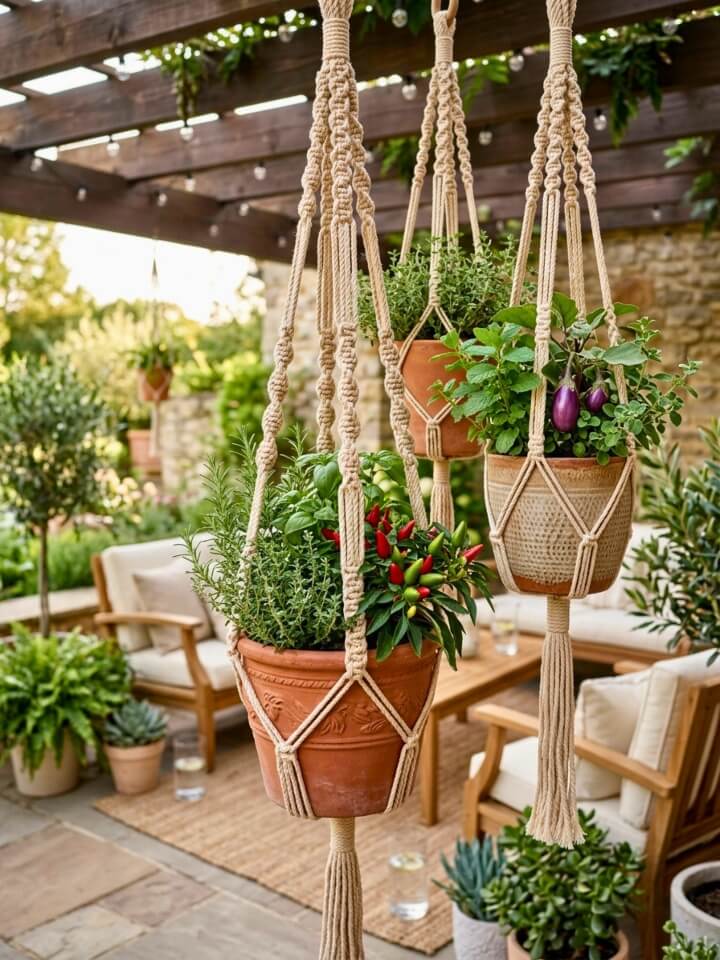
Macrame planters are having a real moment again, and for good reason. The knotted rope cradle holds almost any pot you already own, which means zero specialized equipment. Hang them from pergola beams, a sturdy hook, or even a covered patio ceiling if you’re building out a relaxed outdoor zone with elegant backyard pavilion ideas in mind.
What to Grow in Them:
- Basil, mint, and oregano in 6-inch pots
- Cherry tomatoes in 10-inch pots (use heavy cord)
- Trailing nasturtiums for edible flowers
- Strawberries in shallow bowls
The weak point is always the rope itself. Cheap cotton macrame frays within one season when exposed to sun and water. Spend the extra $5 on polyester or jute treated for outdoor use. Total cost: $15 to $30.
9. Trellis Net with Hanging Pots
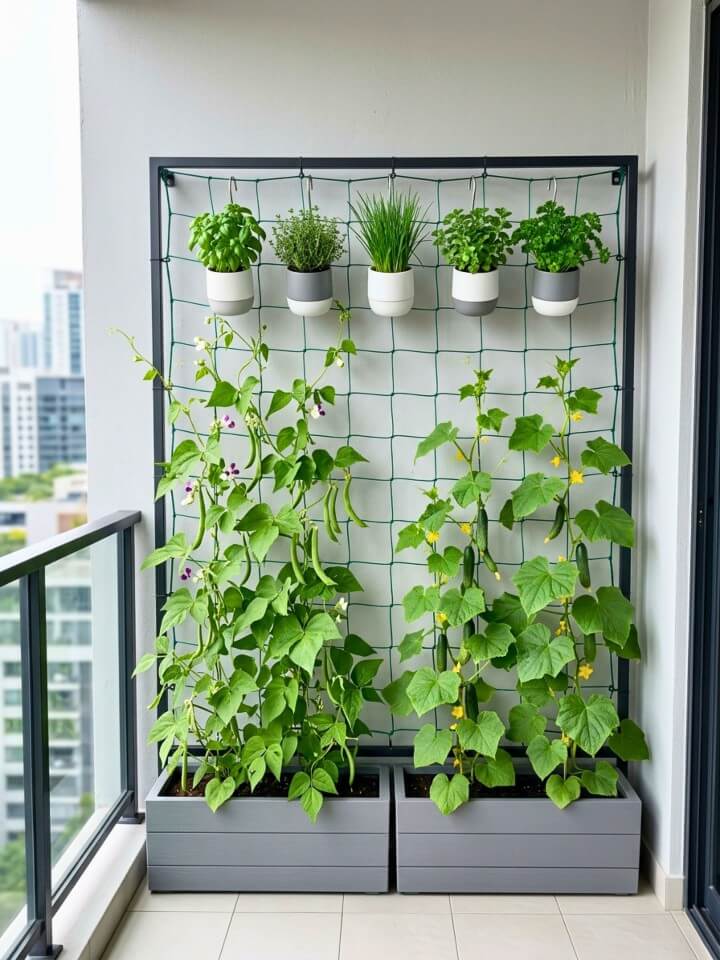
A nylon trellis net stretched across a fence or balcony frame becomes a dual-purpose growing structure. Climbing vegetables grow up through the grid while small pots clip onto the squares at different heights. You essentially double the productive surface of one wall, and the same setup can support superb privacy landscaping ideas if you let peas, beans, or cucumbers fill in the grid.
What Climbs and What Hangs
Pole beans, sugar snap peas, and small cucumber varieties climb the net. Strawberry pots, herb containers, and lettuce bowls clip in between using S-hooks or carabiners.
The net itself costs $8 to $15 for a six-by-eight-foot section. Anchor it to four corner points minimum because loaded climbing vines plus hanging pots create real wind load. This setup needs 6+ hours of sun.
10. Gutter Pipe Hanging Garden
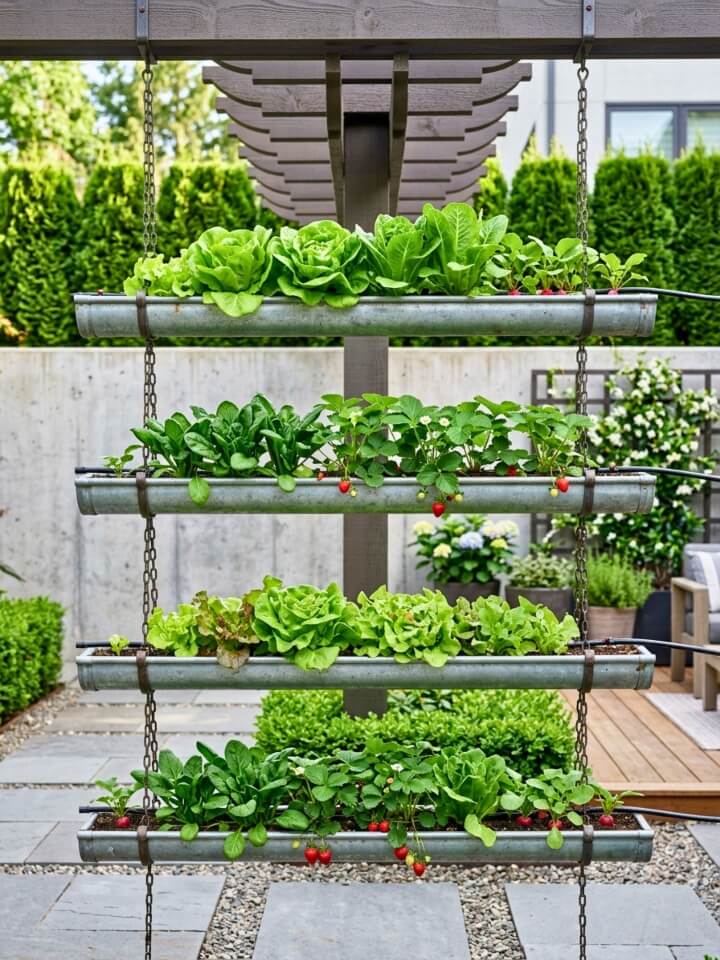
Standard vinyl rain gutters mounted horizontally on a wall or suspended by chains create long, shallow planting troughs that look almost architectural. Each ten-foot section gives you roughly fifteen plants in a clean row, which suits modern home exteriors beautifully.
Drill quarter-inch holes every six inches along the bottom. Skip this step and the gutters turn into stagnant water troughs that drown roots within a week.
Shallow-rooted crops perform best here: leaf lettuce, spinach, radishes, green onions, and strawberries. Avoid anything that needs deep roots like carrots or tomatoes. A ten-foot section of vinyl gutter with end caps runs $12 to $18 at any hardware store.
11. Hanging Shoe Organizer Planter
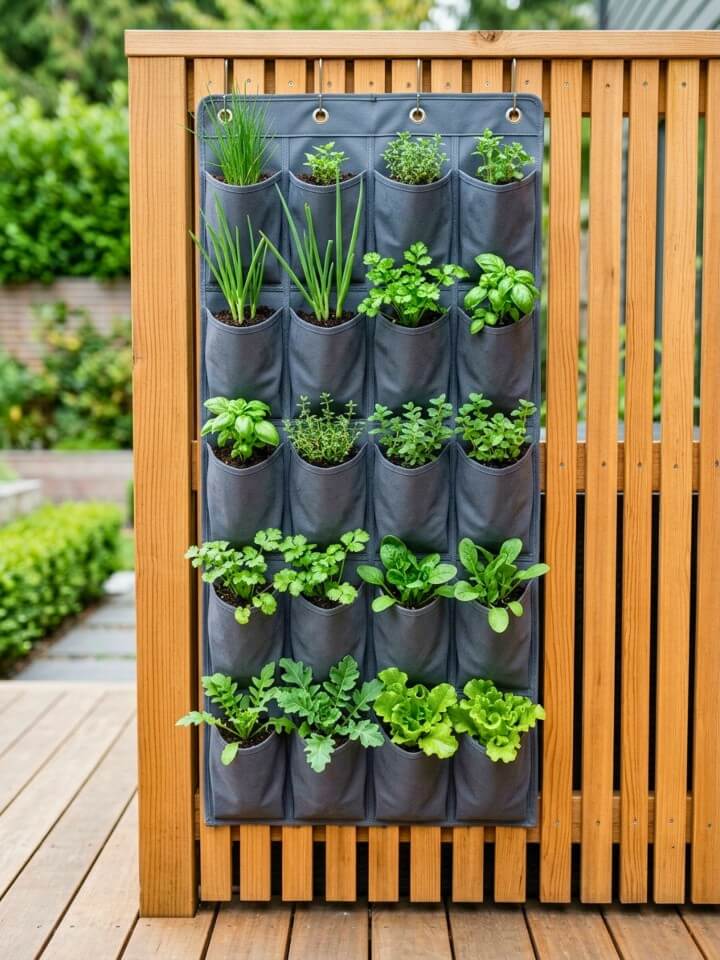
An over-the-door shoe organizer with 24 fabric pockets becomes an instant vertical garden for about $12. Hang it on a fence, balcony railing, or sunny exterior wall. Each pocket holds enough soil for one small plant, which gives you two dozen growing spots in roughly six square feet of wall space.
The fabric drains naturally and lets roots breathe, but here’s the catch: pockets dry out fast in summer heat. Plan on daily watering from June through August.
Green onions, leaf lettuce, baby spinach, cilantro, and parsley. Avoid anything with deep roots or heavy fruit. Choose a canvas organizer over nylon for better UV resistance.
12. Wire Mesh Cone Planters
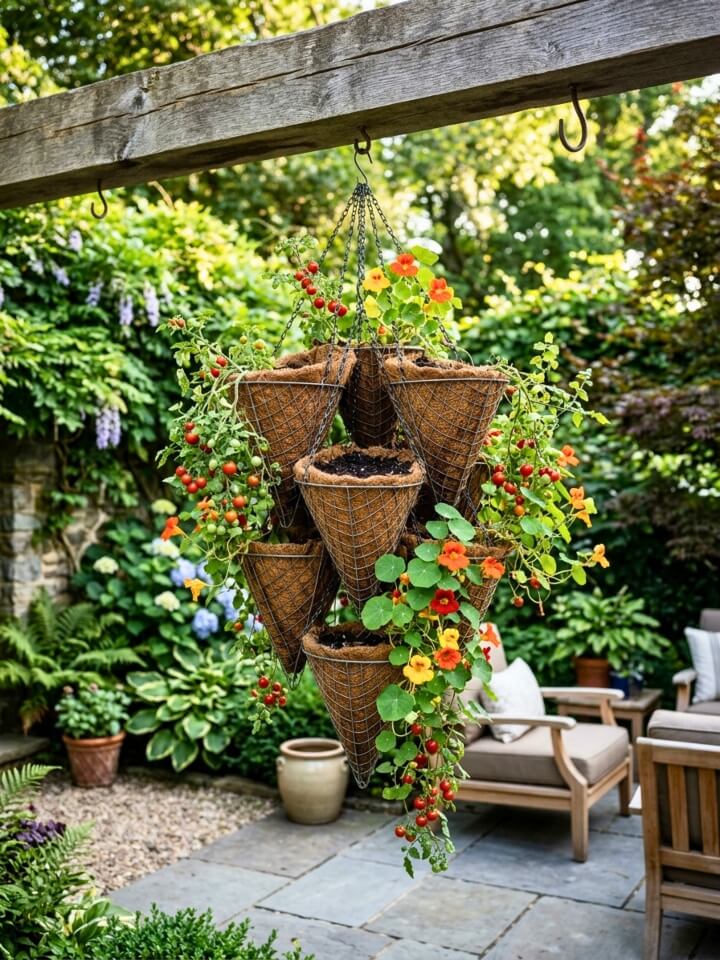
Cone-shaped planters made from rolled wire mesh and lined with coconut coir add genuine sculptural interest to a garden. You’re essentially building a hanging basket from scratch, but the cone shape holds more soil than a standard basket while using less material.
Building One Takes About 20 Minutes:
- Cut a half-circle of half-inch hardware cloth, roughly 24 inches across
- Roll it into a cone and secure with zip ties or wire
- Line the inside with a thick coir mat
- Fill with potting mix and plant
Trailing cherry tomatoes, strawberries, and nasturtiums spill over the wide top beautifully. Material cost runs $8 to $15 per cone.
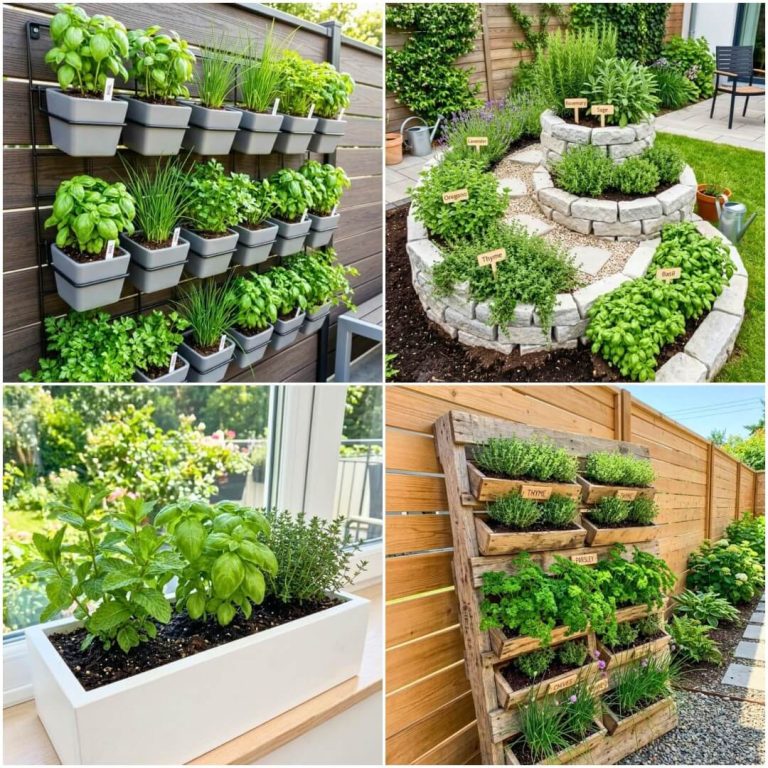
13. Hanging Mason Jar Garden
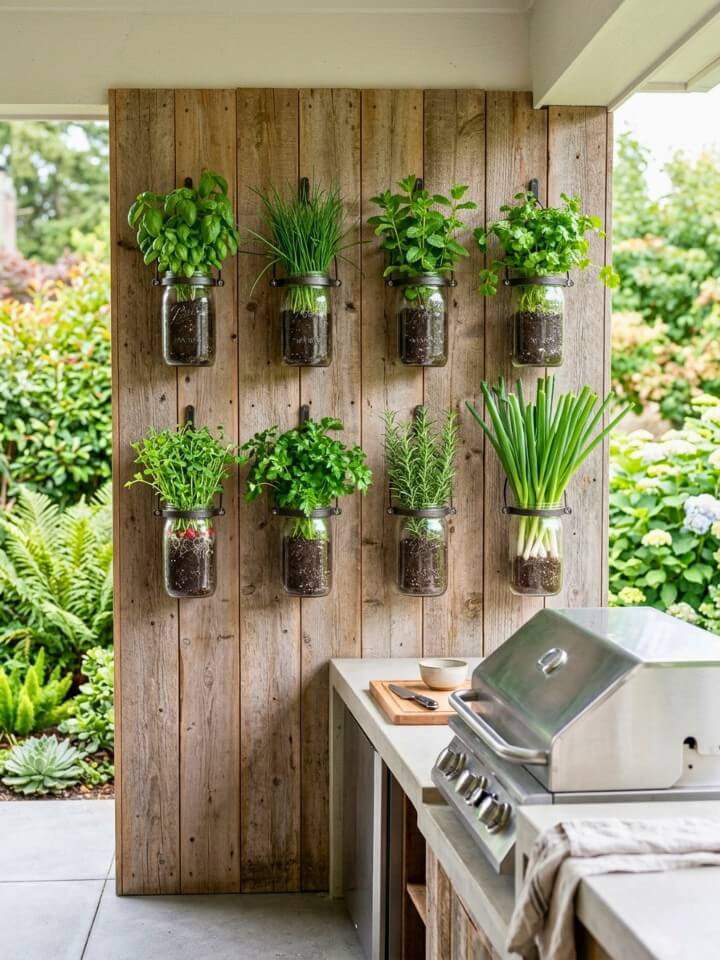
Mason jars mounted on a reclaimed wood board create one of the prettiest functional gardens you can build. Screw pipe clamps into the wood, slide jars into them, and you have an instant herb wall that catches morning light beautifully.
The Drainage Problem and How to Solve It
Mason jars have no drainage holes, which kills plants fast. Two fixes work: drill holes through the bottom with a glass bit, or add a one-inch layer of activated charcoal and pebbles before the soil. The charcoal also prevents the funky smell that stagnant jar gardens develop.
Basil, mint, chives, and microgreens thrive in jars. A six-jar setup runs around $25 to $35 total.
14. Burlap Sack Vertical Planter
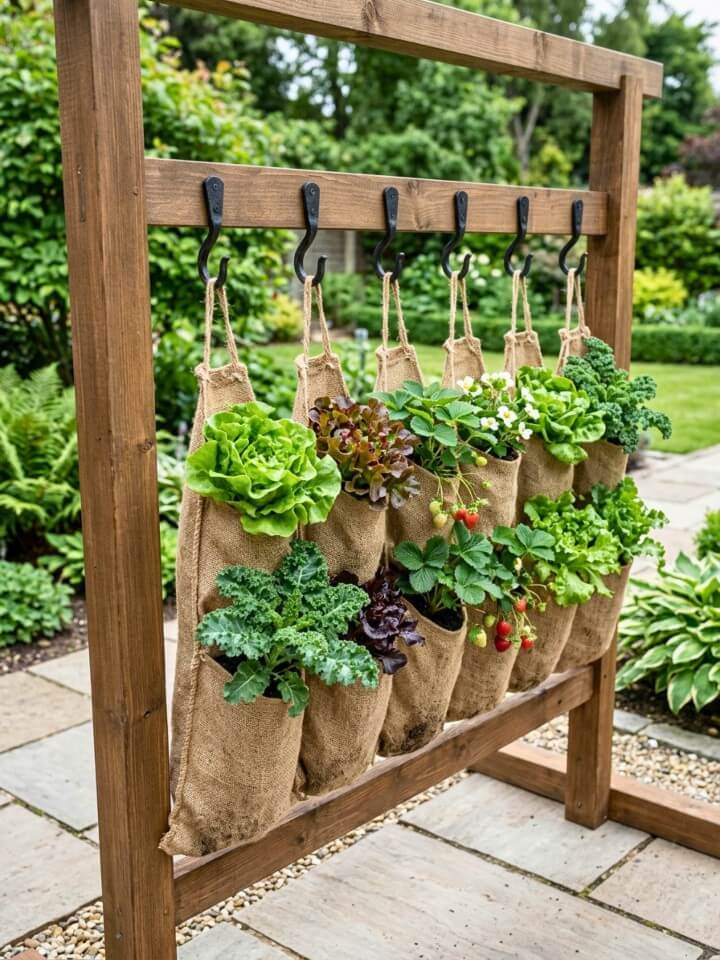
Burlap coffee sacks make surprisingly effective hanging planters. The natural fiber breathes well, drains on its own, and develops a weathered look that suits farmhouse-style exteriors. Most local coffee roasters give used sacks away free if you ask.
Setup Options that Work:
- Hang a single sack from two corner grommets
- Stack three sacks on a vertical wooden frame
- Roll the top edge down to create a self-supporting pot shape
Leafy greens, strawberries, and bush beans perform well. The catch is lifespan — burlap typically lasts one full growing season before breaking down. Line the inside with plastic sheeting (poked for drainage) to extend it to two seasons. Cost: $0 to $10.
15. Hanging Wooden Crate Planter
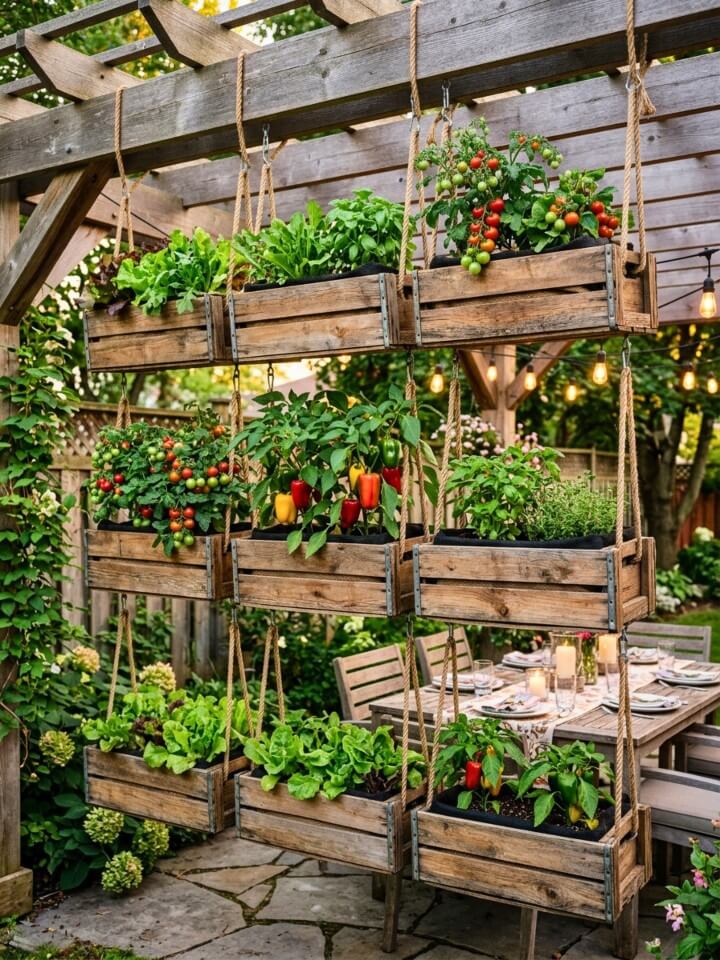
Old wine crates or wooden produce boxes turned sideways and suspended from rope create deep, generous planting pockets with built-in rustic character. The deeper soil volume compared to most hanging setups means less frequent watering and stronger root systems, which matters during heat waves.
Preparing the Crate Properly
Line the inside with landscape fabric stapled to the wood. This holds soil while letting water drain through the gaps between slats. Skip this and dirt pours out for weeks.
Bush tomatoes, peppers, and mixed salad greens all thrive in 12-inch deep crates. Source crates free from wineries or farm markets, or buy reproductions for $15 to $25 each. Use rope rated for 75+ pounds.
16. Hanging Felt Pocket Panel
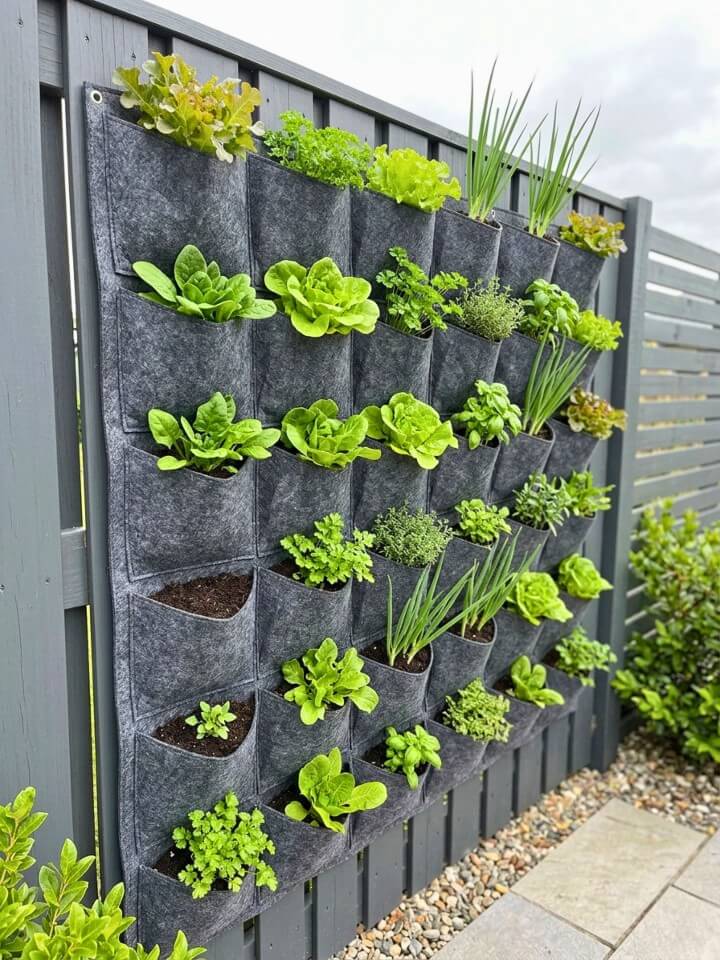
Commercial felt pocket panels are the cleanest-looking option on this list. A standard panel has 8 to 36 individual pockets sewn into thick recycled-PET felt, and the whole thing mounts flat against a wall with four screws. No frame building required.
Why the Material Matters
Quality felt panels use 5mm thick fabric. Cheap versions use 2mm and tear within one season. Check the listing before buying — this is where the price difference shows up.
Lettuce, spinach, herbs, green onions, and compact strawberry varieties all perform well. Avoid heavy fruiting plants because loaded pockets pull screws out of drywall. A 36-pocket panel runs $35 to $60.
Frequently Asked Questions
Before you grab your tools, here are the practical questions worth answering — from weight limits to watering schedules.
How Much Weight Can a Standard Ceiling Hook Hold?
Most retail ceiling hooks are rated for 20 to 25 pounds. A single basket full of wet soil can hit 15 pounds easily, so always upgrade to a heavy-duty swag hook anchored into a ceiling joist for tiered or multi-pot setups.
Which Vegetables Grow Best in Hanging Gardens Overall?
Leaf lettuce, cherry tomatoes, strawberries, herbs (basil, mint, oregano, chives), radishes, and bush beans are the most reliable producers. Skip anything with deep taproots like carrots or parsnips.
How Often Do Hanging Gardens Need Watering?
Most hanging setups dry out about twice as fast as ground containers because air circulates on all sides. Plan on daily watering during summer heat, and consider drip irrigation if you’ll be away for more than two days.
Are Pvc Pipes Safe for Growing Food?
Standard white PVC (Schedule 40) is considered safe for food growing by most extension services. Avoid CPVC, flexible vinyl, or any pipe not labeled for potable water use.
What’s the Cheapest Hanging Garden to Start With?
A shoe organizer planter or thrifted colander setup runs under $15 total and produces real food within 30 days if you plant fast-growing greens like leaf lettuce or radishes.
Do Hanging Gardens Attract Pests?
Less than ground gardens. Elevation reduces slug, snail, and rabbit pressure significantly. Aphids and whiteflies can still appear, but airflow around hanging plants makes infestations easier to spot and treat early.
Final Thoughts on Building Your Hanging Garden
Don’t try to build all sixteen of these in one season. Pick two or three vegetable garden that match your actual space, sun exposure, and skill level, then expand next year based on what worked. The biggest mistake new vertical gardeners make is overcommitting in April and burning out by July when daily watering becomes a chore.
Start with one tested setup. Get a real harvest from it. Build from there.