24 Old Brick Patio Ideas That Add Timeless Charm To Any Backyard
Old brick has a quiet charm that new materials rarely match. The soft edges, faded tones, and slight surface wear tell a story of time, which is exactly why so many homeowners choose it for outdoor spaces. Whether you are planning a small garden nook, a full backyard makeover, or just a cozy sitting corner, brick offers a warm, grounded look that fits almost any home style.
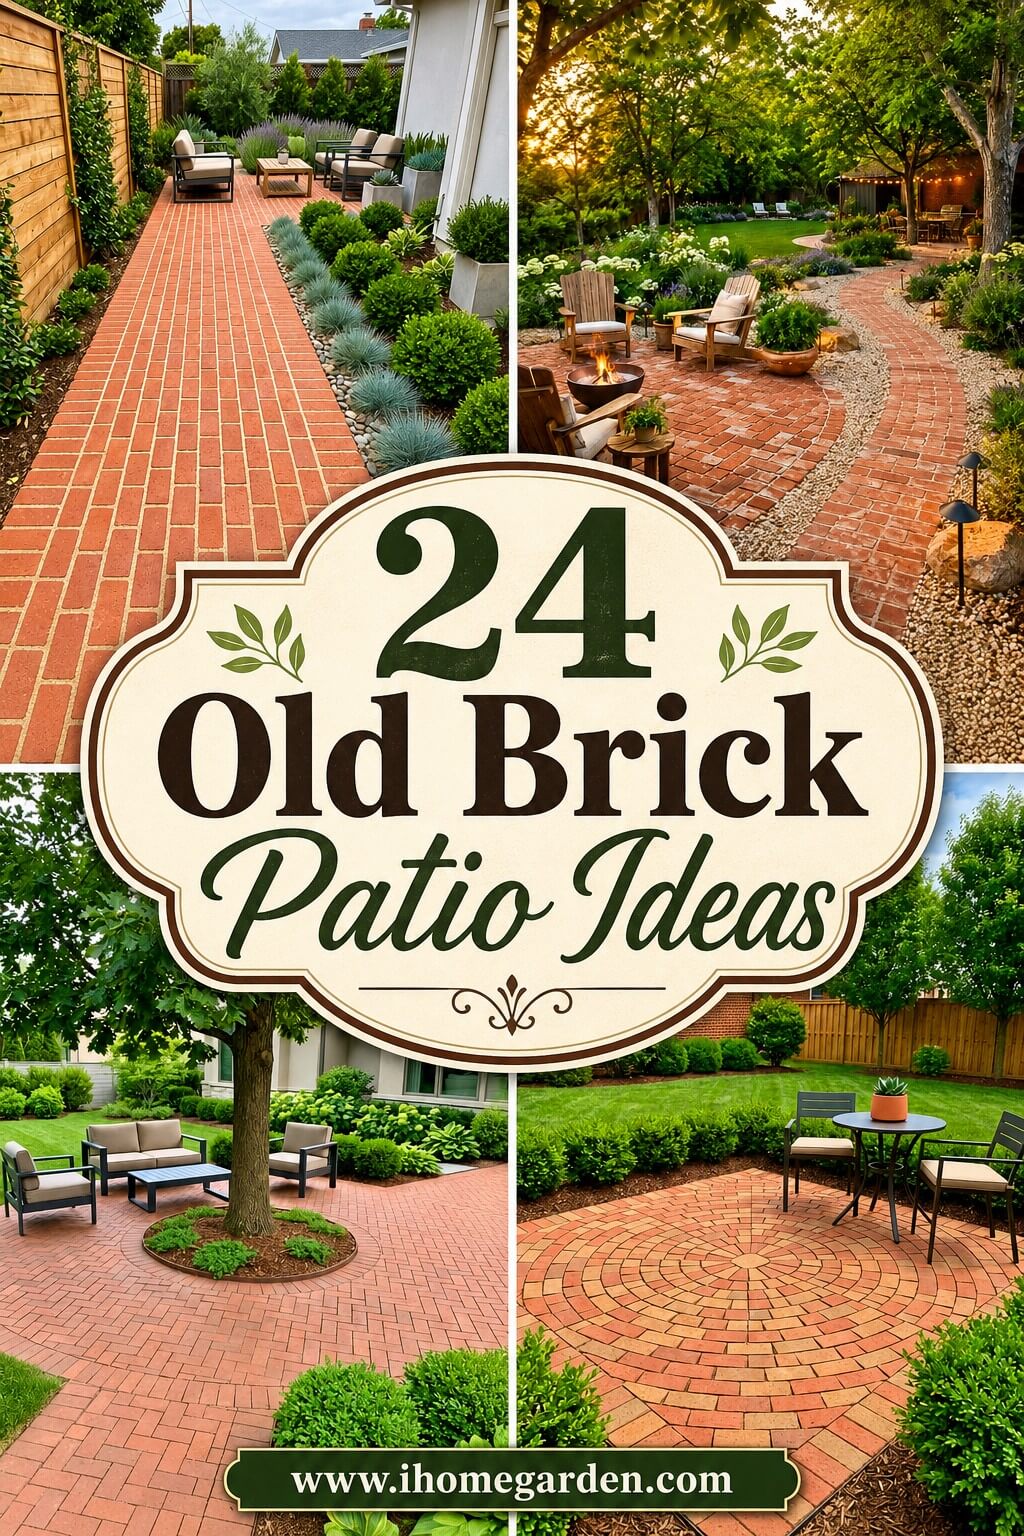
Ahead you will discover 24 beautiful old brick patio ideas covering patterns, layouts, and design pairings. Each old brick patio idea includes practical details on cost, installation, or upkeep so you can decide what fits your yard, budget, and comfort level. Let us get into the ideas.
1. Herringbone Weathered Brick Patio
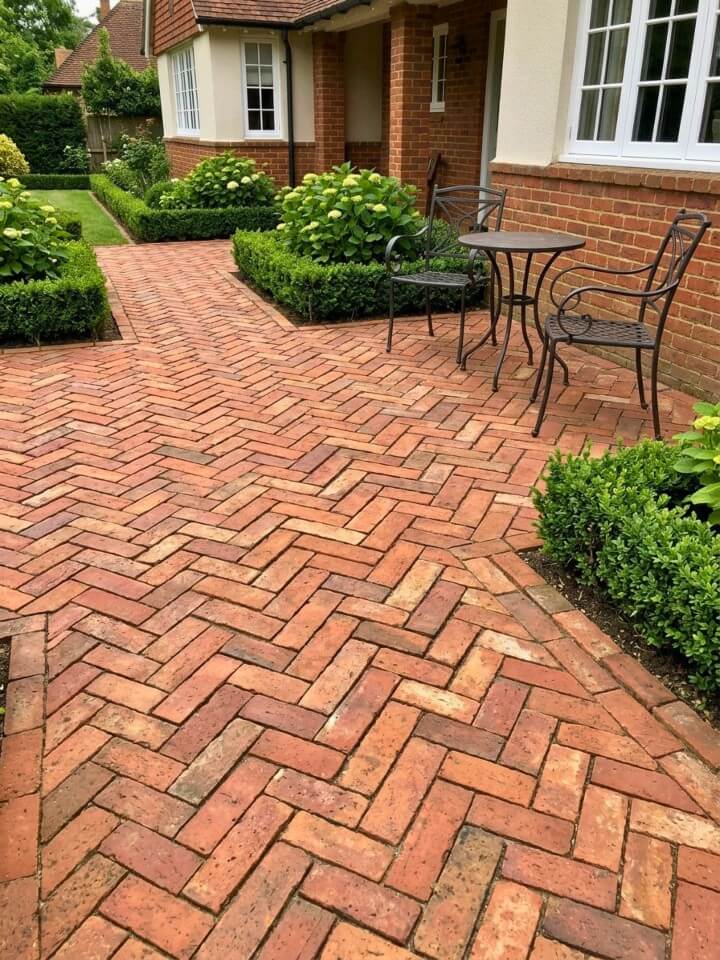
What makes herringbone special — the interlocking angles actually strengthen the surface. Bricks laid at 45 or 90 degrees push against each other under weight, so the patio resists shifting far better than a straight running bond. That is why you still see herringbone in centuries-old European courtyards.
Weathered brick softens the sharp geometry and gives the whole thing a lived-in feel. Budget roughly $15–$25 per square foot installed. If you are going the DIY route, order 10–15% extra bricks because the angled edge cuts create waste, and rent a wet saw for cleaner cuts.
Best for: Narrow patios, high-traffic walkways, cottage-style homes
2. Brick Patio Around a Central Tree
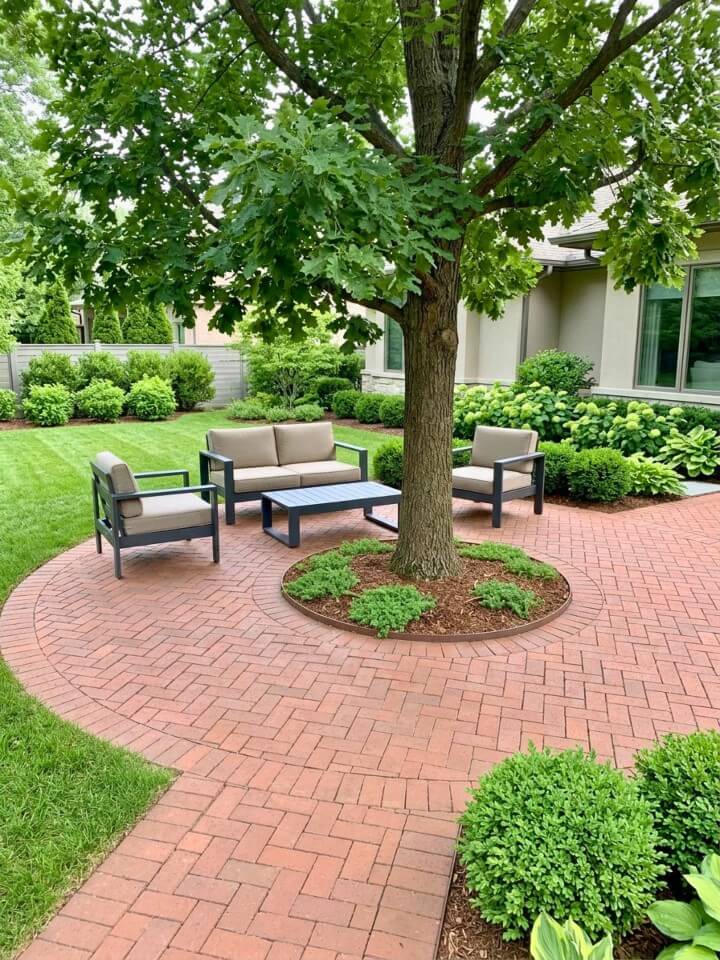
Picture your favorite oak or maple with a curved brick seating area wrapped around its base. Suddenly the tree is not just shade — it is the whole reason the patio exists.
The trick is respecting the roots. Trees hate having their bases suffocated by mortar and compacted soil, so leave a breathing ring of at least 3 to 4 feet around the trunk filled with loose gravel, mulch, or open soil. Sand-set bricks (no mortar) work best near the tree because you can lift and reset them as roots expand over the years.
One warning: avoid this design with young trees. You want a mature, established trunk that will not outgrow the layout in five years.
3. Sunken Brick Patio
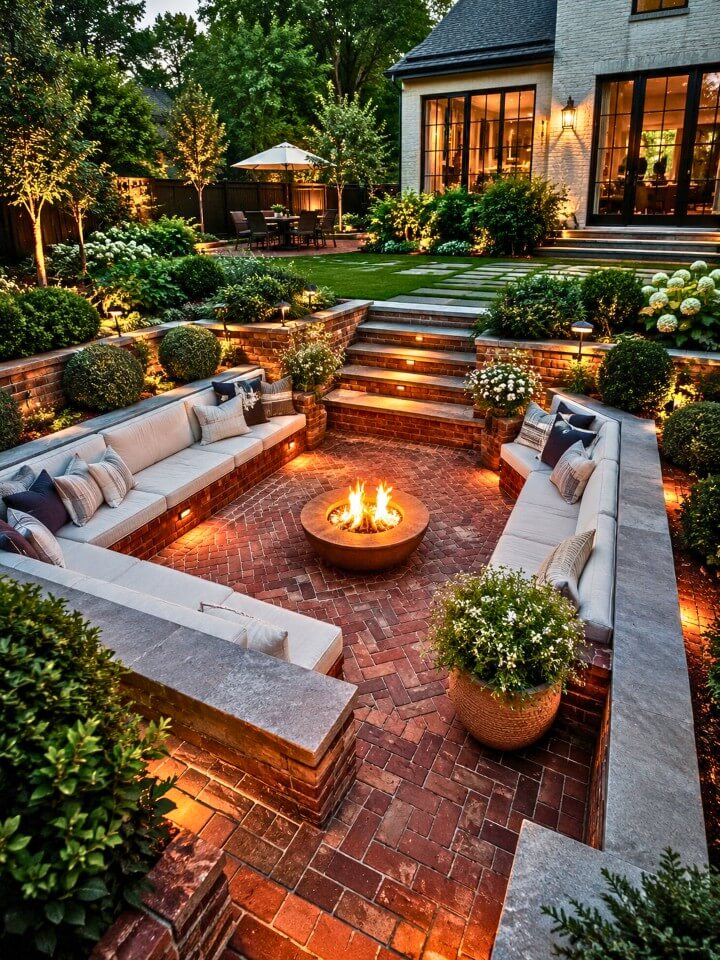
Discover old brick patio ideas that turn weathered charm into your backyard’s best feature yet. A sunken patio drops the seating area 12 to 24 inches below the surrounding yard, and the effect is immediate — you feel tucked in, sheltered, almost like stepping into a private room without walls.
The Honest Tradeoffs:
- Pros: Natural wind block, better acoustics for conversation, dramatic visual impact, ideal for fire pits
- Cons: Expensive ($25–$45 per square foot), drainage is critical, rarely a DIY project
Drainage is the make-or-break factor. Without a French drain or a properly sloped gravel base underneath, the space turns into a swimming pool during a summer storm. Talk to a contractor about soil type before committing — clay-heavy yards need extra drainage planning.
4. Moss-Grown Brick with Wide Joints
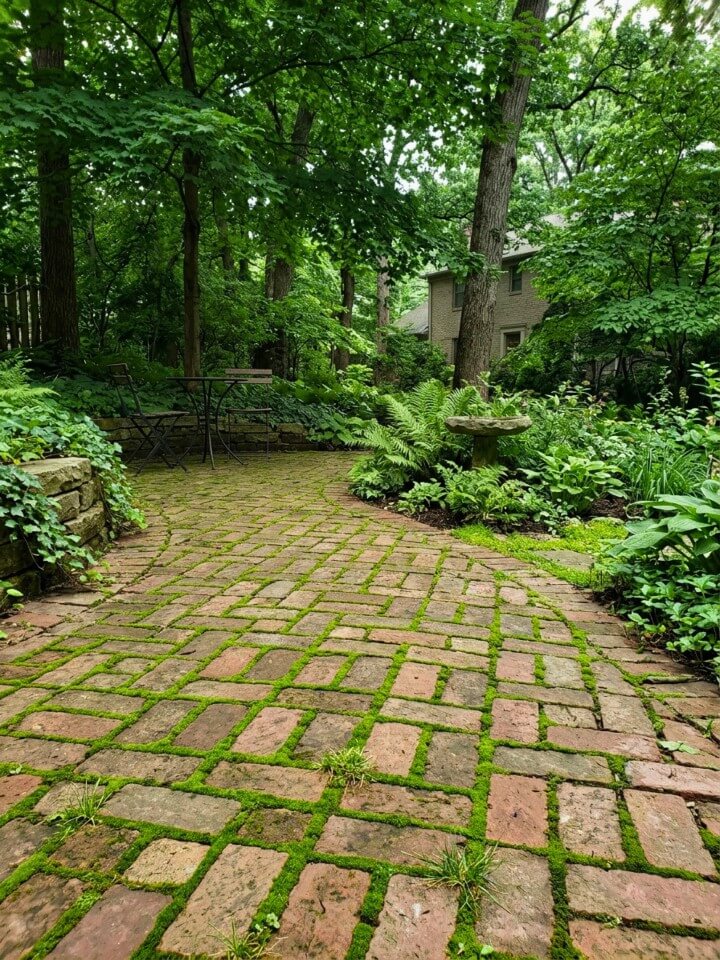
Want to know a shortcut for growing moss between bricks? Blend a handful of moss with a cup of buttermilk or plain yogurt in a blender until it looks like green paint. Then brush the mixture into the joints. Keep it damp for two to three weeks and you will see moss establish faster than waiting for nature to do it alone.
This look only works in shaded, humid spots — think under tree canopies or the north side of the house. Full sun will kill moss quickly. Use a sand-and-soil mix in joints roughly half an inch to one inch wide instead of mortar, so the moss has something to grip.
It fits woodland gardens and older homes beautifully. Modern minimalist yards? Skip it.
5. Circular Brick Medallion
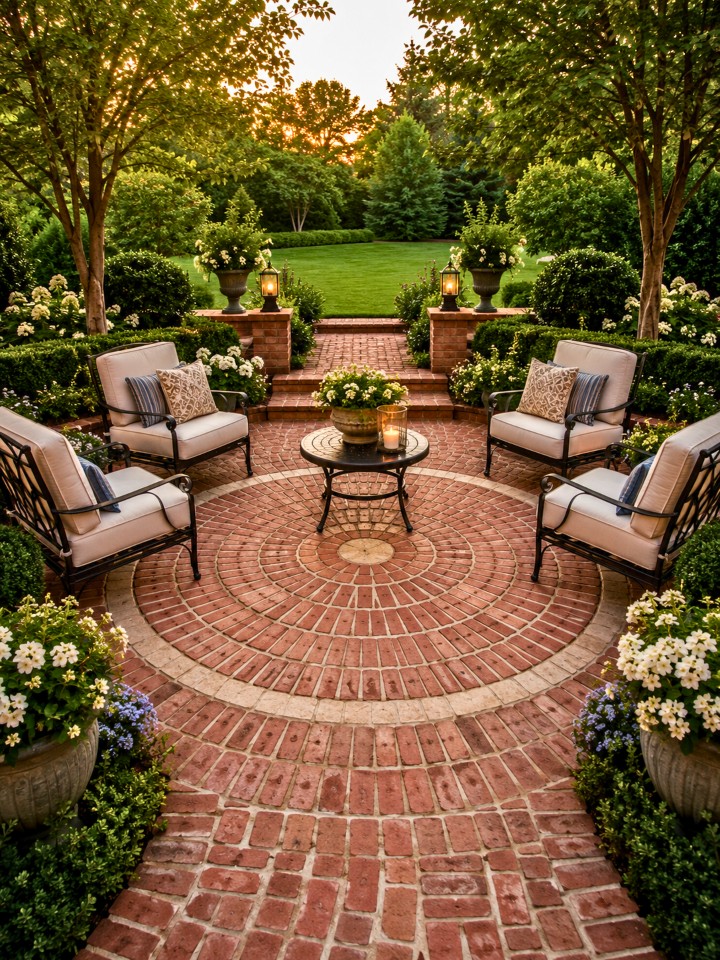
Circular medallions have been showing up in garden design since Roman villas. There is something about a round centerpiece that pulls a space together the way rectangles never do.
You have two paths here. The first is buying a pre-cut medallion kit — expect $200 to $600 depending on size, and installation is straightforward because the bricks are already shaped. The second is hiring a mason to cut and lay the pattern from scratch, which costs more but lets you customize the design and size.
If you are attempting it yourself, drive a stake at the center point, tie a string to it, and use the string as a compass to mark your circle. Work outward from the middle, one ring at a time.
6. Mixed Reclaimed Brick Blend
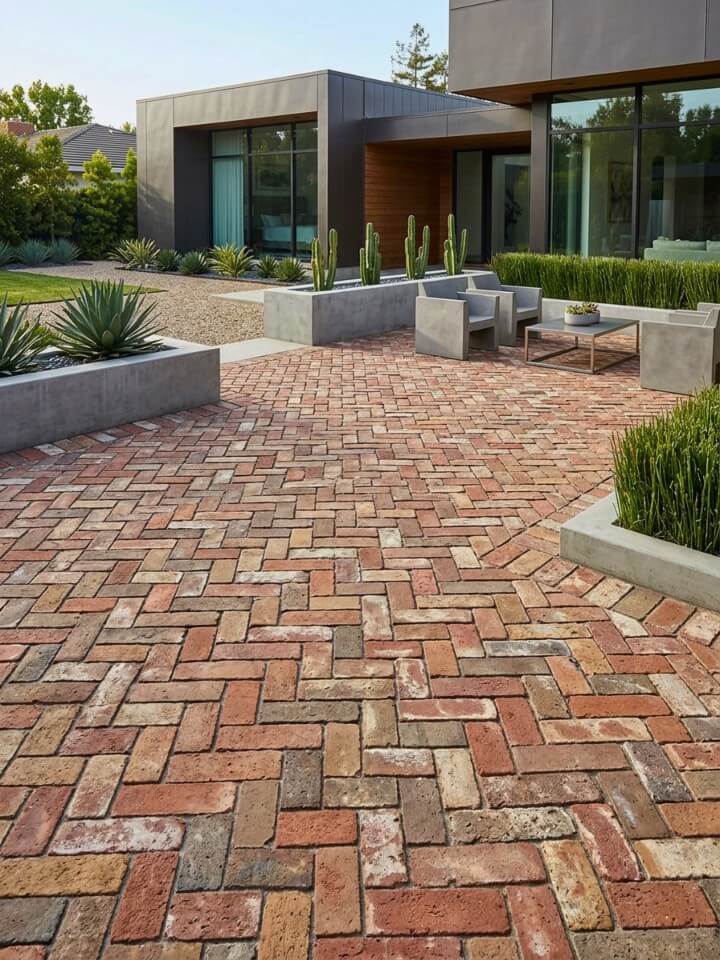
There is something honest about a patio made from bricks that lived another life first. Salvaged from old warehouses, torn-down chimneys, or century-old sidewalks, reclaimed bricks arrive in mismatched shades — deep reds, sun-bleached oranges, smoky browns, sometimes even a few blackened by old fireplaces.
The variation is the whole point. Instead of trying to match everything perfectly, you spread the tones across the surface so the eye reads it as one collected, aged whole.
Sourcing tip: check architectural salvage yards, Facebook Marketplace, and demolition contractors. Prices swing wildly — anywhere from $0.50 to $3 per brick — but expect to pay more for hand-molded antique bricks with visible tool marks. Order 20% extra since reclaimed batches often include broken or unusable pieces.
7. Brick-and-Stone Border Combo
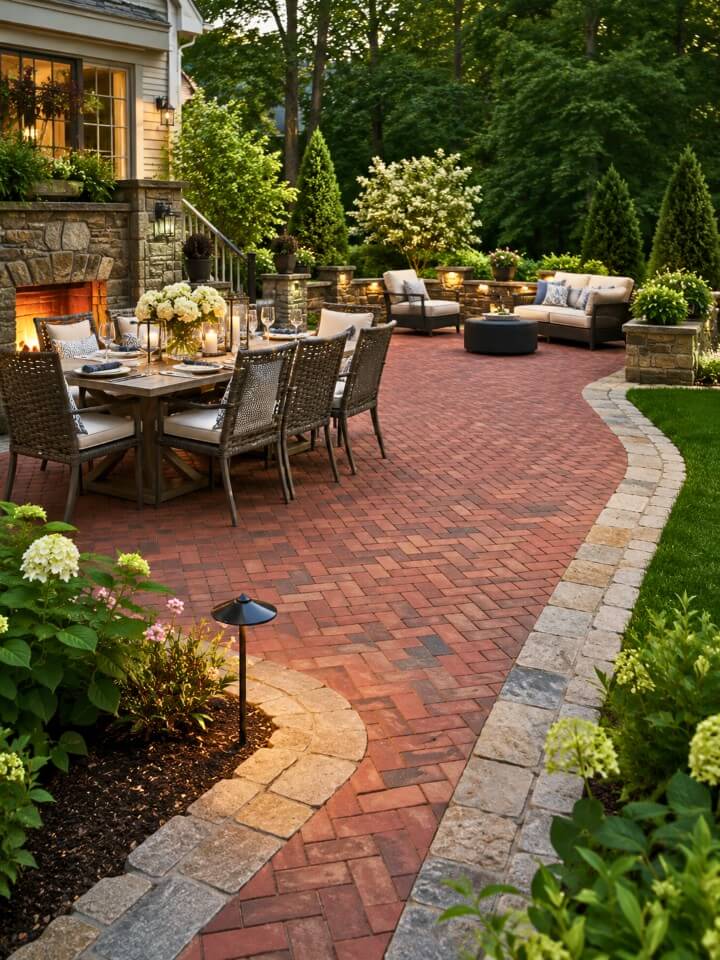
Framing a brick patio with a stone border is one of those design moves that solves two problems at once — it looks intentional, and it keeps the bricks from creeping outward over time.
Bluestone, flagstone, and cobblestone all pair well with aged brick. The contrast in color and texture creates a natural frame without shouting for attention. A border 8 to 12 inches wide usually hits the sweet spot; anything thicker starts to compete with the brickwork itself.
Structurally, the stone edge acts as a restraint. Bricks set in sand have a tendency to shift outward under years of foot traffic and freeze-thaw cycles. A heavier stone perimeter holds everything in place, which means less maintenance and fewer wobbly bricks down the road.
8. Brick Patio with a Dining Zone
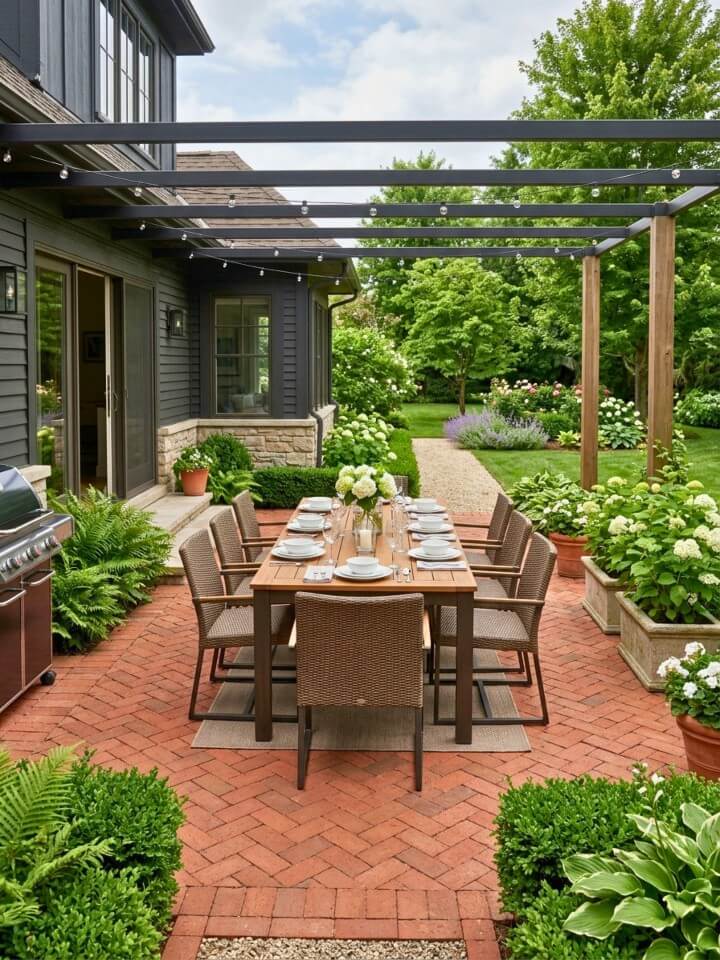
A dining zone needs more thought than people usually give it. The table location shapes everything else — chair clearance, foot traffic paths, even where you place the grill.
Planning Checklist Before You Lay a Single Brick:
- Measure your table, then add 3 feet on every side for chair pull-out space
- Position the zone within 20 feet of the kitchen door for easy serving
- Check afternoon sun direction — you may want partial shade over the table
- Leave a clear 4-foot walking path between the dining area and other patio zones
- Plan for a nearby outlet if you want string lights or a small speaker
Brick handles hot dishes, dropped silverware, and spilled wine without fuss. A running bond pattern under the table area works well because it stays visually calm and does not fight the tablecloth or centerpiece.
For a practical finishing touch, plant cooking herbs nearby and use these fetching herb garden ideas to make the dining zone feel useful as well as beautiful.
9. Aged Brick with Whitewash or Limewash
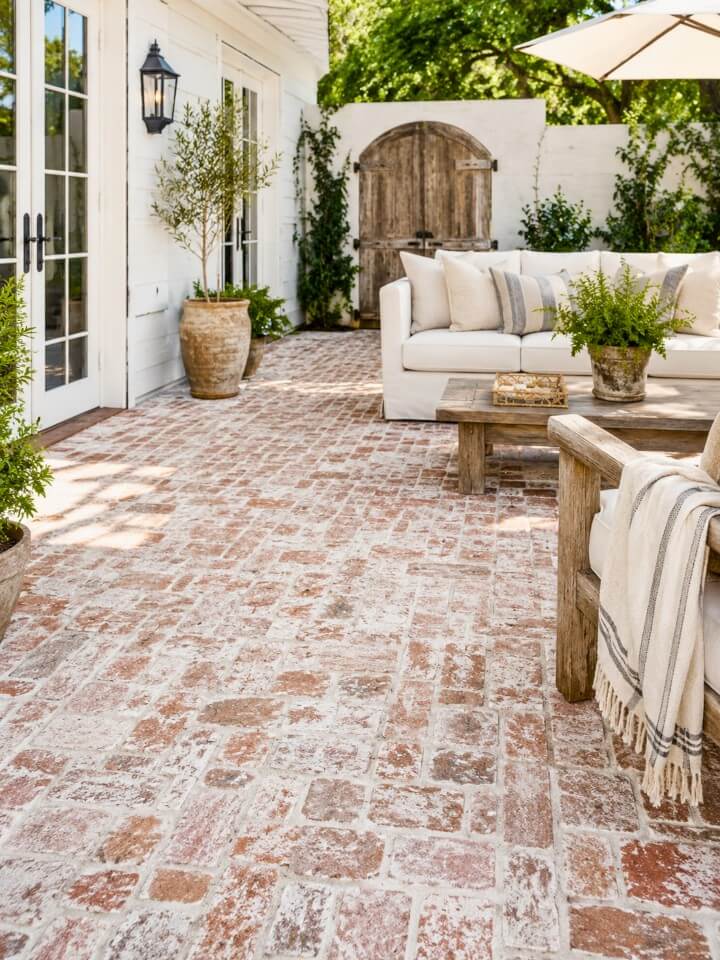
Give your yard a story worth telling with a reclaimed brick patio full of rustic character. Whitewash and limewash are not the same thing, and the difference matters.
Whitewash is typically a diluted paint mixture that sits on the brick surface. It is easier to apply but tends to peel or flake after a few years, especially on outdoor surfaces exposed to rain and sun.
Limewash is made from crushed limestone mixed with water. It actually bonds with the brick at a chemical level, soaking in rather than sitting on top. It weathers gracefully, softening over time rather than peeling, and lasts five to seven years before needing a refresh.
10. Brick Patio with Raised Garden Beds
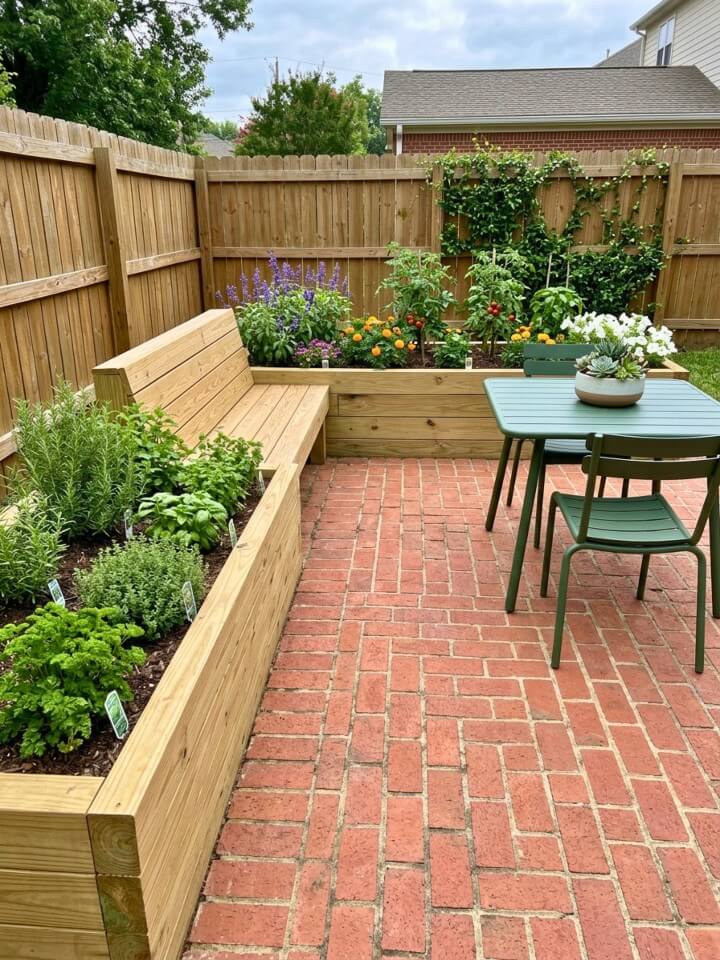
Raised beds along the edges of a brick patio pull double duty — they define the space and give you a working garden without stealing seating room.
The height matters more than most people realize. Beds at 18 to 24 inches tall become informal bench seating during a garden party. Anything shorter than 12 inches gets lost visually against the brick surface. Anything taller than 30 inches starts to feel like a wall.
Match the bed material to the brick or deliberately contrast it. Weathered brick beds beside a weathered brick patio create a seamless flow, while cedar or corrugated metal beds add a modern edge against traditional brick.
A dark mulch layer can also sharpen the planting edges, especially if you like the bold contrast found in alluring black mulch landscaping ideas.
11. Mixed Brick-and-Gravel Patio
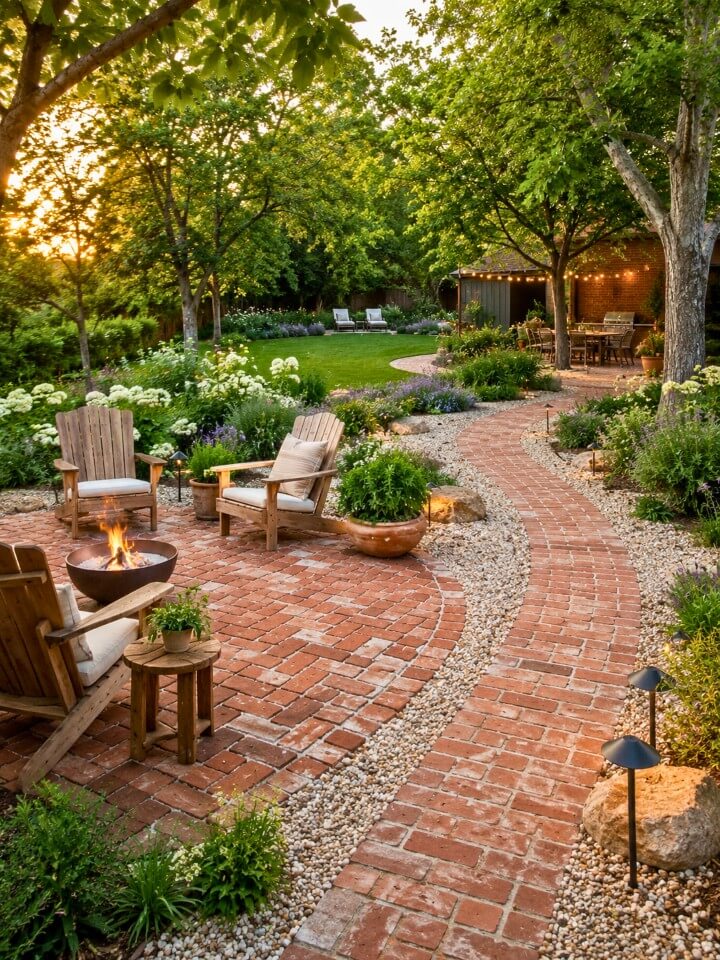
Not every square inch of a patio needs to be solid brick. Mixing brick pathways with gravel infill sections cuts material costs, improves drainage, and gives the space a relaxed European courtyard feel.
The classic approach: lay brick in the main walking lines and seating footprints, then fill the surrounding areas with pea gravel or crushed granite. Water drains straight through the gravel instead of pooling on the surface, which is a real advantage in yards with heavy clay soil.
A few things worth knowing before you start. Gravel migrates — it wanders into lawn edges and gets tracked indoors on shoes. Steel or aluminum edging keeps it contained. Choose gravel between 3/8 inch and 1/2 inch in size; smaller than that feels unstable underfoot, and larger stones are uncomfortable to walk on barefoot.
Budget-wise, this hybrid runs roughly 30 to 40 percent cheaper than a fully bricked patio of the same size.
12. Running Bond with a Sand Finish
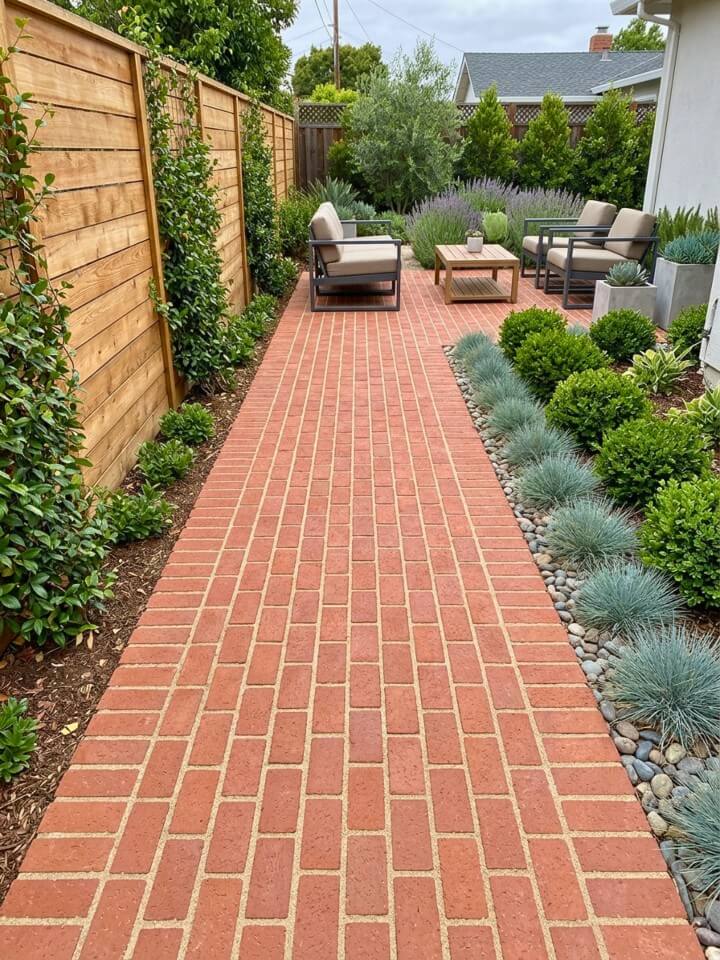
Running bond is the pattern your grandfather probably laid in his own backyard. Each brick offset by half its length from the row above, staggered like standard brickwork on a house wall.
Why does it still show up everywhere? Because it works. The pattern is forgiving on uneven ground, easy to lay without precise cutting, and reads as calm rather than busy.
The sand finish is where the character comes in. Instead of sweeping polymeric sand into the joints and calling it done, use fine masonry sand and leave the surface slightly textured. Barefoot walking feels natural, not slick. Rain drains through the joints instead of running off.
One downside worth mentioning: sand joints need re-sweeping every year or two as the material settles or washes out during heavy storms. Keep a bag of matching sand in the garage for quick touch-ups.
13. Brick Patio with Inset Planting Pockets
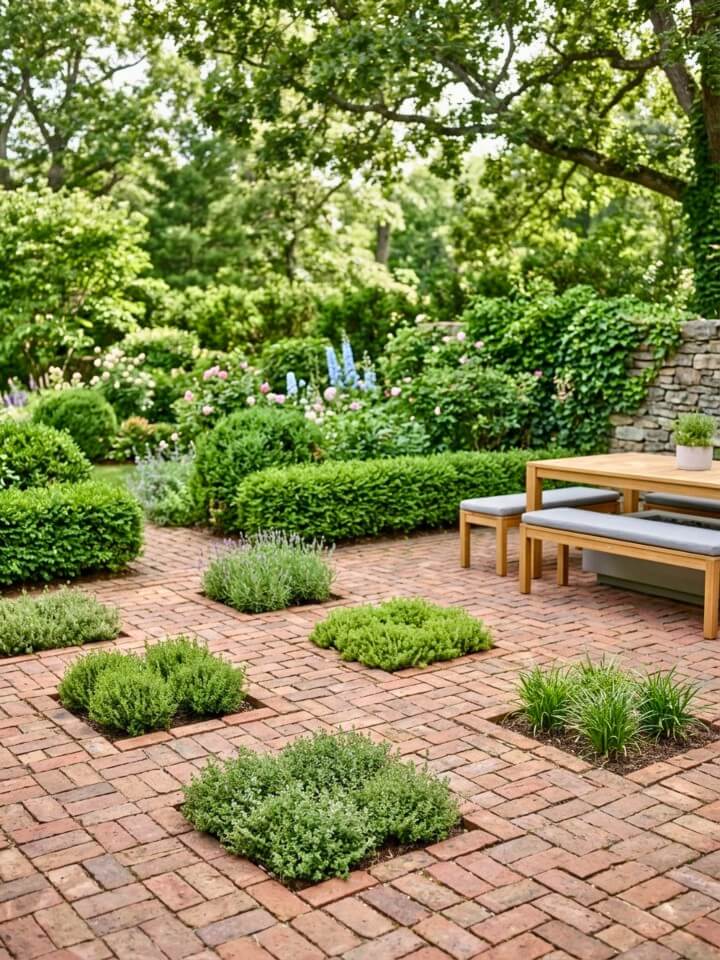
Cutting garden pockets directly into a brick patio changes how the space feels. Instead of hardscape on one side and plants on the other, the two blend into each other.
A few pocket ideas that actually work:
Creeping thyme between stepping bricks releases scent when you walk on it. Ornamental grasses in a corner pocket add movement without demanding maintenance. Low sedums handle full sun and drought without complaint. Dwarf mondo grass fills small square pockets with dense green year-round.
Pocket size guidance: keep them between 12 and 24 inches on each side. Smaller pockets dry out too fast and the plants struggle. Larger ones start eating into usable patio space.
Plan the drainage carefully. Each pocket needs at least 8 inches of soil depth over a gravel base, otherwise roots sit in water after every rain and the plants rot from the bottom up.
14. Basket-Weave Pattern
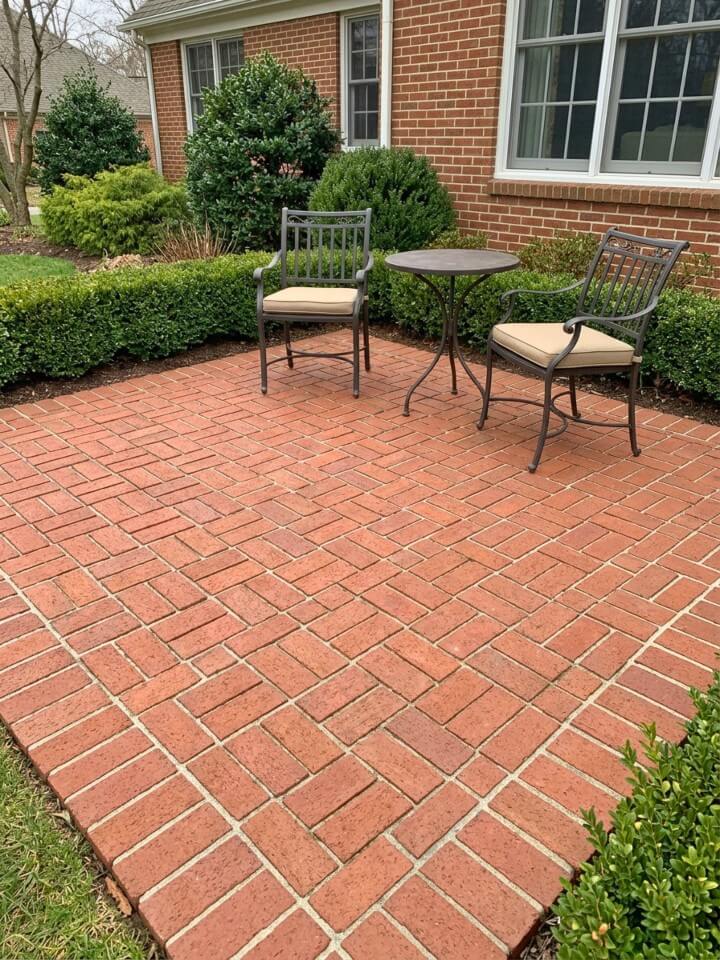
The basket-weave pattern goes back to medieval European courtyards, and once you see it, you understand why it stuck around. Pairs of bricks laid horizontally alternate with pairs laid vertically, creating a woven look that reads like textile more than masonry.
It photographs beautifully. Under morning or late afternoon light, the alternating grain of the bricks catches shadows differently, and the whole surface takes on a subtle three-dimensional quality.
This pattern rewards patience. Every brick has to sit square with its neighbors, otherwise the weave starts to look crooked from across the yard. Use a string line as a guide and check your alignment every three or four rows.
Best applications: square patios, small courtyard spaces, and areas where you want the ground itself to be the visual feature. Skip it for large rectangular patios — the pattern loses impact when stretched too far.
15. Multi-Level Brick Terraces
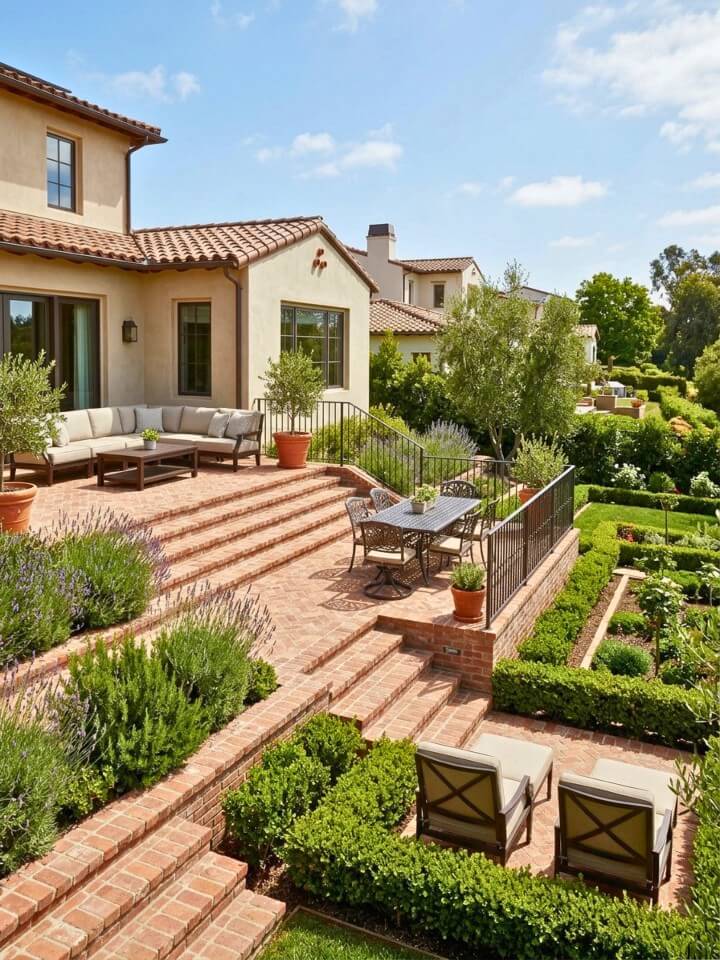
Sloped yards frustrate a lot of homeowners. You cannot really put furniture on a hill, grass is hard to maintain on a grade, and every rainfall carries topsoil downhill.
Terracing solves all of it. Instead of fighting the slope, you break it into flat platforms connected by brick steps.
How the Levels Usually Break Down in A Typical Backyard:
- Upper level: closest to the house, often used for dining or the grill zone
- Middle level: the transition space, works well for lounge seating or a small garden
- Lower level: destination area, often where a fire pit or hammock lives
Each terrace needs a retaining wall, and this is where costs climb. Retaining walls under 3 feet tall can be DIY with segmental blocks or heavy brick construction. Anything taller usually requires engineered drawings and a permit — most municipalities regulate walls above 4 feet for safety reasons.
16. Brick Patio with a Fire Pit Center
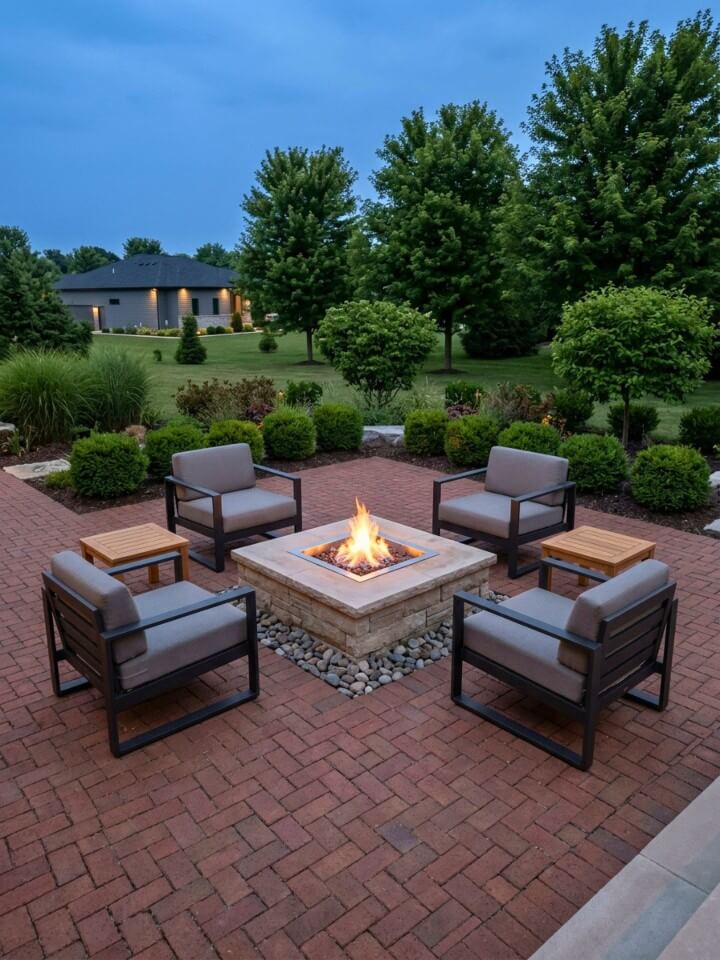
Cold evenings change what a backyard is for. A fire pit at the heart of a brick patio extends the outdoor season by two or three months on either end of summer.
Placement rules matter. Keep the fire pit at least 10 feet from any structure — house, shed, fence, or overhanging branches. Local codes sometimes push that to 15 or 20 feet.
Circular seating works better than linear. A ring of chairs 6 to 8 feet from the flames gives warmth without smoke in the face. Wood-burning pits throw more heat; gas pits offer instant on-off convenience.
Line the pit interior with firebrick — regular brick can crack under repeated high temperatures.
17. Pathway-to-Patio Flow
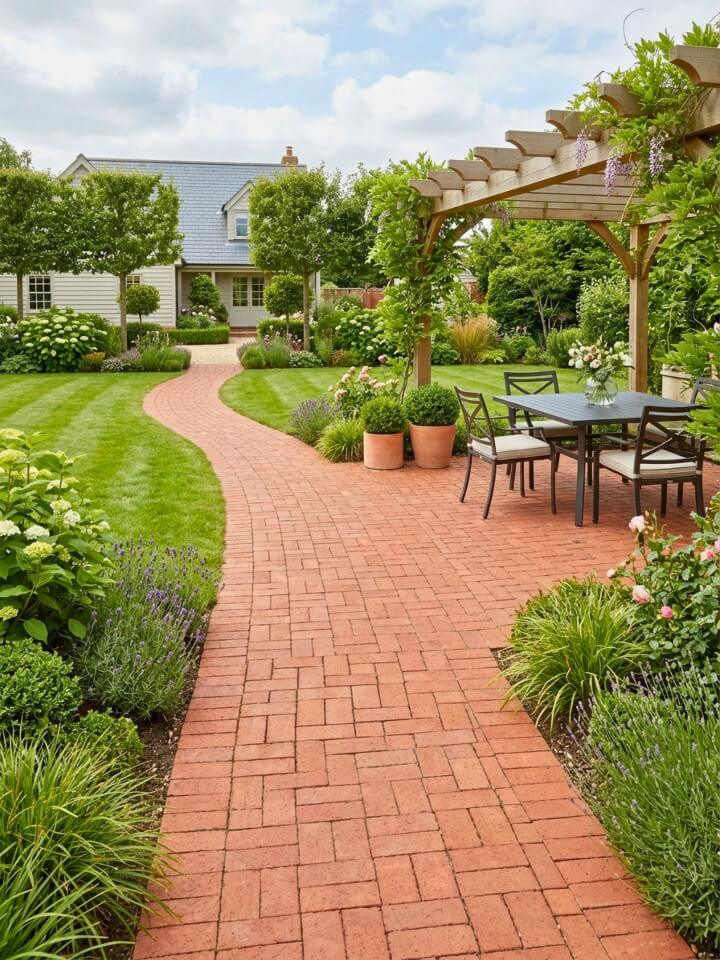
Every reclaimed brick path tells a story, guiding footsteps through timeworn garden beauty. Most patios sit like islands in a yard, disconnected from everything around them. A pathway solves that isolation.
Treat the pathway as part of the patio, not a separate feature. Match the brick type, use a coordinating pattern, and let the width taper naturally near the patio edge. A path heading toward a patio reads best at 36 to 48 inches wide.
Where the path meets the patio, avoid a hard perpendicular joint. Flare the last few feet outward or add a small transition — a semicircle of gravel or a shift to a different brick pattern.
Pathways naturally invite people to explore the yard rather than plant themselves and never move.
18. Brick Patio Under a Pergola
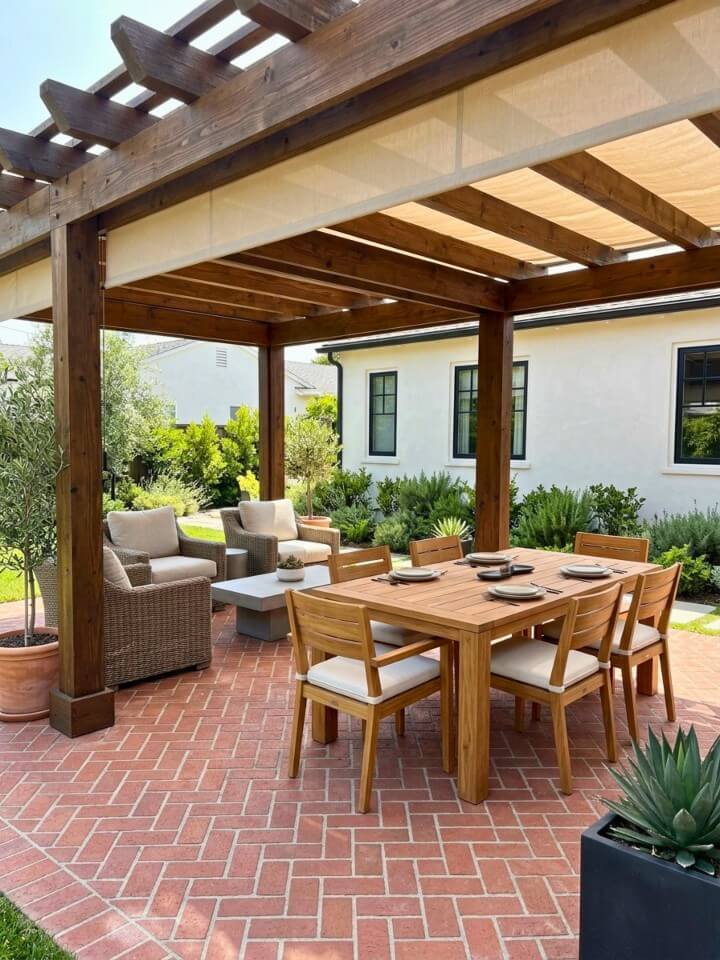
Overhead structure changes everything. Suddenly there is a ceiling, and the space reads as a room instead of an open slab.
Cedar and redwood pergolas weather to soft gray and pair beautifully with aged brick. Painted white leans farmhouse. Steel or black powder-coated aluminum reads modern. Wisteria or grape vines grown across the top add living shade in summer that thins in winter.
Structural note: pergola posts need proper footings, ideally poured concrete 30 to 36 inches deep depending on frost line. Setting posts directly on brick leads to leaning within a few years. Plan post locations before laying brick so footings can go underneath.
19. Diagonal Brick Layout
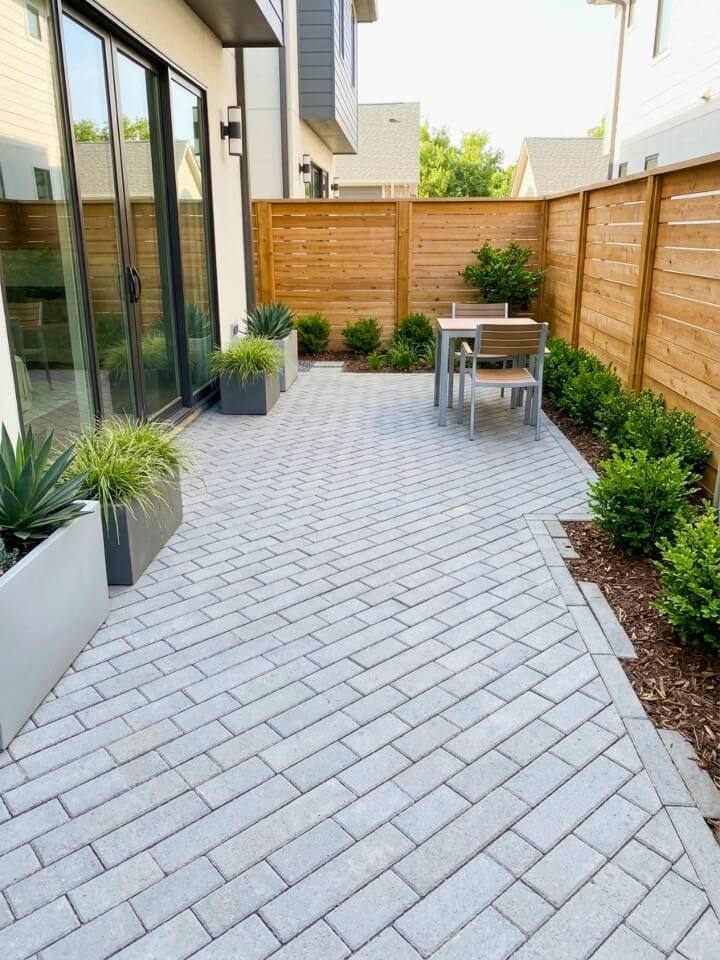
Rotating a running bond pattern 45 degrees off the patio’s edges does something interesting to the eye. The space feels larger, the lines look dynamic, and the surface pulls attention across itself rather than straight down.
This trick works best in small patios that feel cramped — diagonal lines stretch the visual dimensions and trick the eye into reading the space as wider. Narrow side yards benefit too.
The tradeoff is waste. Every edge where the diagonal meets the border requires an angled cut, meaning 15 to 20 percent extra material. Contractors typically charge 20 to 30 percent more for diagonal installations because of the extra cutting time.
For small or awkward patios, absolutely worth it.
20. Brick Patio with a Seating Wall
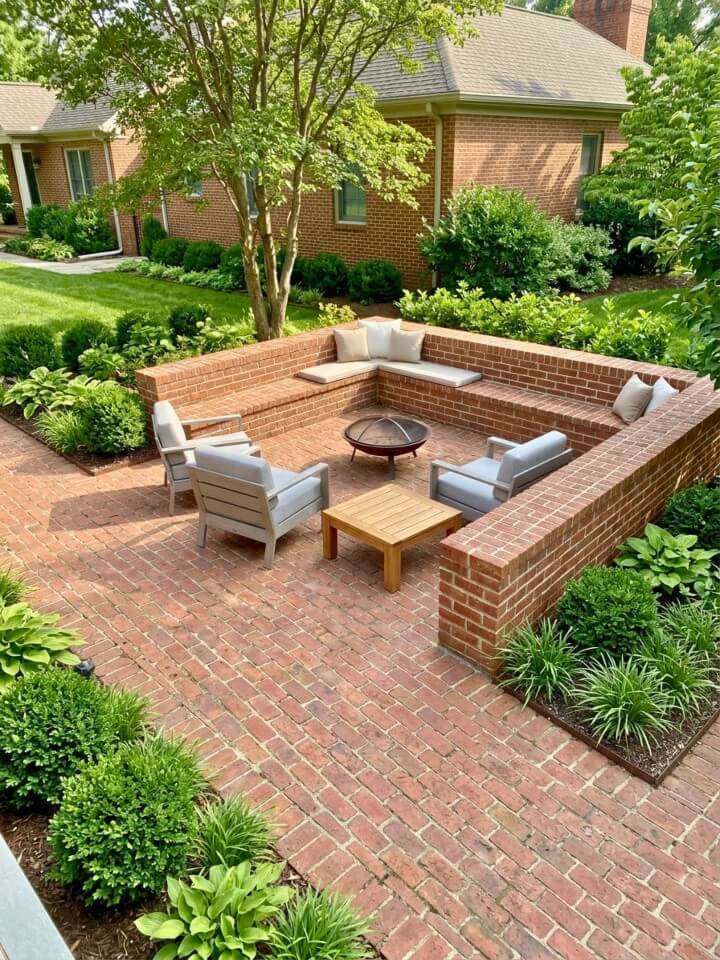
Built-in seating walls separate a nice patio from a serious one. A low wall along one or two edges doubles as extra seating, defines the space without closing it in, and stores its own furniture — because it is the furniture.
Comfortable dimensions matter: 18 inches tall (chair height), 12 to 16 inches wide on top, and plan on 24 inches of length per person. Shorter feels like a curb; taller feels like a barrier.
Add a cap of bluestone, limestone, or wider brick across the top for comfort and a finished look. One clever upgrade — incorporate low-voltage lighting under the cap for a soft downward glow at night, using the same layered approach you might find in clever deck lighting ideas.
21. Courtyard-Style Enclosed Patio
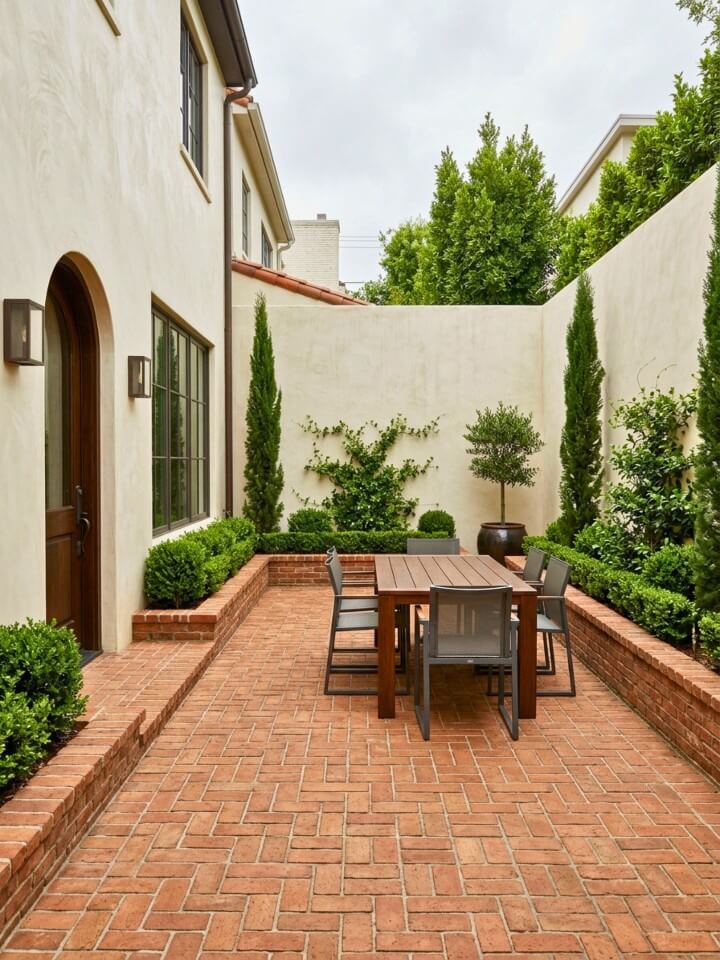
Walls or tall hedges around a brick patio create something rare — genuine outdoor privacy. Instead of neighbors watching from every angle, the space becomes an enclosed retreat that belongs entirely to the household.
Spanish, Mediterranean, and older colonial homes lean naturally into this style. Stucco walls, wrought iron gates, and climbing bougainvillea against aged brick create the classic courtyard look. For modern homes, cedar fence panels or horizontal slat walls achieve the same enclosure with cleaner lines.
Ventilation is the one catch. Fully enclosed spaces can trap heat during summer, so leave gaps at the top of walls or add a pergola opening overhead. Small fountains help too — moving water cools the air a few degrees on hot afternoons.
22. Brick Patio with a Water Feature
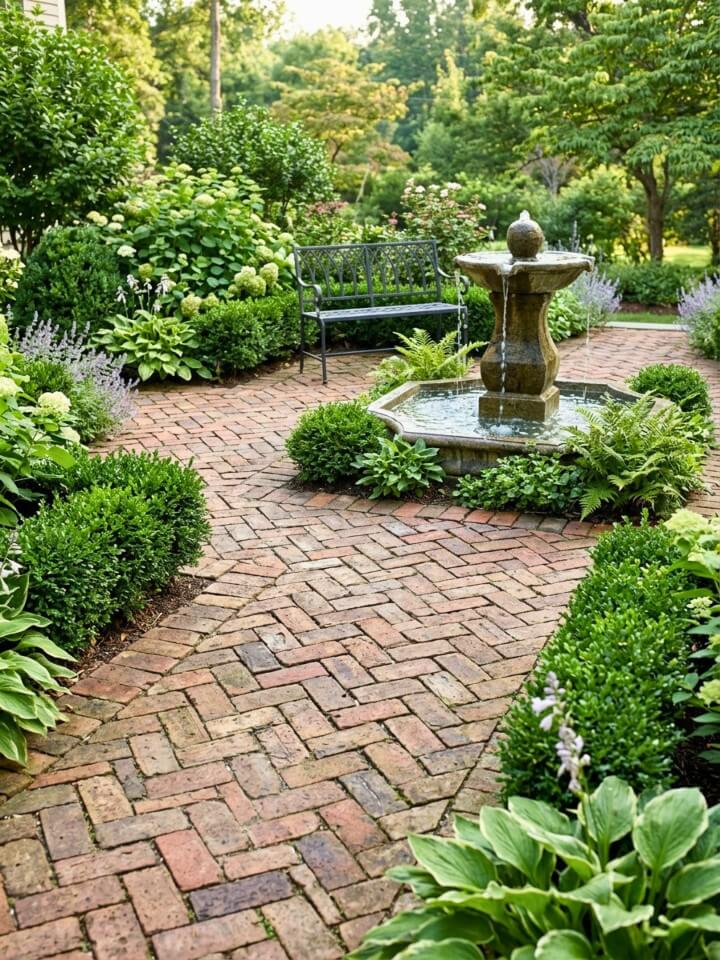
Running water changes the sound signature of a backyard. Traffic noise fades, birdsong stands out more, and the patio suddenly feels twice as relaxing as it did before.
Options range widely. A small recirculating fountain runs under $300 and plugs into a standard outlet. A stone basin bubbler costs $500 to $1,500 installed. A full pond with waterfall pushes $3,000 to $8,000 depending on size and stonework. If your patio sits near a pool or spa area, these desirable pool fountain ideas can also spark ideas for moving water that feels integrated rather than decorative afterthought.
Placement matters more than size. Position the feature within earshot of seating — 6 to 10 feet away is the sweet spot. Too close and the sound becomes distracting during conversation; too far and it fades into background noise.
Winterize any water feature before the first freeze to prevent cracked pumps and basins.
23. Pinwheel Pattern Patio
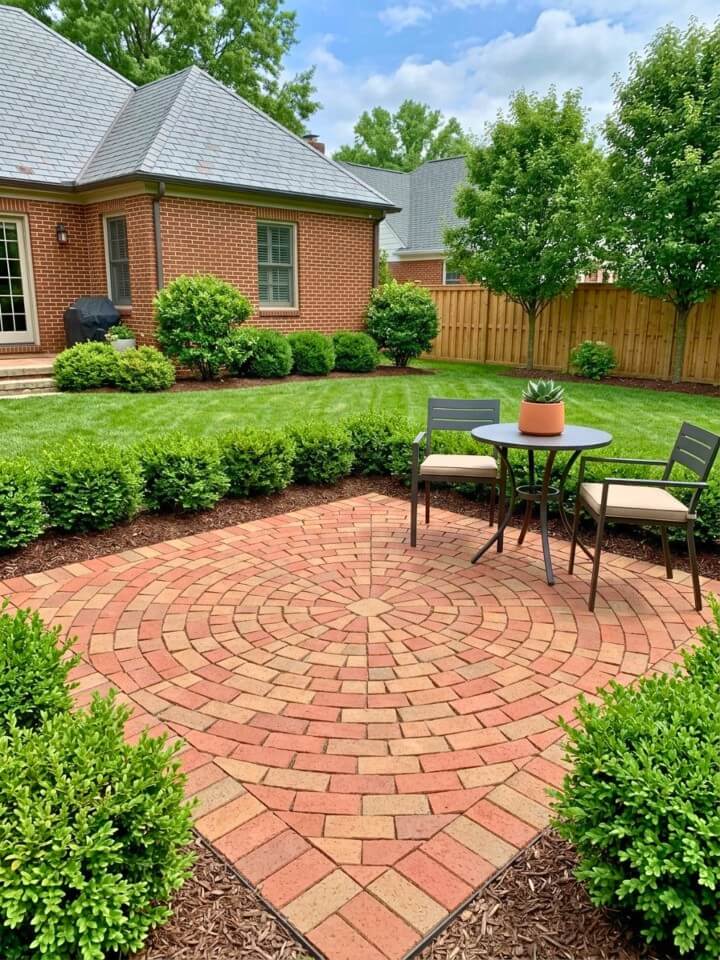
The pinwheel pattern is one of the most visually striking brick layouts, and it hides a clever secret — four rectangular bricks arranged around a single square brick at the center of each unit. That small center piece is what creates the rotating, wheel-like effect across the surface.
This pattern demands precision. Every center square has to sit exactly right, otherwise the whole grid starts to look off. Use a chalk line grid before laying a single brick.
Best suited for square or nearly-square patios where the full pattern can repeat cleanly. Long rectangular spaces cut off the pinwheels awkwardly at the edges.
Sourcing note: you will need bricks in a 2:1 length-to-width ratio for the pattern to work properly. Standard modular brick sizes fit the ratio well.
24. Brick Patio with Edging Lights
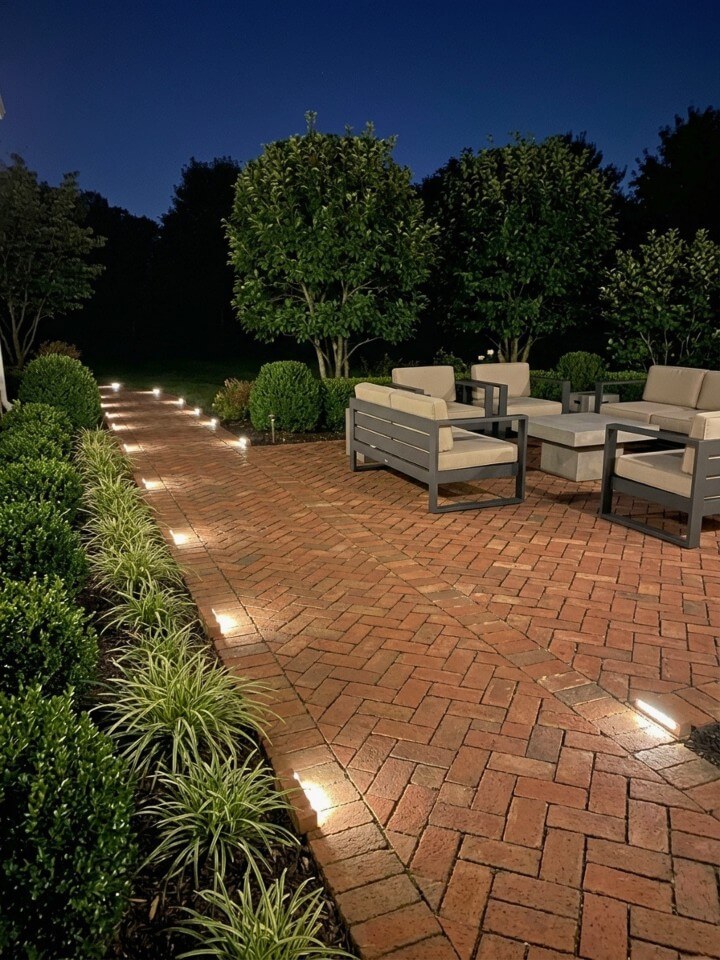
Transform bare ground into art with a reclaimed brick walkway rich in history and charm. Nighttime transforms a patio, but only if you can actually see it. Low-voltage edging lights built into the brick perimeter give the space usable evening hours without the harsh glare of overhead floodlights.
Three common approaches work well: recessed paver lights that sit flush with the brick surface, small fixtures tucked under a seating wall cap, and strip lighting hidden along step risers. Warm white bulbs (2700K to 3000K) flatter aged brick better than cool white, which can look clinical outdoors.
Wire everything before laying the final row of bricks. Retrofitting lights into an existing patio means lifting bricks, cutting channels, and re-setting — expensive and messy. A basic low-voltage system runs $200 to $600 for a mid-sized patio.
FAQs About Old Brick Patios
Got a few lingering questions? The answers below tackle the everyday concerns that tend to come up once the design ideas start feeling real.
Do Old Brick Patios Get Slippery when Wet?
Weathered brick offers decent traction because of its porous, textured surface. However, moss-covered or algae-coated bricks in shaded areas can turn slick. A yearly cleaning with a stiff broom and mild vinegar solution keeps footing safe.
Can I Install a Brick Patio Over an Existing Concrete Slab?
Yes, and it saves excavation time. Lay a thin sand or mortar bed over the clean concrete, then set your bricks on top. Just confirm the slab drains properly and has no major cracks before starting.
How Do I Stop Weeds from Growing Between Brick Joints?
Polymeric sand hardens between joints and blocks most weed growth for three to five years. For sand-set patios, a yearly application of pre-emergent weed killer in early spring stops seeds before they sprout through gaps.
Will Old Brick Fade or Change Color Over Time?
Yes, and that fading is part of the appeal. Sun exposure gradually softens deep reds into warm terracotta tones. Sealing the surface preserves original color, but most homeowners skip it and let the natural aging process do its work.
What Is the Best Season to Build a Brick Patio?
Late spring through early fall gives the most reliable weather window. Dry ground, moderate temperatures, and low freeze risk make installation smoother. Avoid mid-summer heat waves if using mortar — it dries too fast and weakens the bond.
Conclusion:
Old brick earns its place slowly. It takes on moss, softens at the edges, and holds onto stories the way newer materials never quite manage. Whichever direction you lean — a herringbone walkway, a sunken fire pit corner, or a quiet courtyard wrapped in vines — the goal is the same: build something that feels lived-in from day one. Skip the trends that will tire in two summers. Choose the pattern, the pairing, the layout that suits how your family actually spends warm evenings outside. Years from now, the best compliment your patio can receive is that it looks like it has always been there.