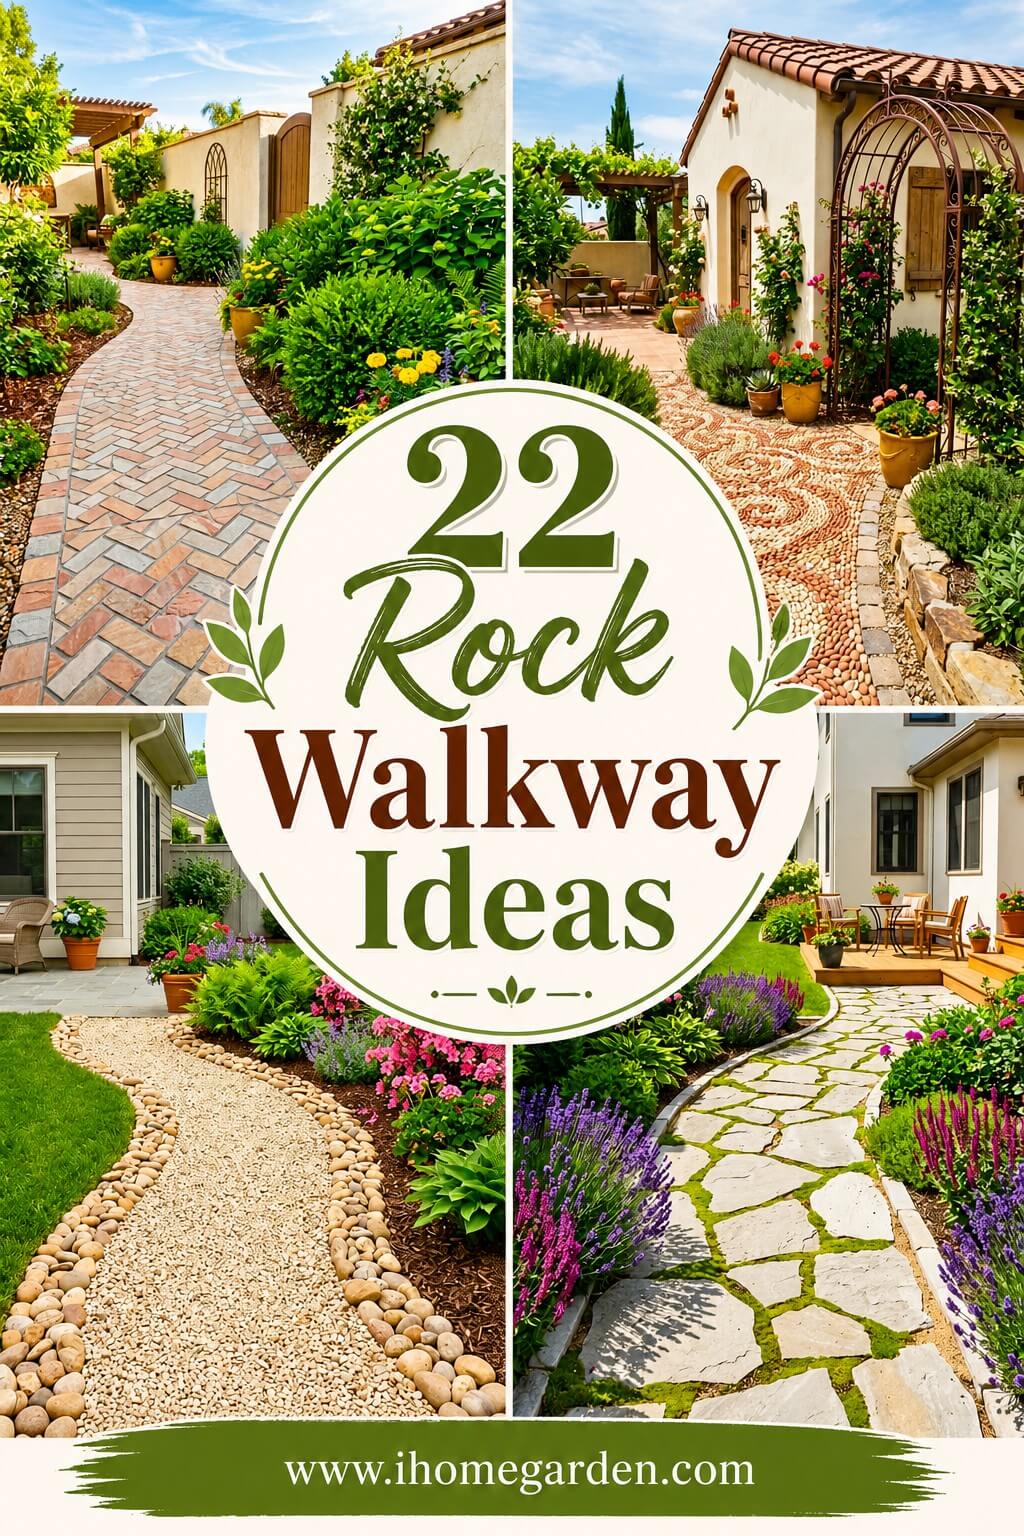
22 Rock Walkway Ideas for a Yard You’ll Love Walking Through
Last spring I watched my neighbor rip out a cracked concrete path and replace it with mismatched flagstone she’d hauled from a local quarry. Six months later, thyme was growing between the gaps and her front yard looked twice as expensive as mine.
That’s the quiet power behind these 22 cool rock walkway ideas. Stone ages into something better, while concrete just ages.
What’s inside covers real ground. Slate zigzags that slow you down enough to actually notice the garden. Lava rock paths that stay cool under bare feet in July. Pebble spirals tucked into meditation corners. Stacked stone borders that throw shadows differently as the sun moves across the afternoon.
A few you can finish in a weekend with a tamper and a bag of polymeric sand. Others need a mason and a real budget. I’ve flagged which is which, plus rough costs, so you’re not three hours into a project wondering what you got yourself into.
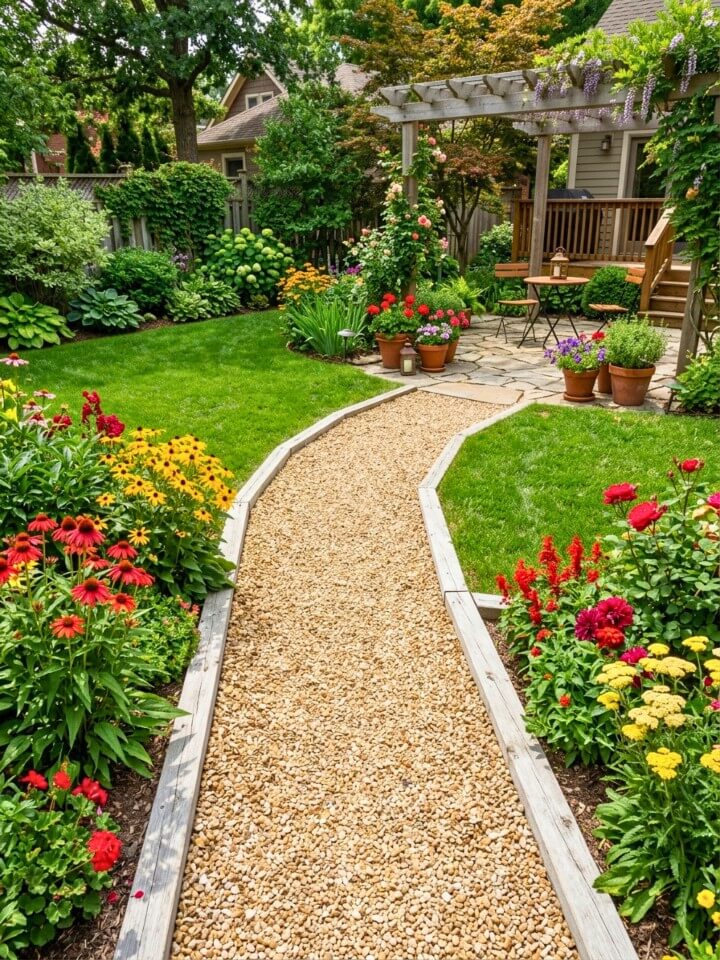
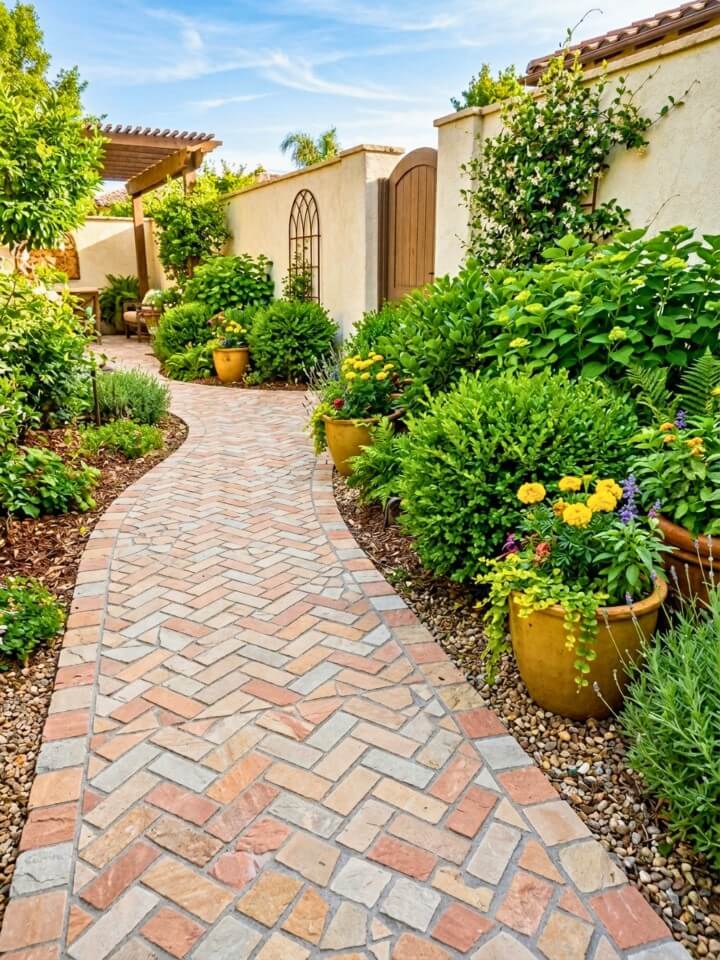
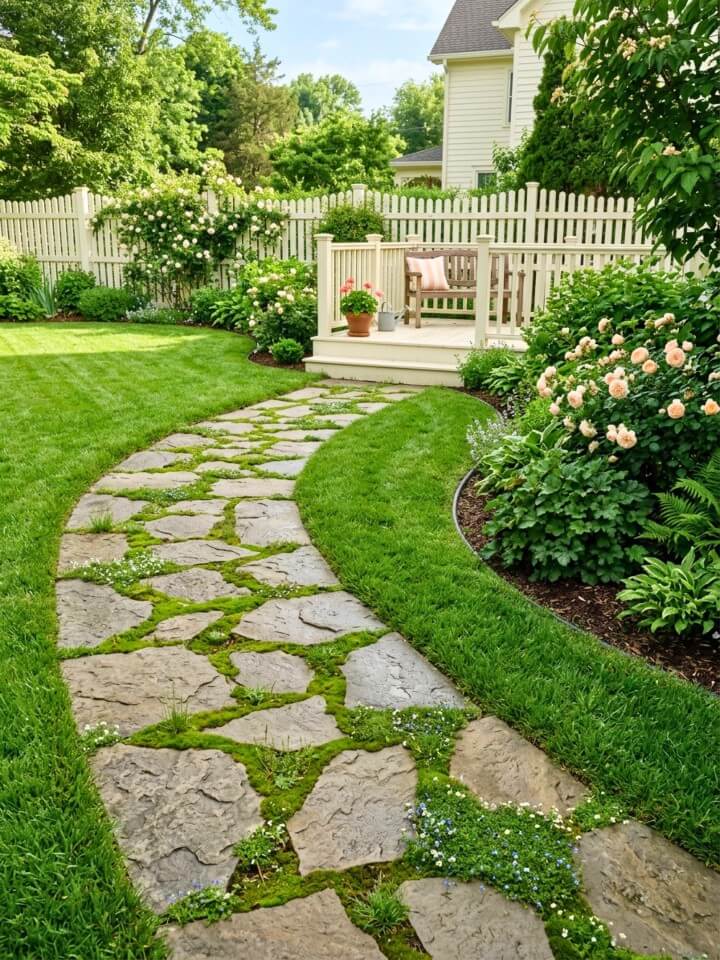
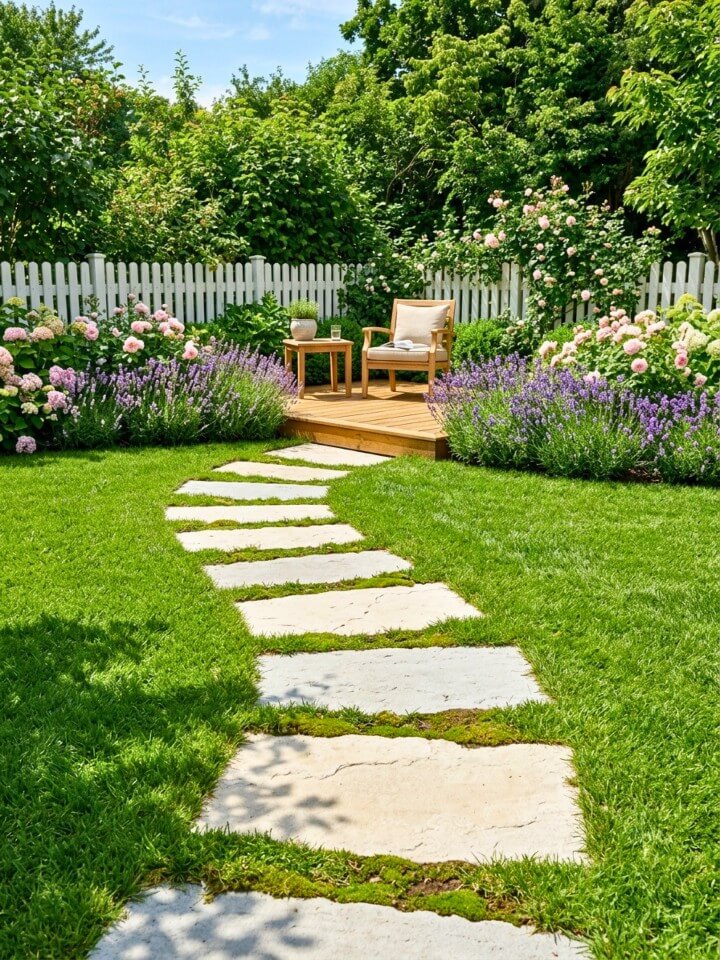
1. Classic Flagstone Path for Traditional Yards
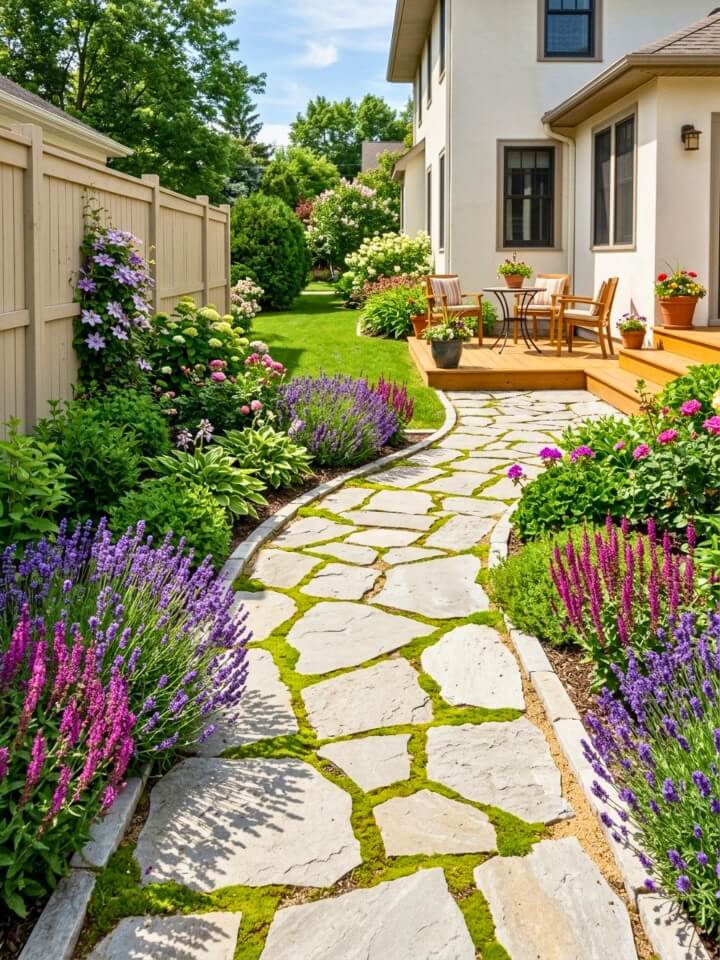
Each flagstone piece is slightly different in shape. That natural variation is exactly what gives this walkway its character. No two paths ever look the same, and that unpredictability is the whole point.
It suits rustic and traditional yards well. Wooden fences, flower borders, and stone planters all sit comfortably alongside it. The path works best winding through garden beds or leading to a patio.
Keep gaps filled with sand or moss to prevent wobbling. Check the levelness every season, especially after frost heaves in winter.
Laying Stones the Right Way
- Choose irregular flagstone pieces of similar thickness
- Dig 2–3 inches deep and add a compacted sand base
- Place stones with 1–2 inch gaps between each piece
- Fill gaps with sand, pea gravel, or plant moss in between
- Press firmly and confirm levelness before finishing
2. River Rock Border Walkway
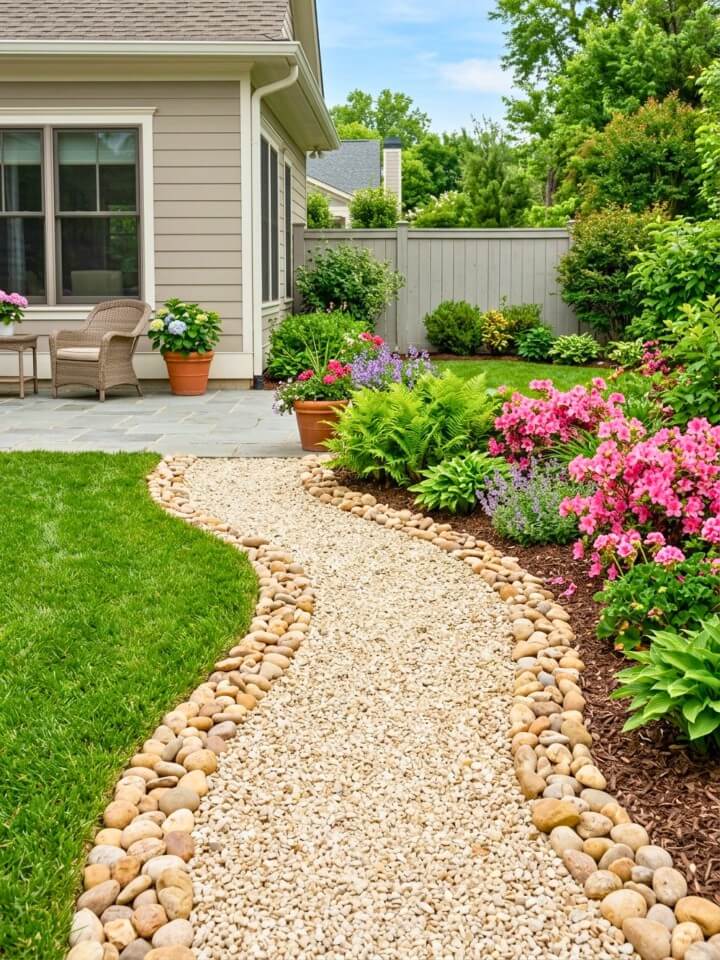
Start with the edges — that is the whole idea here. River rocks placed along a concrete or gravel path do something subtle but effective. They frame the walkway without drawing attention away from the garden around it.
Longer driveways and side yards benefit most from this treatment. The smooth, rounded stones create an organic boundary that feels relaxed rather than rigid. Cottage and coastal themes carry this look naturally.
Pair with low grasses or flowering shrubs along the outer edge. The softness of the plants against the hard rocks creates a balance that feels considered. River rocks generally cost around $4–$8 per square foot.
Building Clean, Lasting Borders
- Dig a shallow trench along both sides of your path
- Pack rocks tightly so they resist shifting over time
- Lay landscaping fabric underneath to block weed growth
- Use uniform rock sizes for a cleaner, more intentional look
- Add a second row if you want a more substantial border
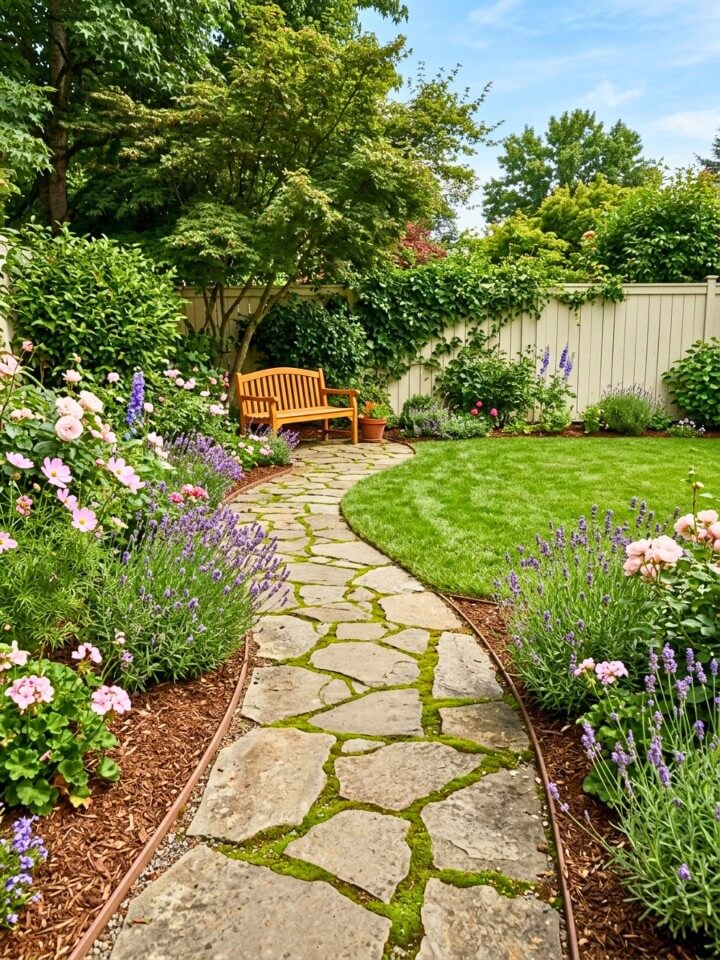
3. Stepping Stone Trail Through Garden Beds
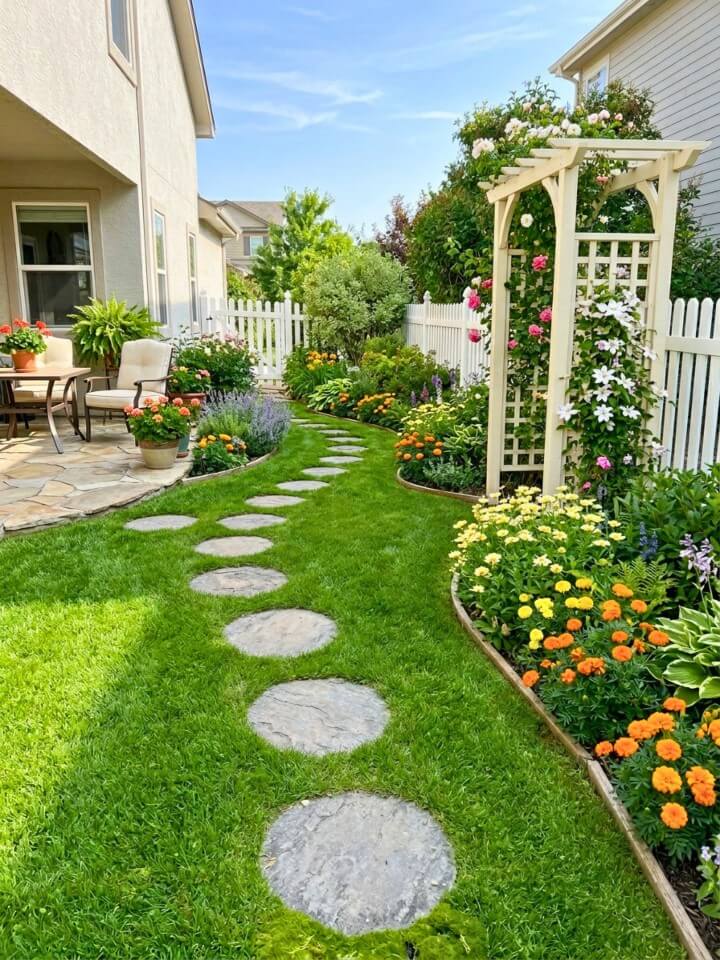
Discover stunning rock walkway ideas that transform your yard into a natural masterpiece today. Stepping stones work with that flexibility rather than against it. You can shift them, add more, or reroute entirely as the garden evolves.
Space each stone about 18–24 inches apart to match a natural walking stride. Gaps between stones can be filled with grass, creeping thyme, or fine gravel. Informal cottage and woodland gardens suit this style best.
Sink the stones slightly below the grass line. This small detail makes mowing around them much easier and keeps them from becoming trip hazards over time.
Getting Stone Placement Right
- Walk the intended path first and mark positions naturally
- Cut into turf and lower each stone just below grade
- Fill surrounding gaps with groundcover or gravel
- Check for rocking and repack soil underneath if needed
- Revisit placement after a few weeks of regular use
4. Gravel and Slate Path – Simple Modern Design
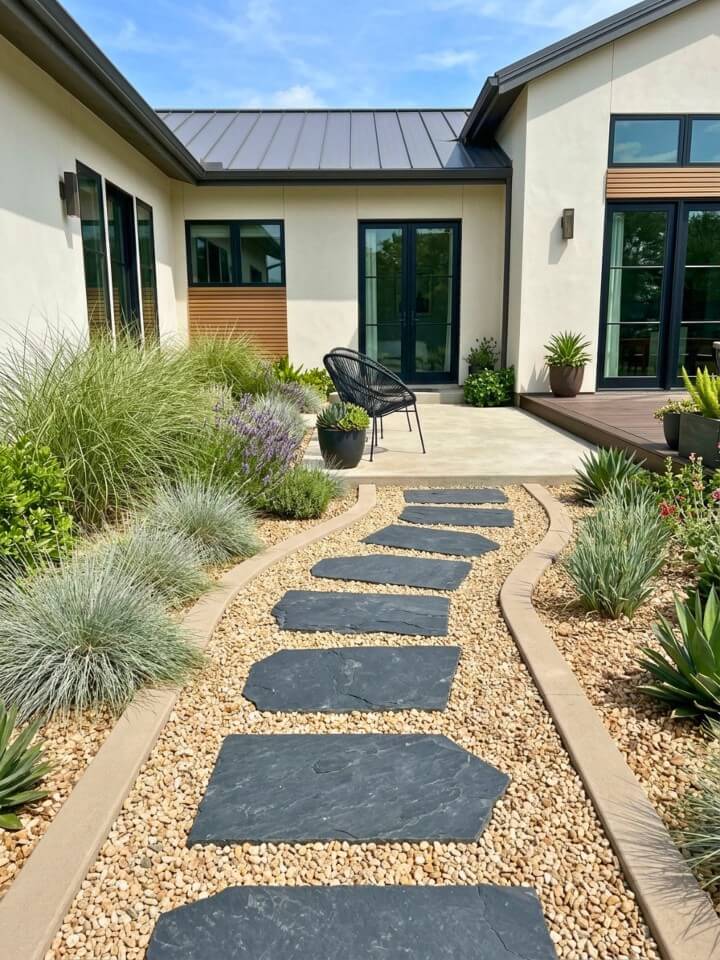
Gravel alone shifts underfoot. Slate alone can feel cold and overly structured. The combination solves both problems. Flat slate pieces give your feet solid landing points while gravel fills everything around them naturally.
This design handles rain well because gravel drains on its own. Visually, dark slate against lighter gravel creates contrast without requiring any planting. It works especially well connecting a patio to a backyard seating zone.
Mixing Materials Without Losing Balance
- Lay landscaping fabric first to suppress weed growth underneath
- Spread and compact a 2-inch gravel base across the full path
- Press slate slabs firmly into gravel as main stepping points
- Keep slab spacing consistent so the path feels deliberate
- Rake gravel back into gaps after wind or heavy rainfall
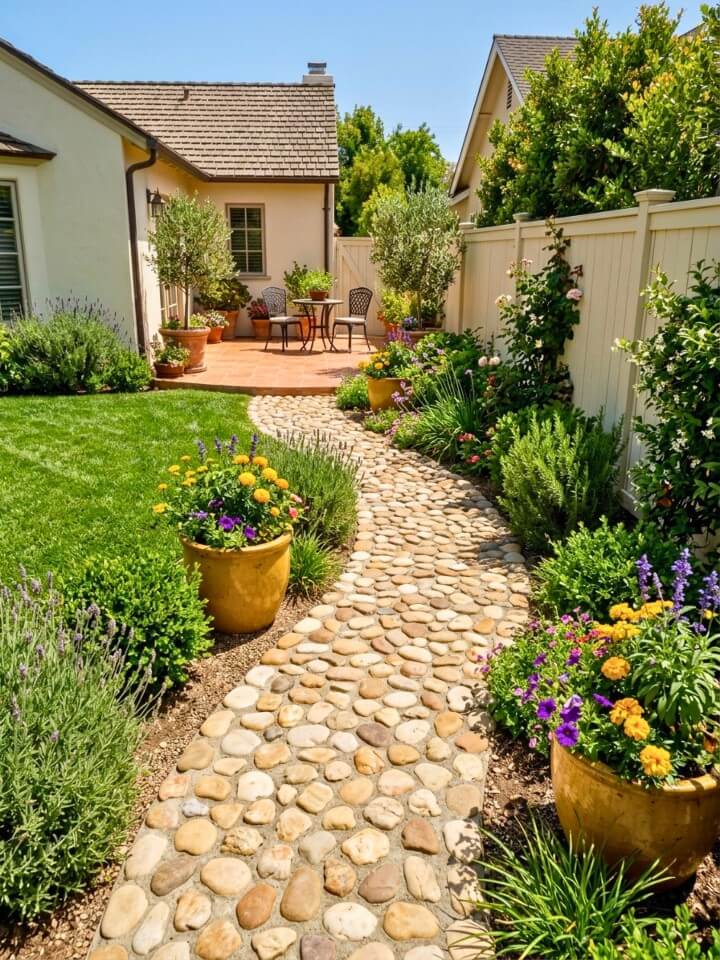
5. Mosaic Pebble Walk
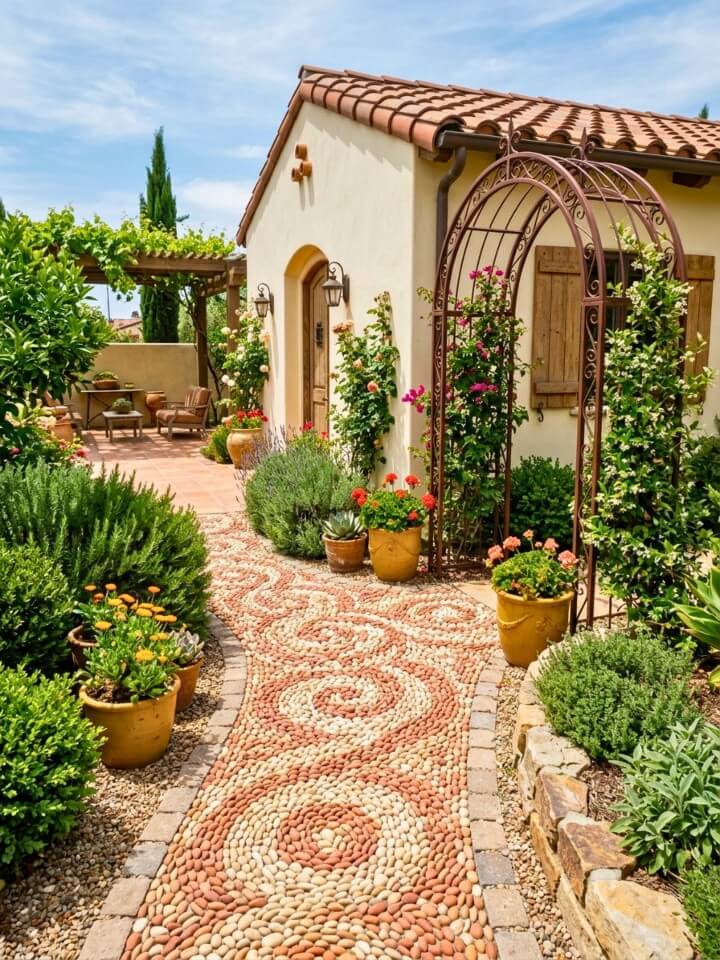
This is not really a walkway in the traditional sense. It is closer to ground-level art that also happens to be functional. Small stones pressed into mortar can form patterns, gradients, or completely freehand designs depending on how creative you want to get.
Near pools, patios, or garden entrances it performs best. The texture feels pleasant underfoot, especially barefoot on warm days. Mediterranean and coastal yards carry this style without much effort.
Plan your pattern on paper before touching a single stone. Working freehand on wet mortar often leads to rushed decisions. Once sealed, the colors stay vibrant and stones remain locked in place.
Turning Pebbles Into a Finished Surface
- Sketch the intended pattern before preparing the base
- Work in small sections so mortar does not dry too quickly
- Press each pebble firmly and evenly by hand
- Avoid rushing — uneven depth shows clearly once dry
- Seal the entire surface after full curing for lasting color
6. Cobblestone Path With Old-World Charm
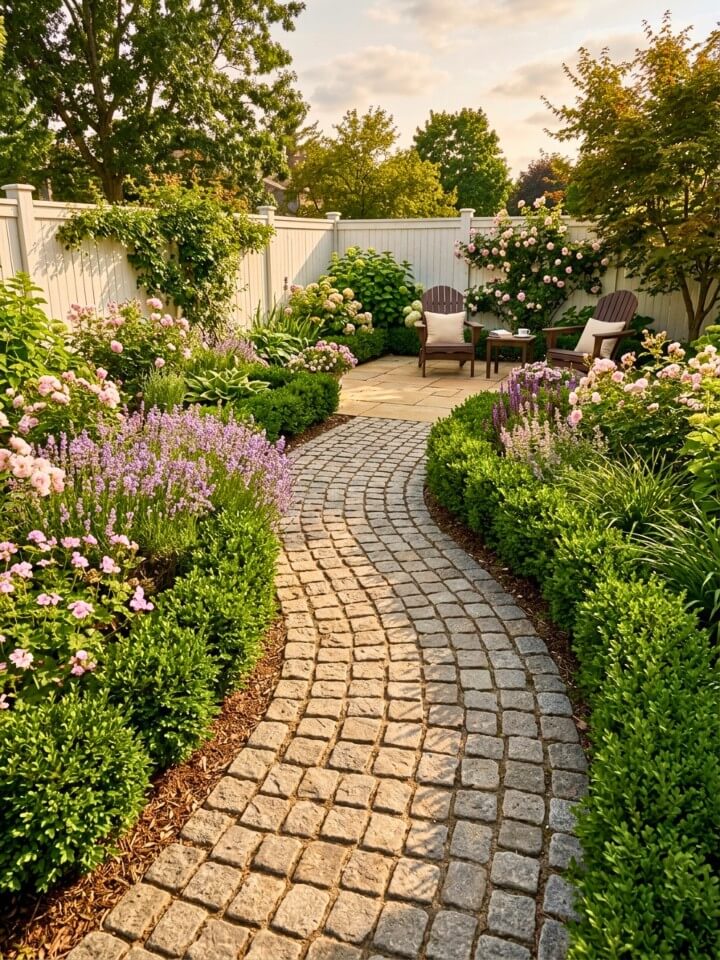
Time does something interesting to cobblestone. The more it weathers, the better it looks. That slow development of patina is what separates it from materials that just age and fade — cobblestone genuinely improves. Front entrances, courtyards, and structured garden zones are where it performs best.
Set the stones tightly in mortar or packed sand. A well-laid cobblestone path handles foot traffic, seasonal changes, and light equipment use without complaint. Joints should be compact — loose jointing leads to shifting over time.
Setting Cobblestones for Long-Term Durability
- Begin from one straight edge and work systematically outward
- Use a rubber mallet to seat each stone firmly and evenly
- Keep joint spacing consistent at roughly half an inch
- Fill all joints with sand and compact thoroughly once done
- Apply jointing sand stabilizer to prevent long-term movement
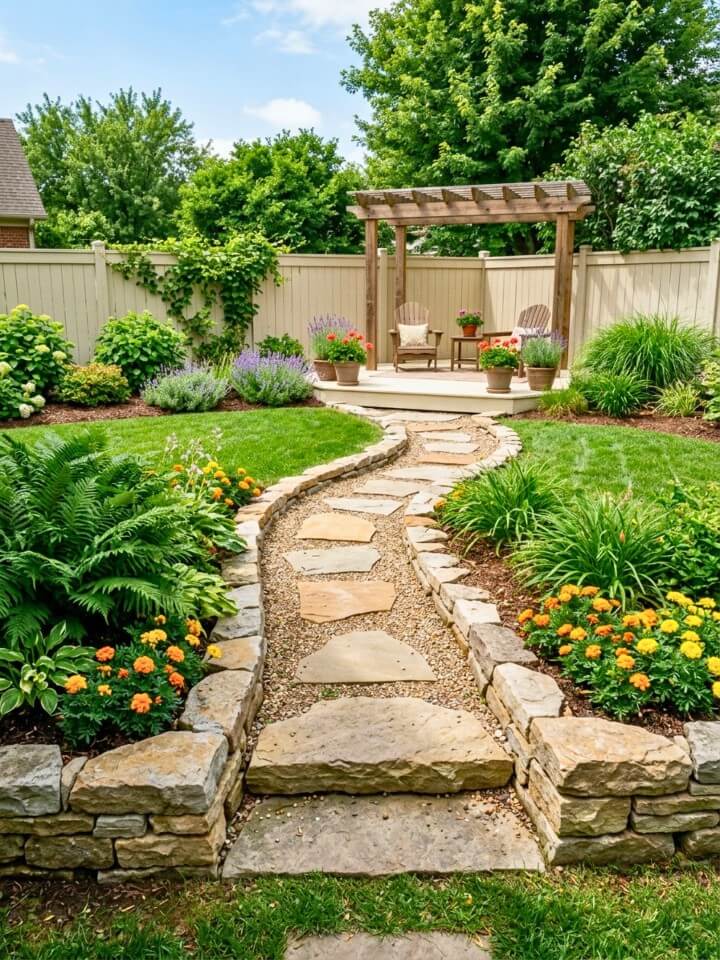
7. Sandstone Step Trail
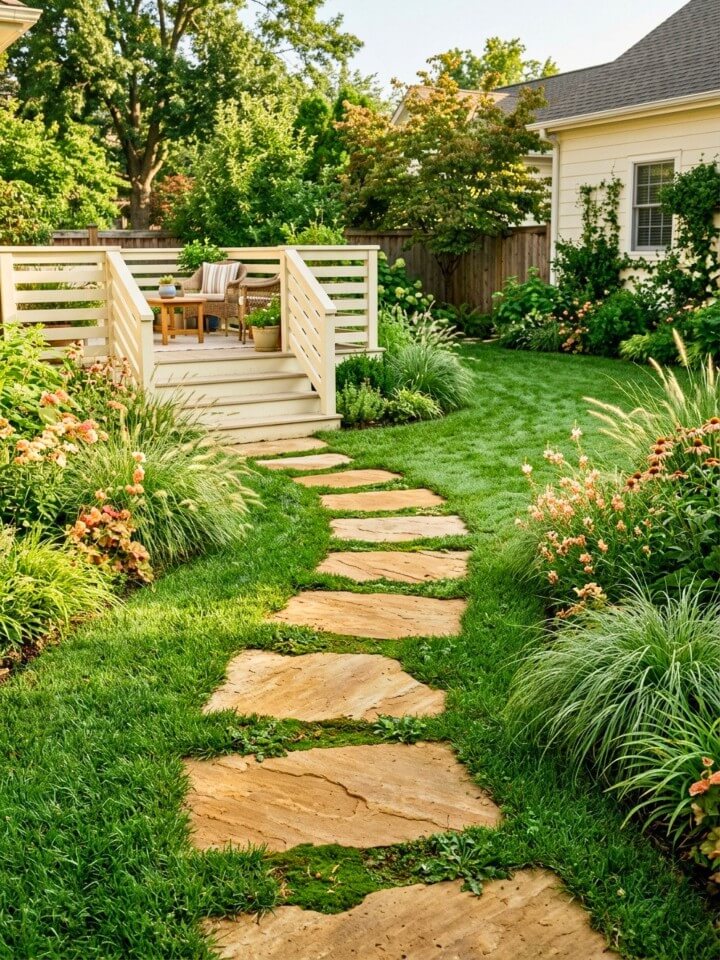
There is a warmth to sandstone that most other path materials simply do not have. The amber and terracotta tones blend into the landscape rather than contrasting with it. Soil, mulch, dry grass — sandstone sits alongside all of it without looking placed.
Hillside gardens, backyard trails, and patio approaches all benefit from this style. Rustic and Southwestern-themed yards carry it most naturally. Ornamental grasses and woody shrubs work particularly well planted alongside.
Leave small gaps between slabs so grass or moss can push through. That thin strip of green prevents the path from looking heavy or overbuilt, keeping it connected to the surrounding landscape.
Placing Sandstone Slabs Properly
- Select slabs with flat, stable surfaces to avoid tripping risk
- Level the ground beneath each slab carefully before placing
- Leave consistent small gaps for groundcover to grow through
- Avoid slabs with thin edges — they crack under regular foot traffic
- Check for movement after the first heavy rain and repack if needed
8. Boulder Accent Walkway
Boulders change the scale of a garden immediately. Place one correctly and the entire surrounding space reorganizes around it. Used along a path, they shift from decoration to structure — marking direction, controlling erosion, and adding genuine visual weight.
Larger yards and sloped areas benefit most from this approach. Native plants, ferns, and natural mulch work well planted around the base of each boulder. The style pulls toward rustic, woodland, and mountain-inspired landscapes.
Use smaller stepping stones between boulders to maintain a walkable route. The boulders define the path edges while the stones do the functional work. This combination also helps slow water runoff on slopes.
Using Boulders Effectively Along a Path
- Plan boulder placement before any digging or moving begins
- Bury the bottom third of each boulder for a natural, grounded look
- Place smaller stepping stones between boulders at walking intervals
- Use boulders on the downhill side of slopes to reduce erosion
- Fill gaps around bases with mulch or low ground cover plants
9. Crushed Stone Path – Easy Low-Maintenance Option
Explore creative rock pathway ideas that blend rustic charm with timeless outdoor elegance. Sometimes the simplest solution is the right one. Crushed stone requires no cutting, no mortar, and no heavy equipment. Spread it, compact it lightly, and the path is essentially done. That straightforward quality is what makes it so widely used.
Long garden paths, side yards, and spaces between outdoor living areas are where it fits best. Rustic and cottage designs carry it well, especially when bordered with timber or stacked edging stones. Wildflowers and low shrubs alongside it complete the look.
Crushed stone drains naturally, which makes it practical in areas that collect water. Add edging to keep the material contained — without it, the stone gradually migrates into surrounding beds.
Laying a Crushed Stone Path That Stays Put
- Excavate about 3 inches and compact the soil base first
- Lay landscaping fabric before adding stone to suppress weeds
- Spread crushed stone evenly and tamp down for stability
- Install timber or stone edging on both sides before filling
- Top up stone levels each spring as material compacts over time
10. Slate Tile Zigzag Path
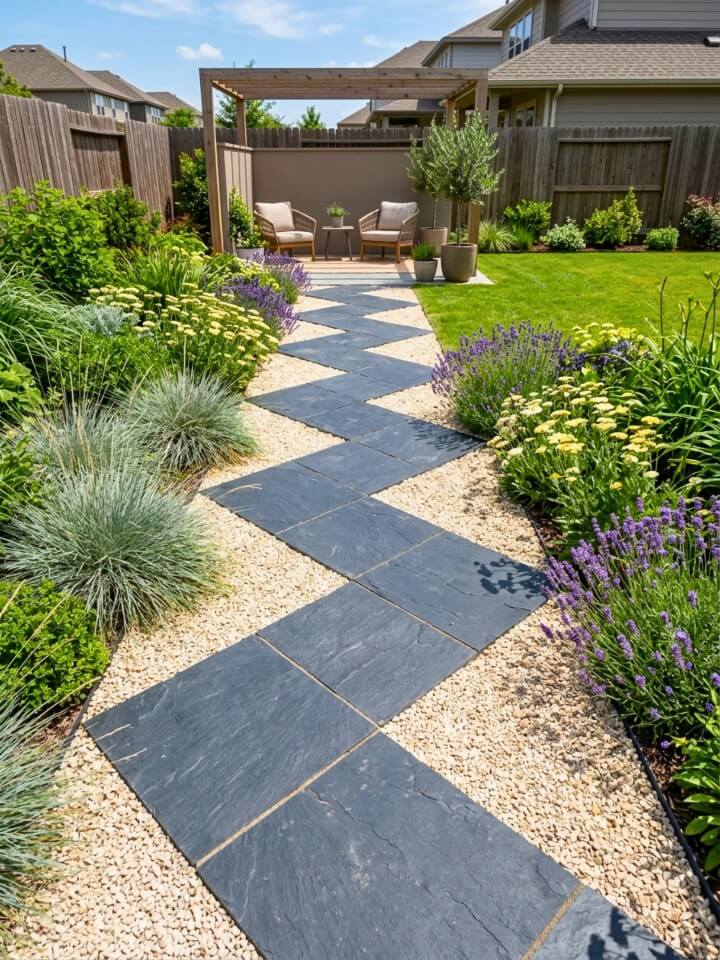
A straight path moves you efficiently. A zigzag path makes you actually look around. That change in direction slows the pace just enough to notice the garden on either side. It is a small design choice with a noticeable effect.
Set the tiles with minimal gaps and surround with gravel or closely trimmed grass for contrast. This works well in formal gardens, near patios, or leading toward a focal point like a fountain or bench. Contemporary and minimal yards suit it best.
Keep the tiles swept regularly. Debris collects in the angle joints and loosens them over time. Occasional realignment keeps the pattern sharp and the surface safe to walk on.
Creating a Clean Zigzag Layout
- Map out the angle and spacing on paper before cutting anything
- Use a string line to keep each diagonal row properly aligned
- Set tiles on a compacted sand base for slight adjustability
- Fill surrounding gaps with fine gravel or keep grass trimmed close
- Reseat any tiles that shift after frost or prolonged wet weather
11. Granite Slab Modern Walk
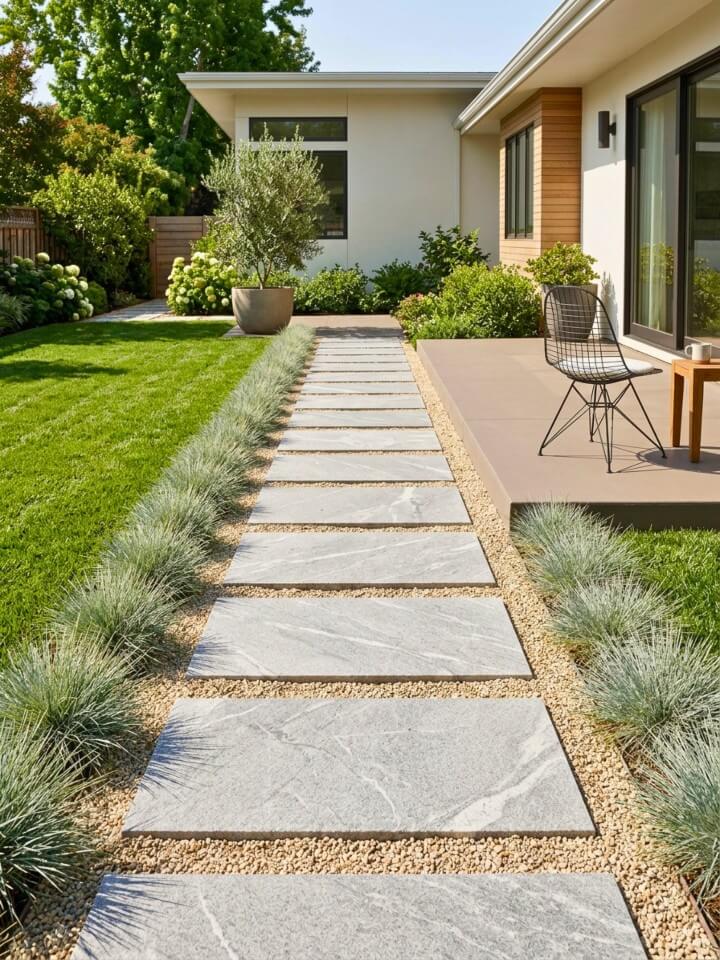
Granite does not try to blend in. It holds its ground visually — solid, clean, and slightly formal without feeling cold. That confidence is what makes it work so well in contemporary outdoor spaces.
Large evenly spaced slabs on a gravel or sand base keep the surface stable. Front yards, patios, and garden seating approaches all suit this material well. Minimal landscaping around it — low profile plants, ornamental grasses, concrete edging — lets the stone speak for itself.
Why Granite Works – and How to Lay It
- Source large flat slabs with consistent thickness for even footing
- Prepare a compacted gravel base before placing any slab
- Space slabs evenly — measure gaps rather than estimating by eye
- Use a level on every slab before the base sets fully
- Avoid sealing unless the surface feels slippery after rain
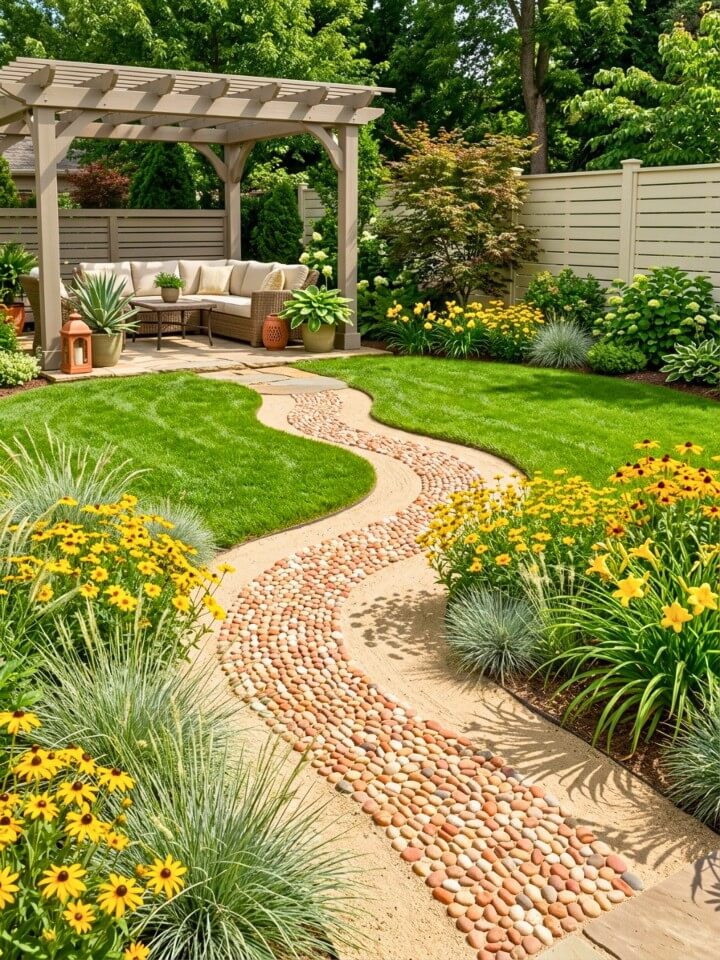
12. River Pebble Spiral – Meditative Garden Feature

Most paths move in one direction. A spiral path does something different — it draws you inward, slows the pace, and turns the act of walking into something almost meditative. The shape itself carries meaning before a single stone is placed.
Small garden nooks, meditation corners, and courtyards are the right settings for this. Zen, cottage, and coastal themes all carry it naturally. Bamboo, ornamental rocks, and low shrubs planted around the edges complete the atmosphere.
Arrange pebbles on compacted sand and keep the surface even for safe footing. Over time the stones settle slightly, which actually improves the feel underfoot. The path becomes more grounded the longer it sits.
Designing the Spiral – Practical Starting Points
- Draw the spiral shape with chalk or rope before placing any stone
- Work from the center outward for better shape control
- Keep pebble sizes consistent within each ring of the spiral
- Compact the sand base thoroughly before setting stones
- Fill any gaps between pebbles with fine sand after completion
13. Stepping Stone Lawn Path
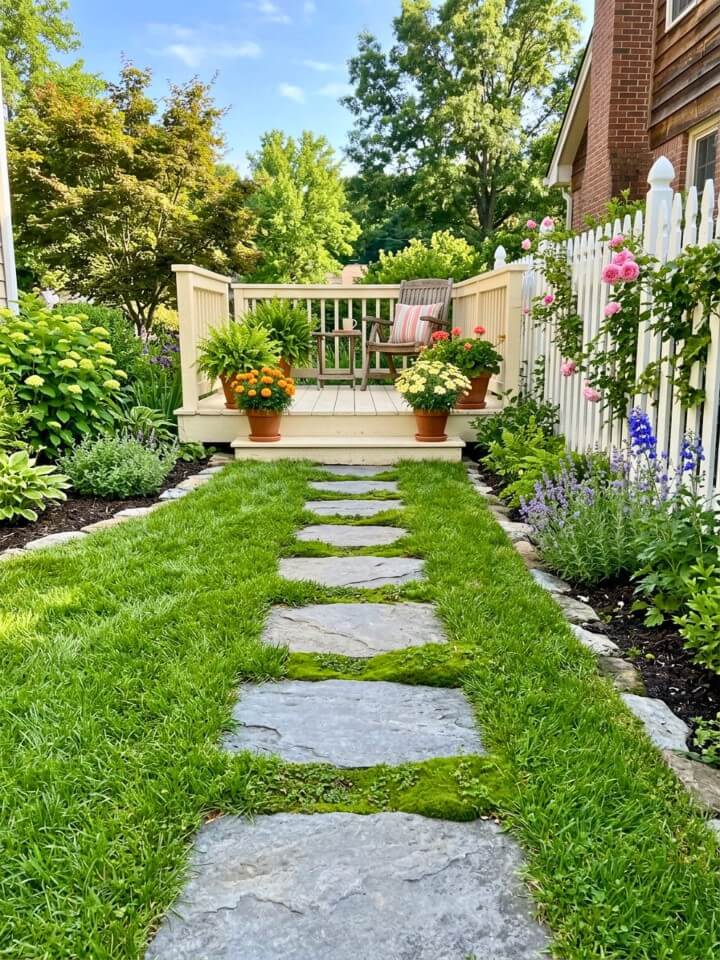
A lawn path should feel like it belongs to the grass, not imposed on it. When stepping stones are placed well, the lawn grows around them naturally and the path becomes part of the yard rather than a feature on top of it.
This works best connecting patios, garden beds, or outdoor seating areas without interrupting the open feel of the lawn. Informal, cottage, and woodland-themed yards carry it effortlessly. Flowering borders alongside make it feel even more relaxed.
Sinking Stones Into a Lawn Properly
- Walk the path naturally first — place stones where feet actually land
- Trace each stone outline and remove turf to that exact shape
- Lower the stone so its top sits just below surrounding grass
- Pack soil firmly underneath to prevent future sinking
- Check for wobble immediately and adjust before grass fills back in
14. Mixed Stone Mosaic Walkway
Using one type of stone gives a path consistency. Using several gives it a story. Different shapes, colors, and textures arranged together create something that feels handmade and genuinely unique — because it is.
This works well leading from a patio into a garden or along a side path where visual interest matters. Eclectic, Mediterranean, and artistic yards are natural fits. Colorful flowers, potted plants, and low walls alongside it add to the layered feel.
Arrange stones tightly and fill gaps with sand or mortar for stability. There is no single correct pattern here. Working intuitively often produces better results than following a rigid plan — the variation is the point.
Mixing Stone Types Without Losing Cohesion
- Limit your palette to three or four stone types maximum
- Vary sizes but keep thickness consistent for an even surface
- Lay out the full pattern dry before committing to mortar
- Work in sections and step back regularly to check balance
- Fill joints with fine sand once the arrangement is finalized
15. Flagstone Path With Soft Mulch Borders
Rock pathways add structure, beauty, and durability to any garden landscape you can imagine. Flagstone handles the structure. Mulch handles everything around it. Together they create a path that feels soft and natural rather than constructed — which is exactly the right quality for garden beds and flower borders.
Lay irregular flagstones with mulch filling gaps along the edges and between stones. The mulch suppresses weeds, improves drainage, and frames each stone without needing any hard edging material. Side yards and cottage-style borders suit this approach particularly well.
Building This Path Without Overcomplicating It
- Choose flagstones with relatively flat surfaces for comfortable walking
- Clear the path area and lay landscaping fabric beneath mulch zones
- Set flagstones first, then pack mulch firmly around and between them
- Keep mulch depth around 2–3 inches to stay effective without mounding
- Top up mulch each spring before the growing season begins
16. Crushed Lava Rock Path
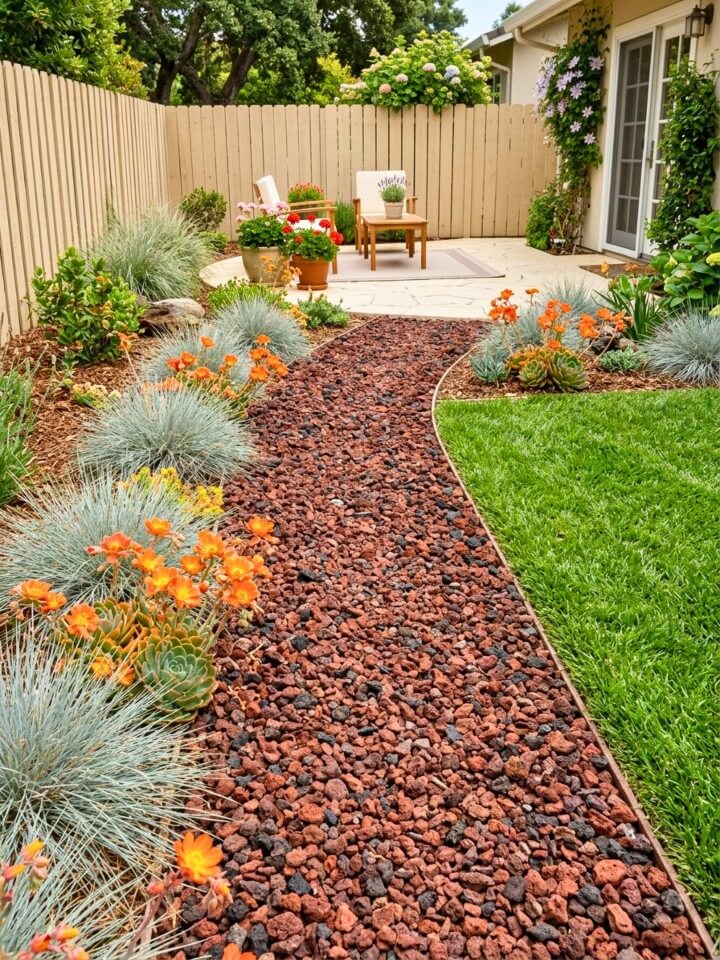
Lava rock behaves differently from most path materials. It is porous, lightweight, and dark — almost black — which creates a strong visual contrast against green plants and lighter stonework. That contrast does a lot of work in the right yard.
Desert landscapes, tropical gardens, and Southwestern-themed yards are the natural setting for this material. Cacti, succulents, and ornamental grasses planted alongside make the dark surface even more striking. It handles heat well and drains quickly after rain, which also makes it useful for yards inspired by stunning low-maintenance Florida landscaping ideas.
Spread it over a compacted base for a stable, even surface. The porous texture means it stays cooler underfoot than solid stone on hot days. Lava rock typically costs around $5–$10 per square foot depending on the supplier.
Laying Lava Rock the Right Way
- Compact the soil base thoroughly before adding any rock
- Lay landscaping fabric to prevent rock from sinking into soil
- Spread rock in a 2–3 inch even layer across the path area
- Use timber or metal edging to keep material from spreading
- Rake the surface level again after the first heavy rainfall
17. Slate and Grass Inlay Walk
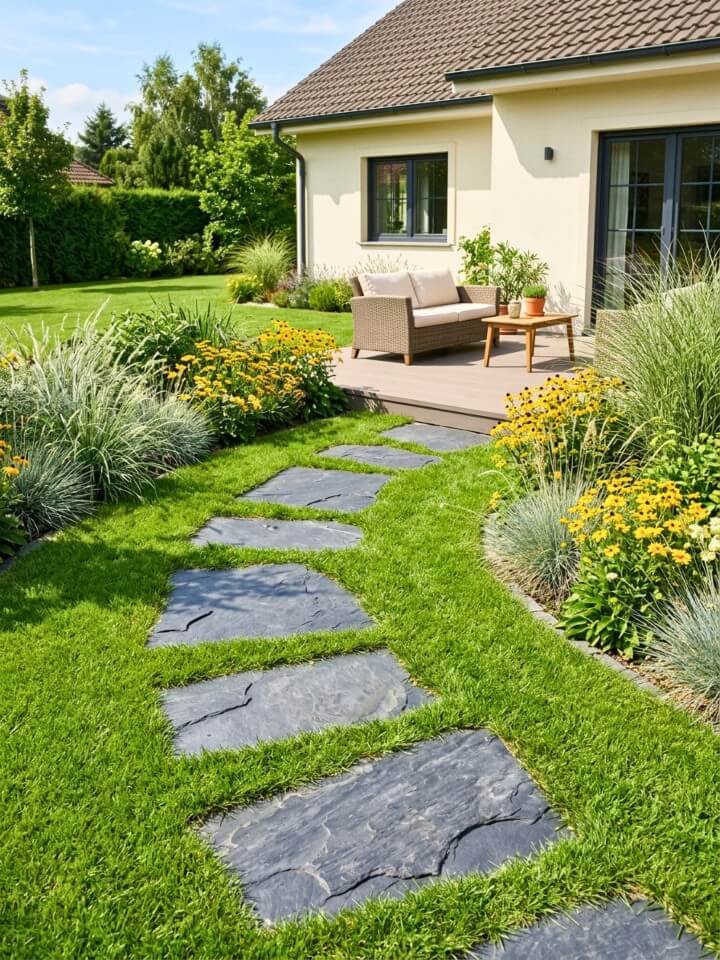
The geometry of slate and the softness of grass are not obvious partners. But placed together — flat dark tiles set into a green lawn — they create something that feels both structured and alive. The contrast is what makes it interesting.
This works across open lawns, connecting patios to garden features, or framing a clean approach to a seating area. Modern and contemporary yards carry it best. The look stays sharp as long as the grass between tiles is regularly maintained.
Setting Slate Into a Lawn Surface
- Space slabs to allow comfortable walking and easy mowing between
- Cut turf precisely to each slab’s shape before placing
- Bed each slab on sharp sand for a stable, adjustable base
- Ensure slate sits slightly above grass to shed water properly
- Trim grass edges every two weeks to maintain the clean inlay look
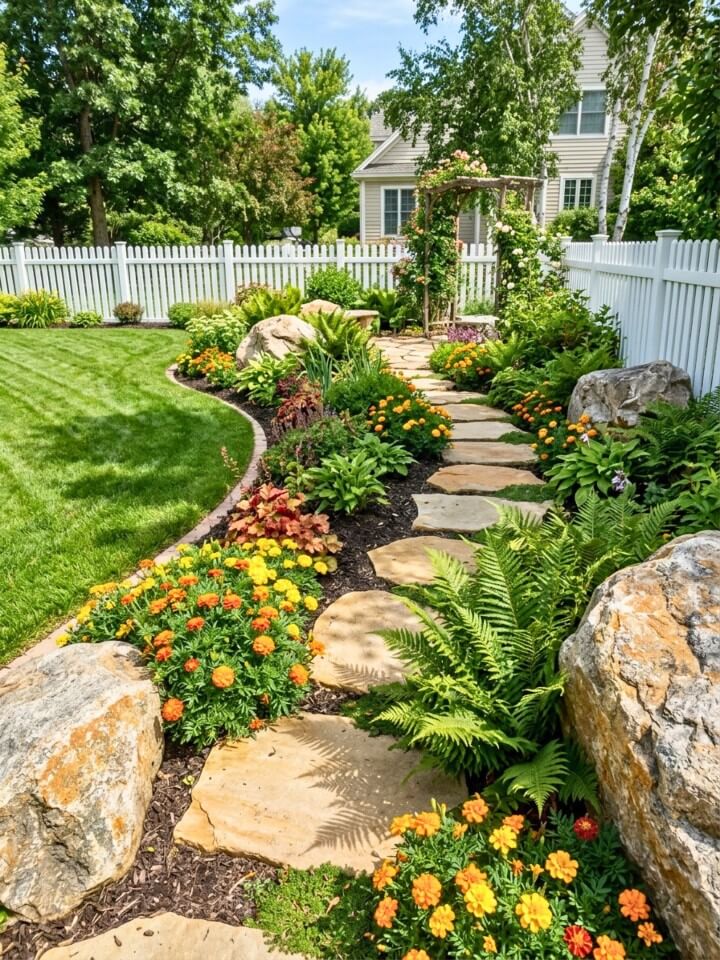
18. Irregular Stone Trail – Naturally Organic Look
Irregular stones work because imperfection is the goal. Uneven shapes, varied gaps, slightly different heights — all of it contributes to a path that looks like it grew rather than was built. That quality is difficult to fake with uniform materials.
Winding through wooded areas, alongside backyard streams, or through naturalistic garden beds is where this trail type belongs. Woodland and rustic landscapes suit it perfectly. Ferns, wildflowers, and native groundcover planted in the gaps complete the effect.
Fill gaps between stones with moss or fine gravel. Moss takes longer to establish but looks far more natural once it does. Gravel works immediately and still softens the overall appearance considerably.
Placing Irregular Stones for a Natural Look
- Avoid arranging stones in any obvious geometric pattern
- Vary gap widths intentionally — uniform gaps look artificial
- Plant moss or low groundcover between stones as you lay them
- Use stones of different thicknesses for a more organic surface feel
- Walk the path after laying and adjust any stones that feel unstable
19. Polished River Rock Path
Polish changes everything about river rock. The same stone that looks casual and rough when raw becomes refined and almost luminous when smoothed. Embedded into mortar, polished rocks create a surface that holds up to heavy use while remaining visually impressive.
Near pools, patios, or garden seating areas it performs particularly well. Mediterranean, Zen, and coastal yards carry the aesthetic naturally. Low walls, container plants, and water features all complement it without competing.
Embedding Polished Rocks for a Lasting Finish
- Sort rocks by size and color before starting any installation
- Prepare a mortar base and work in manageable sections
- Press each rock to a consistent depth for an even surface
- Allow full curing time before allowing foot traffic on the path
- Apply stone sealer once cured to protect color and surface sheen
20. Stacked Stone Garden Walk
A winding rock garden path brings texture, color, and peaceful flow to your outdoor retreat. Stacking stones along path edges does something that flat borders cannot — it adds height and shadow. The layered profile catches light differently throughout the day, and that changing texture makes the path feel more dynamic than its materials alone would suggest.
Terraced gardens, flower beds, and gently sloped yards benefit most from this treatment. Rustic and mountain-themed landscapes are the natural fit. Native plants, ferns, and textured foliage planted behind the stacked edges anchor the whole composition.
Use larger stones at the base and smaller ones on top. That tapering profile is structurally sound and visually correct. Stacked borders that are too uniform in stone size tend to look artificial rather than naturally built up.
Stacking Stones Along a Path Edge Correctly
- Select a flat, stable base stone for each stacking point
- Alternate stone joints as you build up — like bricklaying
- Keep stacks no higher than 12 inches without additional support
- Backfill behind stacks with soil to hold them from behind
- Plant low groundcover at the base to anchor the stacked edge visually
21. Pebble and Sand Zen Path
Sand is not just filler in a Zen garden — it is an active surface. Raked into patterns around pebbles or shaped into alternating zones, it becomes part of the design. The act of maintaining it, raking and resetting after wind or rain, is considered part of the practice.
Meditation gardens, quiet courtyards, and private side yards are the right settings. Japanese and minimalist landscapes carry this style without any additional decoration. Bonsai, bamboo, and stone lanterns alongside it deepen the atmosphere naturally.
Use coarse sand rather than fine beach sand. Fine sand blows and shifts too easily. Coarse sand holds rake patterns longer and compacts slightly underfoot without losing its texture.
Setting Up a Pebble and Sand Zen Space
- Excavate and lay a firm compacted base before adding sand
- Use edging stones or timber borders to contain the sand cleanly
- Place pebble groupings before raking to finalize their positions
- Rake patterns outward from pebbles — circles first, then lines
- Keep a dedicated rake nearby for regular pattern maintenance
22. Limestone Step Path for Shaded Garden Areas
Limestone is quieter than most path stones. Its pale, muted tones do not demand attention — they reflect light gently and brighten areas that other materials would leave feeling heavy. In shaded garden corners or dense planting areas, that quality is genuinely useful.
Leading to patios, through flower beds, or toward a garden seating area are all natural uses. Traditional, cottage, and Mediterranean yards suit it best. Flowering perennials and small trees planted alongside make the soft stone color look even warmer.
Placing Limestone Slabs for a Gentle, Lasting Path
- Choose slabs with consistent thickness to avoid uneven stepping
- Prepare a sand or fine gravel base for slight adjustability
- Set slabs with small even gaps — around half an inch works well
- Allow groundcover or grass to establish naturally in the joints
- Avoid sealing limestone — it needs to breathe to resist cracking
FAQs About Rock Walkways
Most walkway articles wrap up before answering the questions you actually start asking once the project is underway. Below are honest answers to the gritty stuff, like permits, freeze damage, stubborn weeds, and figuring out how wide your path really needs to be.
How Much Does a DIY Rock Walkway Typically Cost per Square Foot?
Budget roughly $8 to $15 per square foot for materials if you handle the labor yourself. Flagstone and granite push higher, around $15 to $30, while pea gravel and crushed stone stay closer to $3 to $6.
Do Rock Walkways Need a Permit Before Installation?
Most residential walkways under 30 inches wide skip permit requirements, but rules vary by city and HOA. Always call your local building office first, especially if the path connects to a driveway, crosses a setback line, or involves drainage changes.
What’s the Best Way to Stop Weeds from Growing Between Path Stones?
Polymeric sand swept into joints hardens slightly and blocks most weed seeds for years. Pair it with quality landscape fabric underneath, and spot-treat stragglers with vinegar or boiling water rather than harsh chemical sprays.
Will a Rock Walkway Hold up In Freezing Winter Climates?
Yes, when built properly. Excavate below your local frost line, use a thick compacted gravel base for drainage, and choose dense stones like granite or quartzite. Avoid soft limestone in regions with heavy freeze-thaw cycles.
How Wide Should a Garden Rock Walkway Be?
Single-file garden paths work at 24 to 30 inches wide. For main walkways where two people walk side by side or you push a wheelbarrow through, aim for 48 inches minimum to keep things comfortable.
Conclusion:
Stand in your yard tomorrow morning and picture the route you take most often. That worn line in the grass is already telling you where your path belongs, and which of these rock walkway ideas will earn its keep.
Skip the trend chasing. Sandstone warms a Southwestern lot the way slate never could, and a zigzag tile path feels ridiculous in a wild cottage garden. Match the stone to your weather, your soil, and the hours you’ll realistically spend on upkeep.
The best rock walkways aren’t finished the day they’re laid. They’re finished slowly, by rain, frost, footsteps, and whatever decides to grow in the cracks.