18 Shed Ramp Ideas To Roll In Mowers, Carts, and Tools With Ease
Getting a mower, wheelbarrow, or heavy toolbox in and out of a shed sounds simple — until you’re stuck lifting it over a 6-inch threshold every weekend. A good ramp fixes that problem in one afternoon, but the “right” ramp depends on your shed height, the gear you move, and how much you want to spend.
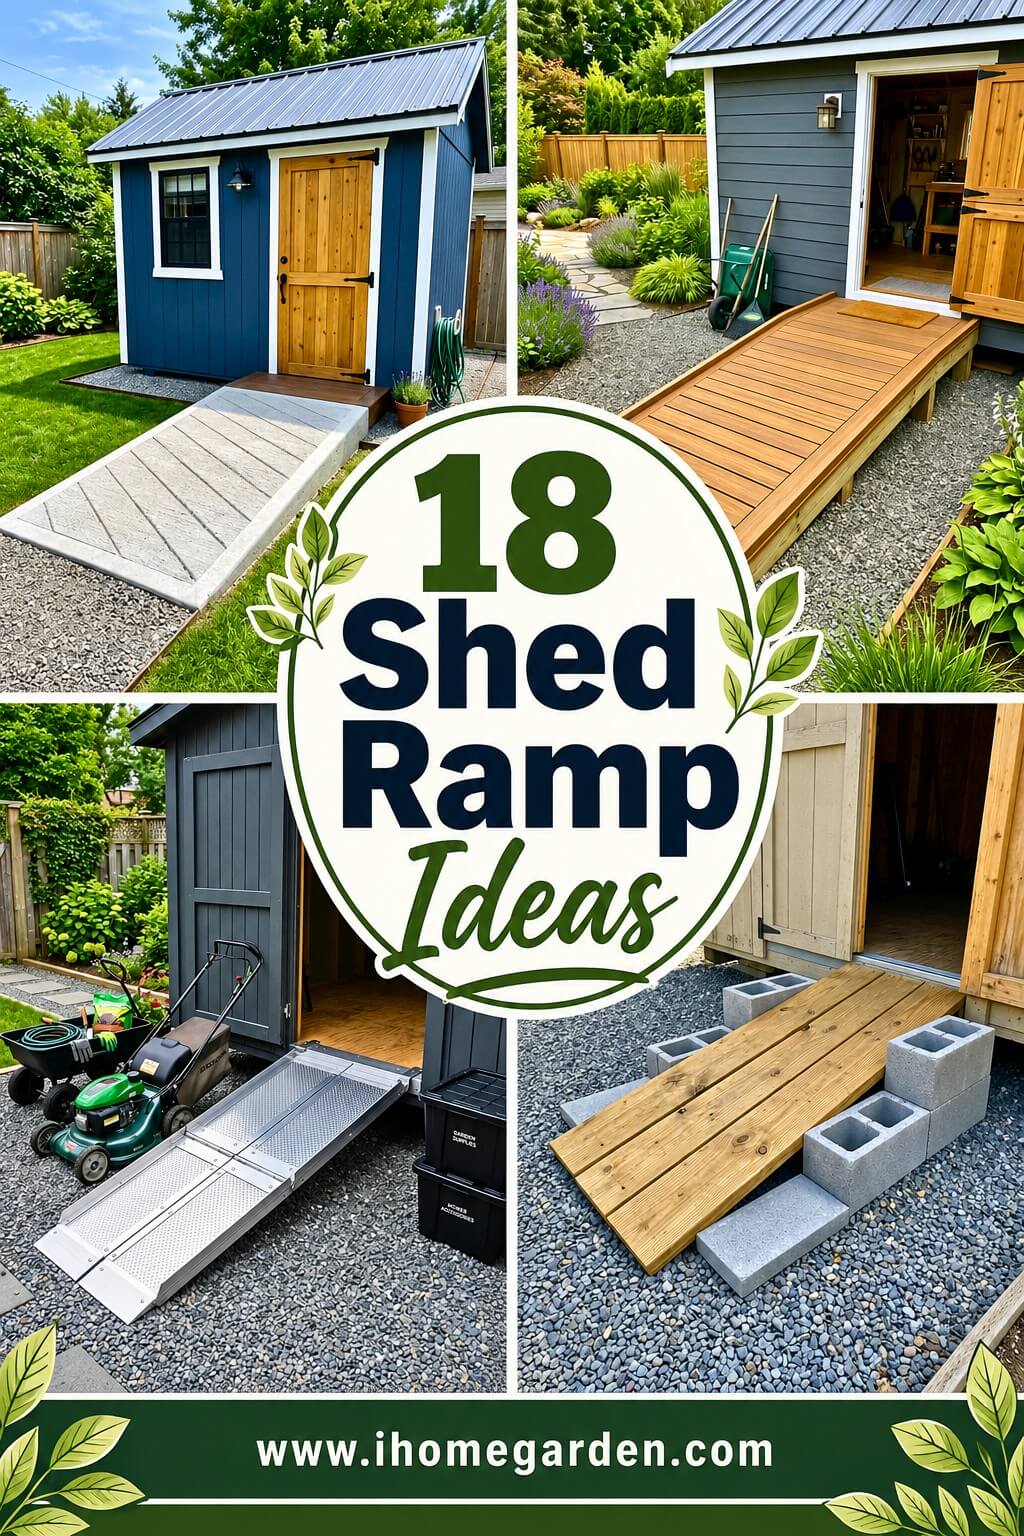
These 18 stunning shed ramp ideas worth considering, each with the slope, cost, and quirks that matter. A safe shed ramp slope sits around 1:8 for mowers and 1:12 if anyone in the family uses a wheelchair or walker.
1. Solid Wood Plank Shed Ramp
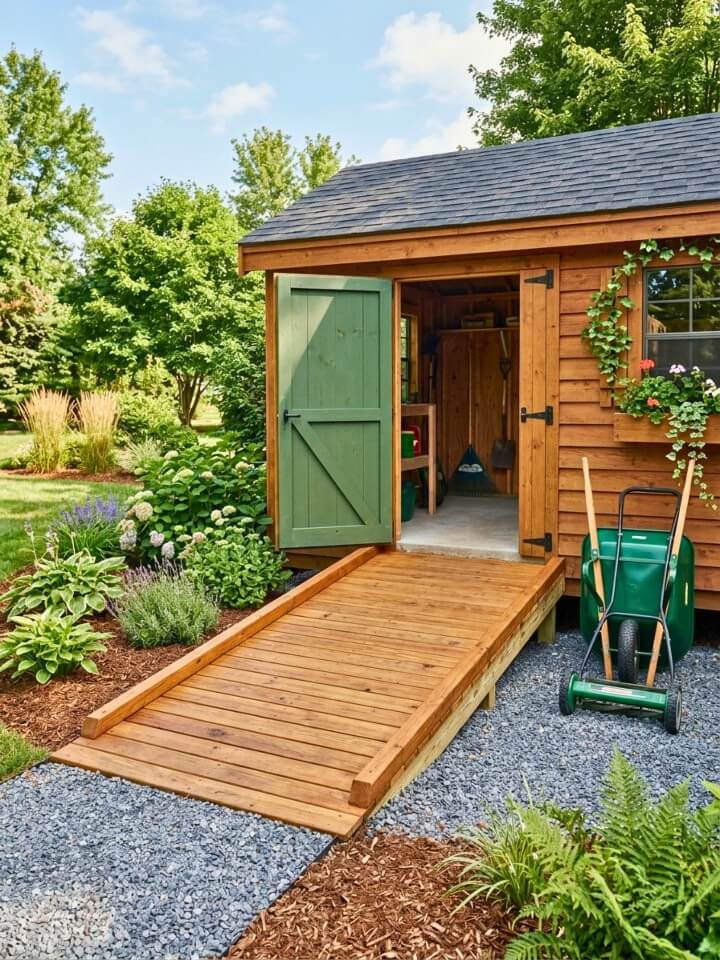
Wood is the classic choice for a reason — it looks like it belongs with the shed instead of bolted on as an afterthought. Frame it with pressure-treated 2x6s spaced 16 inches on center, then top with 2×8 planks laid tight together. For a standard 8-inch threshold, a 5- to 6-foot ramp gives you a slope a push mower can climb without scraping the deck. Lumber runs around $80–$140. One free upgrade most people skip: cut three or four shallow grooves across each top board with a circular saw. That’s your traction, and wet sneakers will thank you in October.
2. Poured Concrete Shed Entry
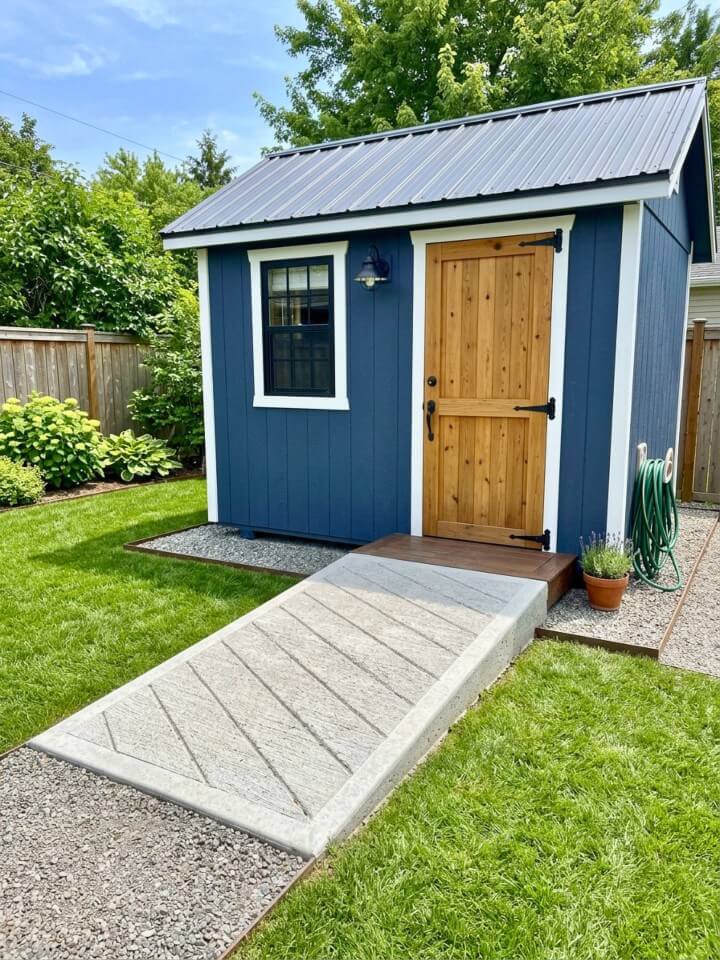
Pour it once, forget about it for 30 years. That’s the appeal. Concrete makes sense for workshop sheds where the loads are heavy — riding mowers, generators, anything north of 200 lbs.
A few numbers worth knowing before you start:
- Thickness: 4 inches minimum, over a 4-inch compacted gravel base
- Slope: No steeper than 1:8, or tires slip when it rains
- Finish: Drag a stiff broom across before it sets — that texture is what saves you from a fall in wet weather
- Cost: $120–$180 DIY for a 4×5-foot ramp, or $400–$600 hired out
The work is unforgiving (mistakes set in literal stone), so if you’ve never poured concrete, practice on a small pad first.
3. Foldable Aluminum Loading Ramp
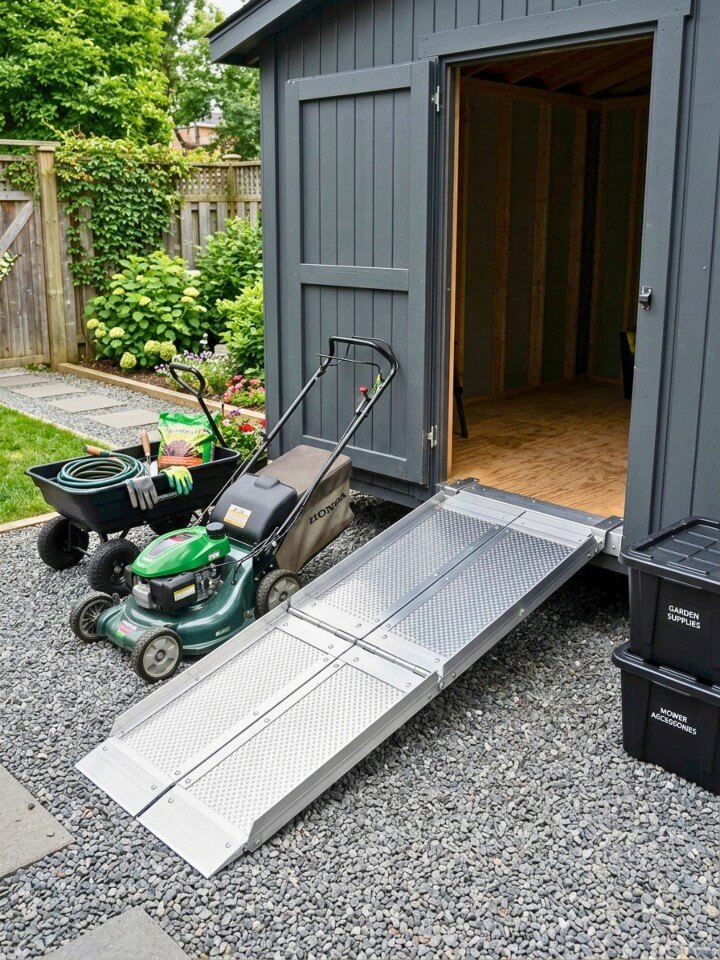
Transform your backyard storage with brilliant shed ramp ideas that blend style and function. Do you actually need a ramp 365 days a year, or just when the mower comes out?
If it’s the second one, stop building. A folding aluminum ramp solves the problem in 10 seconds and tucks behind the door the rest of the time — huge win on small patios and narrow side yards. Bi-fold pairs rated for 1,000 lbs combined handle a riding mower; 600-lb pairs are fine for push mowers and hand tools. Aluminum stays light (20–30 lbs each), never rusts, and a decent pair costs $90–$200. The one thing to check every single time: make sure the hook lip is fully seated on the threshold before you drive up. They can kick loose if it isn’t.
4. Budget Gravel Walkway Ramp
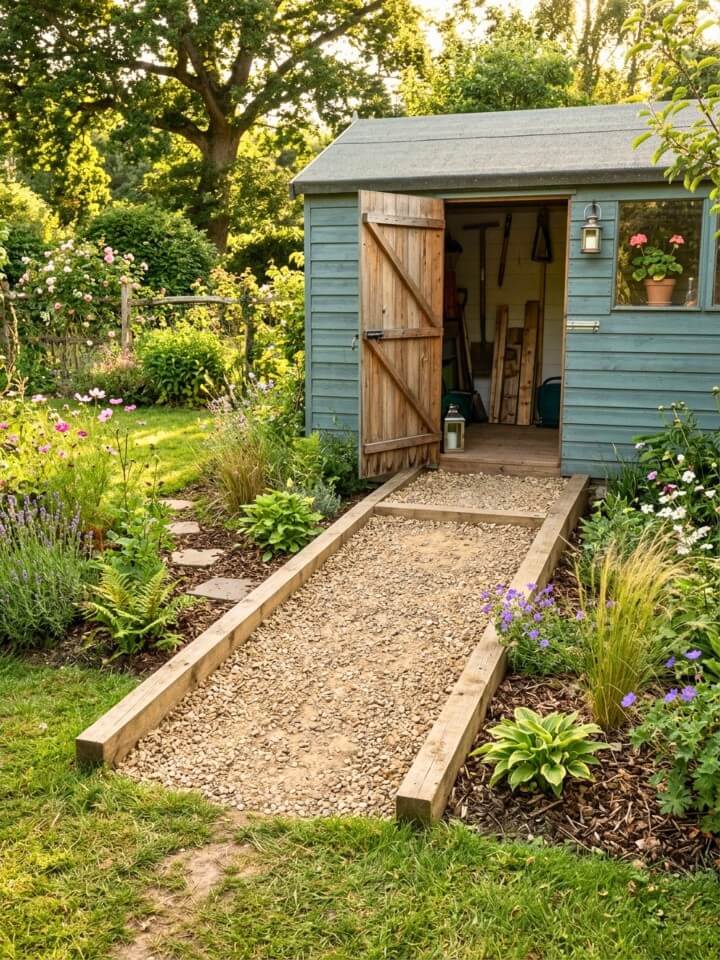
Cheapest permanent ramp you can build, and it drains itself — rain runs through instead of pooling on top.
Here’s the Build, in Order:
- Dig out the slope area roughly 6 inches deep
- Lay landscape fabric across the bottom (this is the step people skip and regret — weeds will push through within a year)
- Frame the sides with 4×4 pressure-treated timbers or steel edging
- Fill with 3 inches of crusher run, compact hard with a hand tamper
- Top with 2 inches of pea gravel or decomposed granite
Total cost: $40–$90. Fine for wheelbarrows, bikes, garden carts. Skip it for anything with small caster wheels — they’ll sink straight down.
5. DIY Pallet Wood Ramp
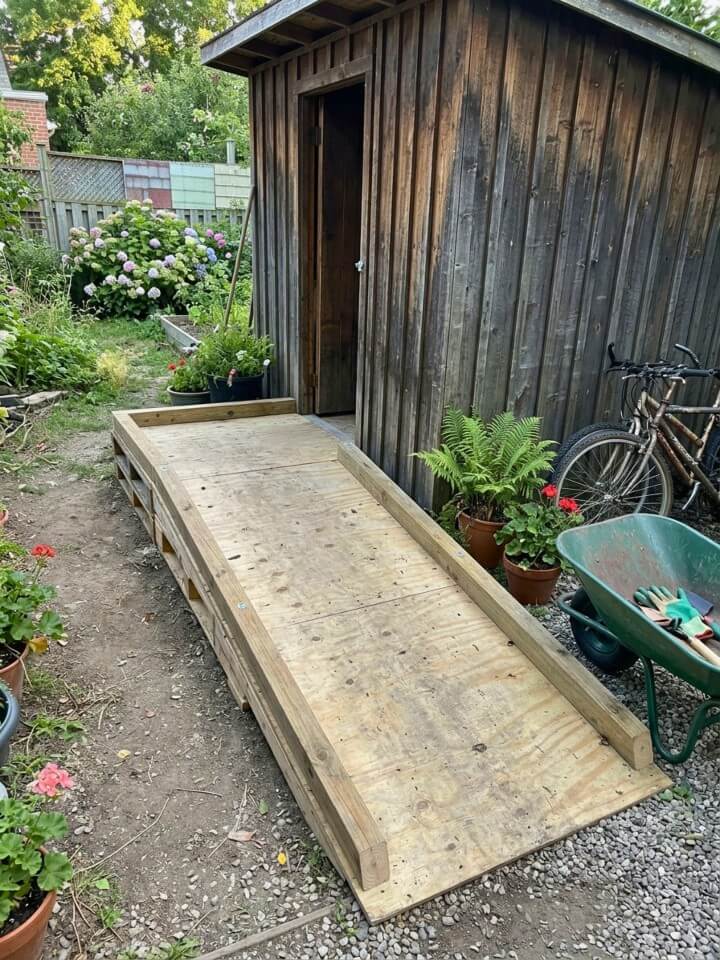
A word of warning before the build tips: not every pallet is safe to reuse. Look for the “HT” stamp (heat-treated). Skip anything marked “MB” — that one’s been treated with methyl bromide, which you don’t want leaching near a garden or kids’ play area. Also pass on pallets with oil stains, cracked stringers, or missing deck boards.
Once you’ve got two clean ones, double them up if the rise is more than 4 inches and sister extra 2x4s under the stringers for support. Cover the top with 3/4-inch exterior plywood screwed every 8 inches so wheels don’t catch in the gaps. Seal with deck stain. Realistic outdoor lifespan: 2–4 years, longer if it stays dry.
6. Paver or Brick Shed Ramp
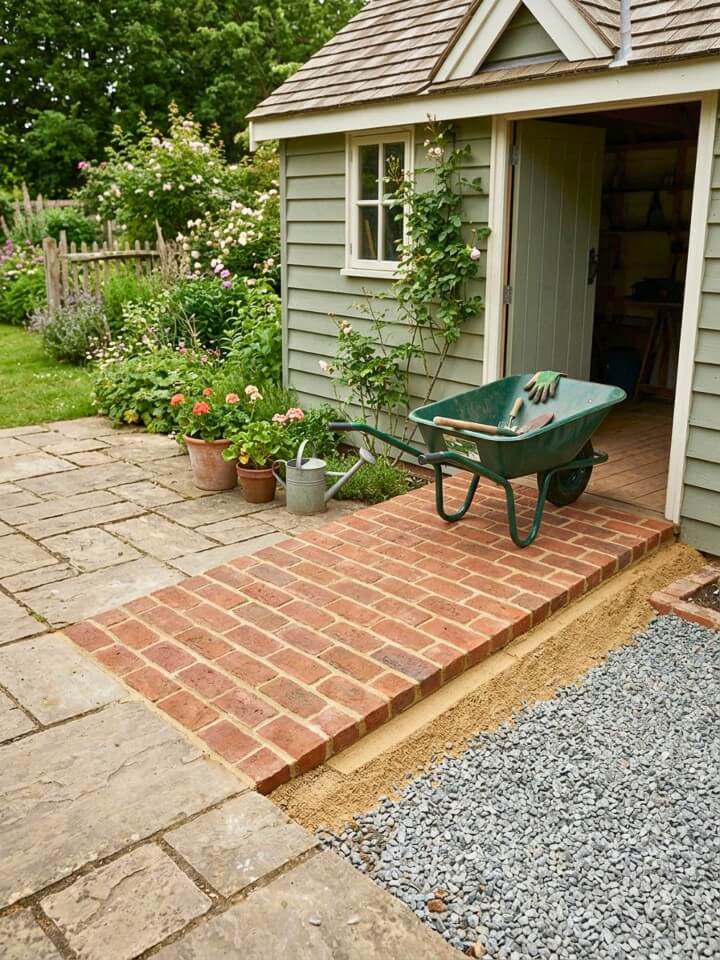
If your shed already connects to a patio or stone walkway, a paver ramp lets the entry blend in instead of sticking out as a separate add-on. The trick is the base, not the pavers themselves — and most failed paver ramps fail because someone rushed this part.
Excavate 7 inches deep. Lay 4 inches of compacted crusher run, then 1 inch of bedding sand screeded flat. Pavers go on top, tight together, with polymeric sand swept into the joints and misted to set. Edge restraints along both sides keep everything from creeping outward over the years.
Brick reads cottage. Gray concrete pavers read modern. Tumbled stone reads farmhouse. Budget around $5–$9 per square foot in materials.
7. Heavy-Duty Steel Diamond-Plate Ramp
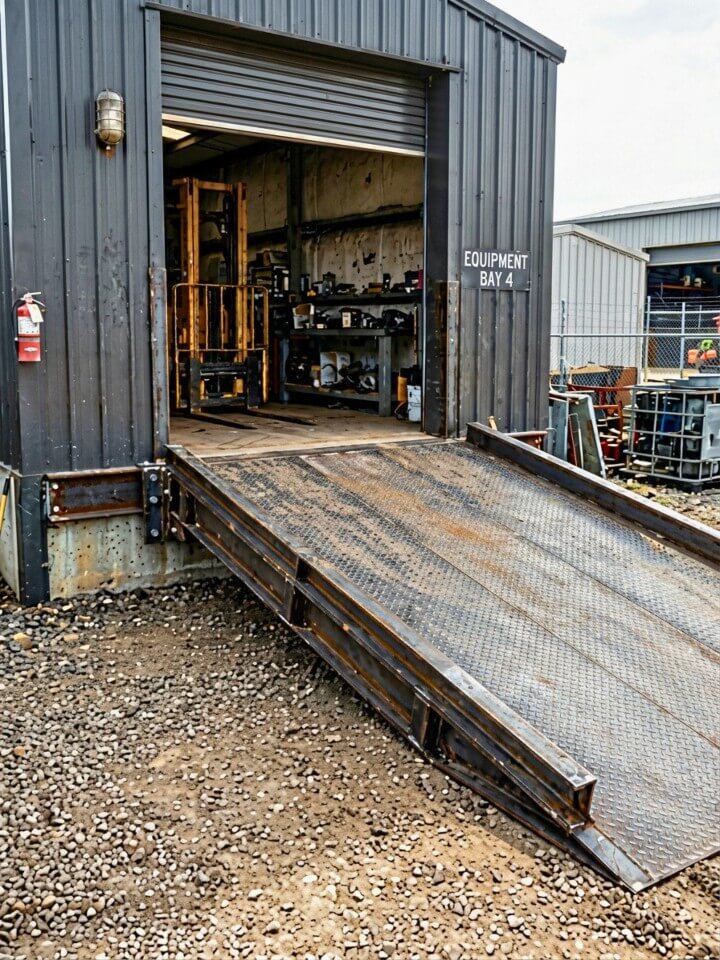
This is the ramp you build when “heavy duty” actually means heavy duty — a small tractor, a welder on wheels, a loaded equipment cart that would crack lesser surfaces.
Diamond-plate steel comes in thicknesses measured by gauge. For shed ramps:
- 14-gauge — light equipment, hand carts, up to ~500 lbs
- 1/8-inch — push mowers, loaded wheelbarrows, up to ~1,000 lbs
- 3/16-inch or 1/4-inch — riding mowers, small tractors, anything serious
Weld or bolt the sheet to a steel angle-iron frame, then anchor the frame to the shed threshold with lag bolts. The raised diamond pattern is your traction — but it gets slick under leaves and ice, so keep it swept. Expect $150–$400 depending on size and steel thickness.
8. Composite Decking Shed Ramp
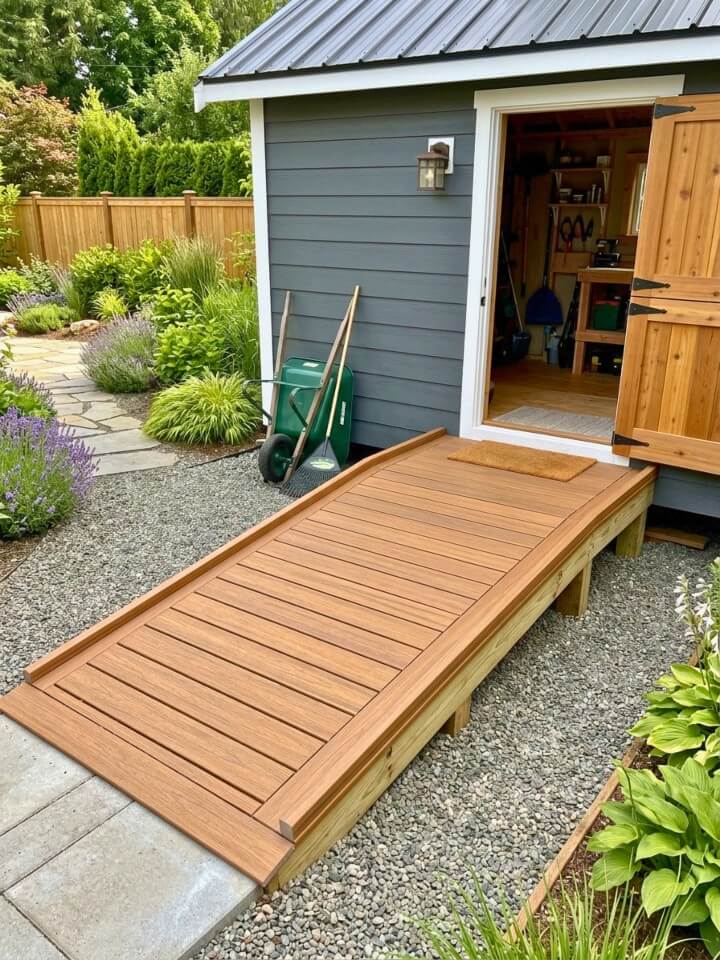
Explore the most practical ramp for shed ideas to make loading heavy equipment effortless. Wood ramps look great for about three years. Then the staining begins — every spring, every fall, sand, seal, repeat. Composite skips all of that.
Build the frame exactly like a wood ramp (pressure-treated 2×6 joists, 16 inches on center), but use composite deck boards on top with a 1/8-inch gap between each one for drainage. Hidden fasteners keep the surface clean and screw-free, which matters because composite shows screws more than wood does.
Two things to know going in: composite costs roughly 2–3x more than pressure-treated lumber upfront ($200–$350 for a typical ramp), and the surface gets noticeably hotter in summer sun. Pick a lighter color if the ramp sits in full afternoon exposure.
9. Rubber Threshold Wedge Ramp
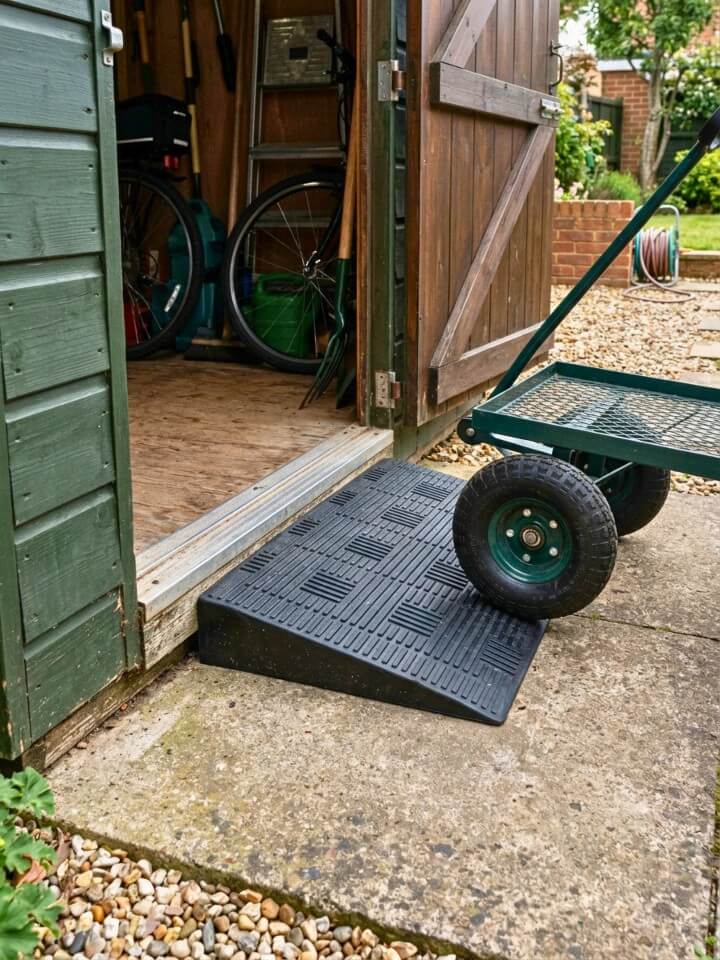
Sometimes the shed only sits 2–4 inches above the ground and a full ramp would be overkill. That’s where a rubber threshold wedge does the job.
Drop it against the doorway, and trash bins, bikes, and hand carts roll right over the lip with no bump. No tools, no building, no maintenance — closest thing to an instant fix in this whole list. Solid rubber (not hollow plastic that calls itself rubber) holds up best; expect $25–$60 depending on width and height.
One limitation worth being honest about: it only works on level, hard surfaces. If your shed sits on grass or soft dirt, the wedge tips forward under weight. Concrete pads, pavers, or asphalt only.
10. Earth Berm Shed Ramp With Stepping Stones
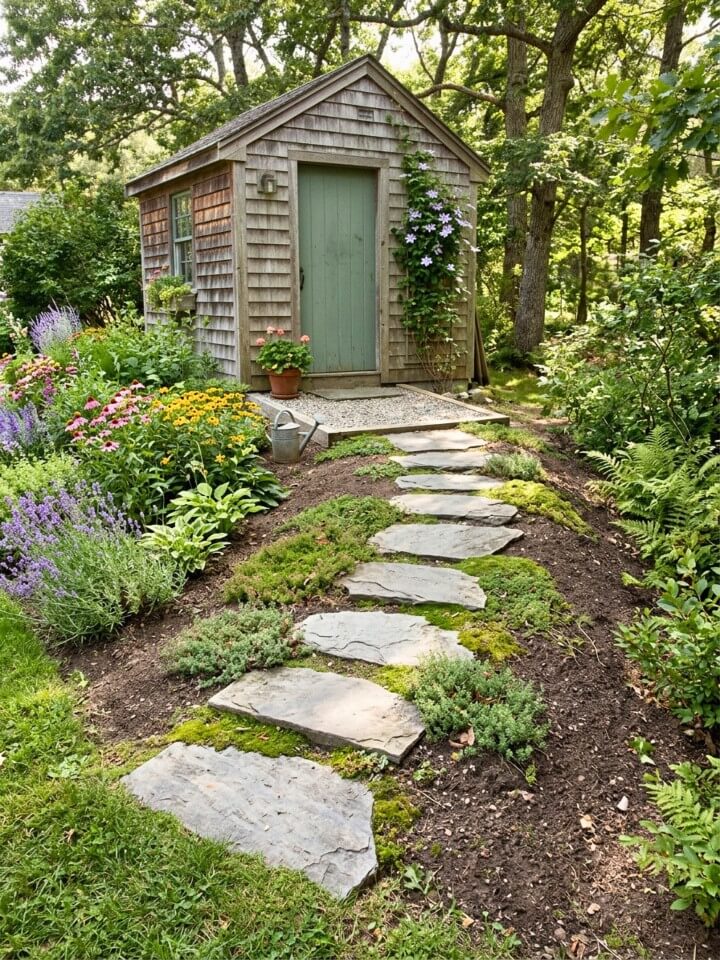
The most landscape-friendly option on this list, and almost free if you’ve already got soil to move from another project.
Mound compacted topsoil into a gentle slope against the shed threshold — aim for a rise no steeper than 1:10 so it feels natural underfoot. Set flat stones into the top, pressing each one down until it sits flush and doesn’t rock when you step on it. Plant low ground cover (creeping thyme, sedum, Irish moss) in the gaps once everything’s settled.
This works for foot traffic, hand tools, and small carts. It will not hold up to mower wheels — the soil compresses under repeated narrow loads and the stones shift. Best beside garden sheds tucked into landscape beds.
11. Cinder Block and Plank Ramp
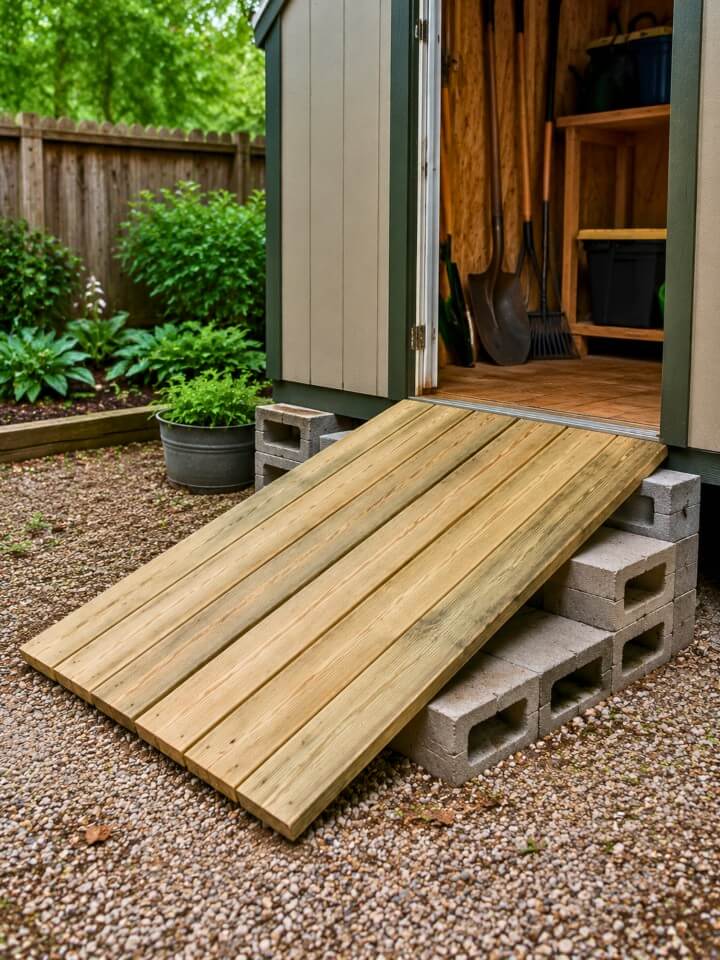
Quick, cheap, and surprisingly solid if you build it right — but also the ramp that hurts people most often when built wrong. Here’s the line between the two:
Do this:
- Set blocks on a flat, compacted base, not loose grass
- Stack with the holes facing up, filled with gravel or sand for stability
- Use 2×10 or 2×12 pressure-treated planks at least 2 inches thick
- Secure the planks to the blocks with construction adhesive or L-brackets
- Cap the ends so planks can’t slide off
Don’t do this:
- Single 2×6 planks (they flex and snap under load)
- Loose planks (they kick out when you push a heavy cart up)
- Stacking blocks more than two high without mortar
Total cost runs $30–$60. Treat it as a 1–2 year solution, not forever.
12. L-Shaped Ramp With Landing
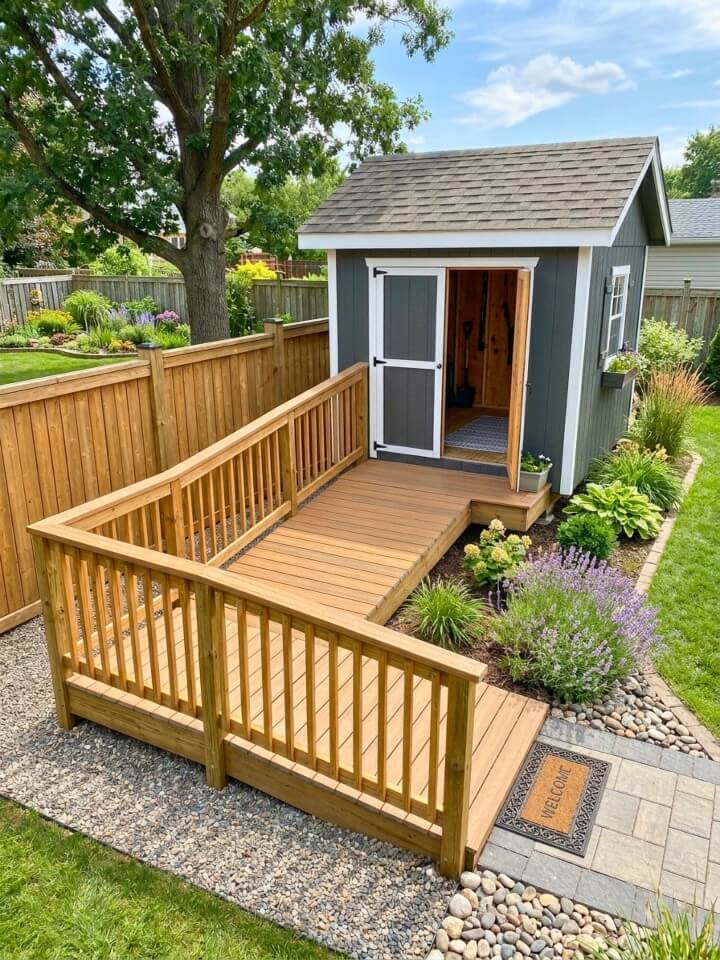
Math problem most people don’t realize they have: a shed with a 12-inch threshold needs a 12-foot ramp at the recommended 1:12 accessibility slope. That’s longer than a parking space. Sticking straight out from the shed, it eats half the yard.
The fix is a landing — a flat 4×4-foot platform where the ramp turns 90 degrees and continues in a new direction. Now that 12-foot run becomes two 6-foot runs at right angles, which fits beside a fence, garden bed, or walkway instead of jutting into the lawn.
Build it like a small deck: pressure-treated framing, footings at the landing corners, decking on top, and a simple handrail if anyone in the household needs one. Budget $300–$700 in materials depending on size and railing choice.
13. Hinged Fold-Down Shed Ramp
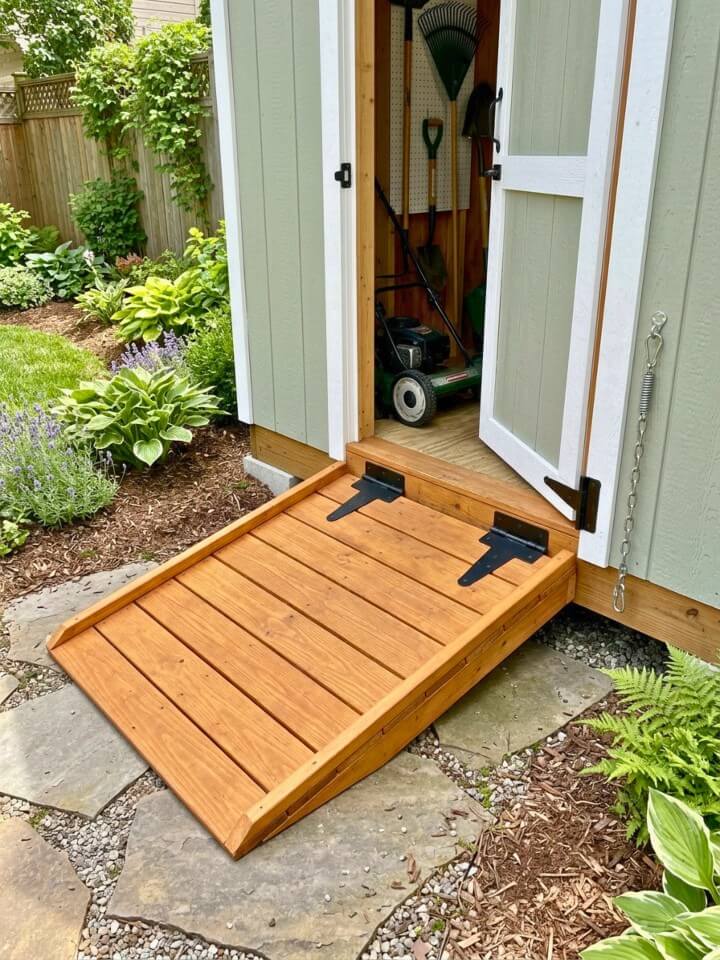
Imagine walking past your shed and not tripping over a permanent ramp every time. That’s the whole pitch for this build.
Attach a wood or aluminum ramp panel to the shed threshold with two heavy-duty strap hinges (galvanized or stainless — regular steel rusts shut within a season). When you’re done moving gear, lift the ramp up flush against the shed door and secure it with a hook-and-eye latch or a short length of chain.
A few things that separate a fold-down ramp that lasts from one that doesn’t: hinges rated for at least 3x the ramp’s weight, a counterweight or gas strut if the panel is over 30 lbs, and a rubber bumper where the ramp meets the threshold so the wood doesn’t split over time. Materials run $60–$140.
14. Rustic Railroad Tie Ramp
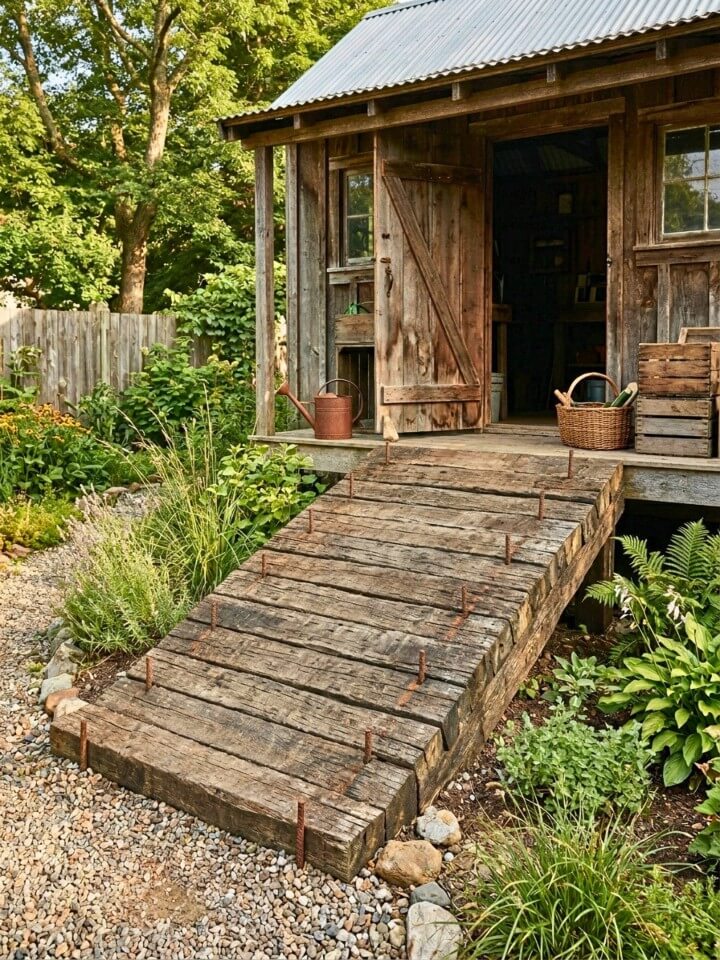
Before you go this route, one thing worth knowing: older railroad ties were treated with creosote, which can leach into surrounding soil and isn’t something you want near vegetable beds, well water, or anywhere kids dig. If your property has any of those, skip to a different idea or source newer ties marked as creosote-free. Garden zones with edible plants are better served by safer materials, especially around areas planned with cute herb garden ideas.
For the right setting — a barn-style shed at the back of a wooded lot, say — railroad ties make a ramp that looks like it grew out of the land. Set them into a 4-inch compacted gravel base, butt them tight side-by-side across the slope, then drive 18-inch rebar stakes through pre-drilled holes to anchor each tie. Fill the seams with crushed stone for drainage.
The look is rugged and permanent. The weight is brutal — each tie runs 150–200 lbs, so plan for help.
15. Stamped and Stained Concrete Ramp
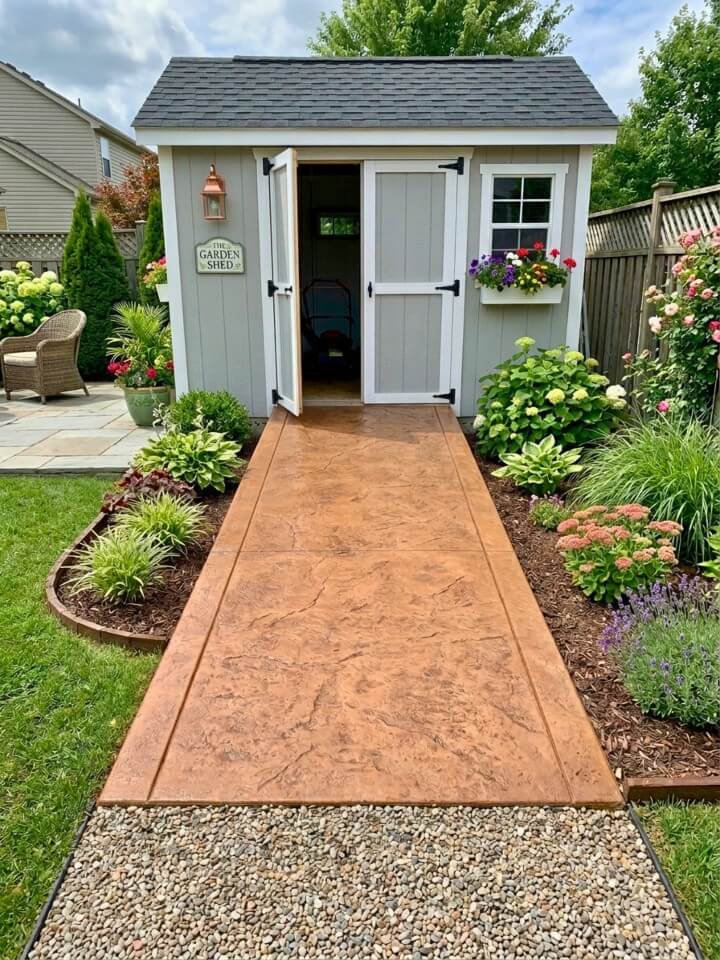
Stamping happens in a narrow window: after the concrete is poured and floated, but before it sets. A patterned mat gets pressed into the surface to mimic brick, slate, or flagstone. Color goes in two ways — integral (mixed into the wet concrete, fades less over decades) or topical acid stain (richer color, needs sealing every 2–3 years).
The catch: stamping isn’t beginner work. Mistime the press and you get smeared mush. For a ramp this visible, hiring a concrete finisher ($600–$1,200 installed) usually beats a DIY first attempt.
16. Modular Plastic Snap-Together Ramp
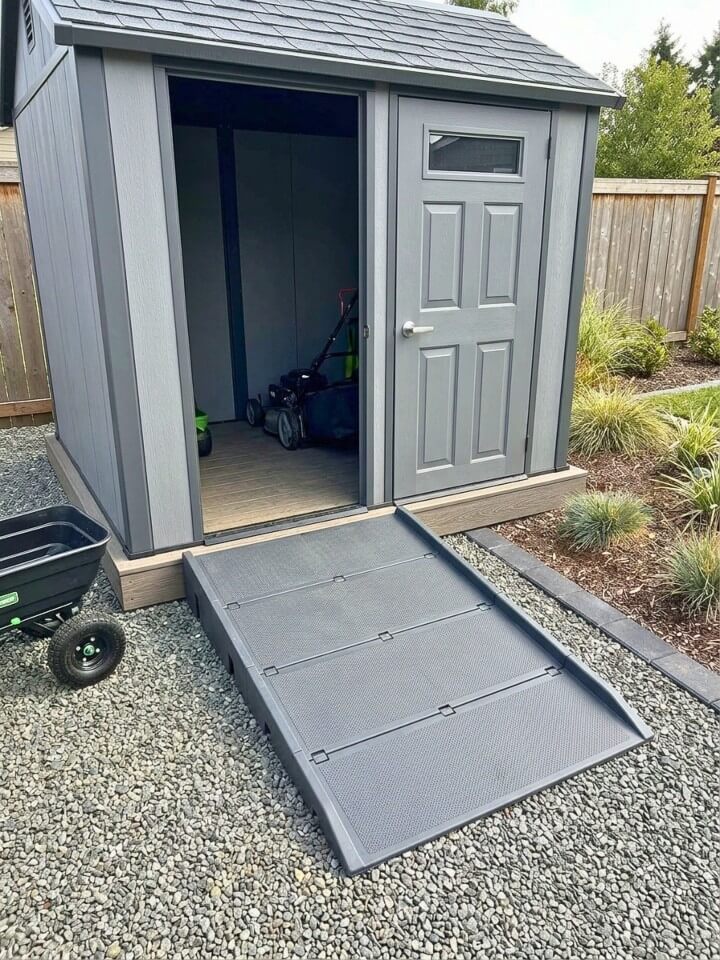
Discover budget-friendly ramp ideas for shed access that save time and protect your back daily. The “buy it, set it, done” option. Modular plastic ramps come in pre-formed sections that snap or bolt together to match your threshold height, with a textured non-slip surface molded in.
What Makes Them Worth Considering:
- No rot, no rust, no annual sealing
- Light enough to reposition if the shed moves
- Most are UV-stabilized so they don’t go brittle in sun
- Weight ratings clearly printed (usually 400–800 lbs per section)
- Drainage holes built into the deck so water doesn’t pool
What to watch for: cheaper ramps use recycled plastic that gets slippery when wet despite the texture, and the snap connections can loosen if you skip the included locking pins. Stick with brands that publish a weight rating and a UV warranty. Expect $80–$250 depending on length.
17. Smooth Asphalt Shed Ramp
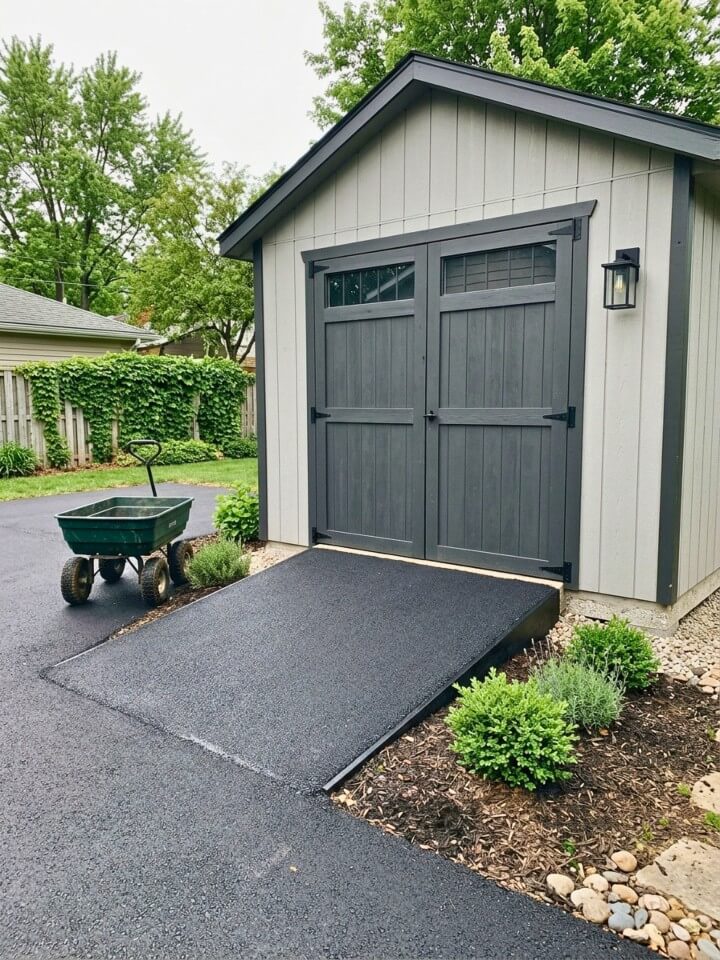
This is the right ramp when your shed sits 10 feet from an asphalt driveway and you want the surface to flow visually from one to the other. Anywhere else, it’s usually overkill.
Asphalt needs a contractor unless you’ve worked with hot mix before — it arrives at 300°F, hardens fast, and a botched compaction shows forever. The build: 4 inches of compacted gravel base, 3 inches of hot mix asphalt, rolled with a small compactor while still hot. Slope no steeper than 1:8.
Done right, it gives you a smooth, dark surface that mowers, carts, and even a small ATV roll over without a bump. Done wrong, it cracks within two winters as water gets underneath. Realistic cost: $400–$900 installed. DIY cold-patch asphalt is cheaper but doesn’t last more than 3–4 years.
18. Built-In Integrated Shed Ramp
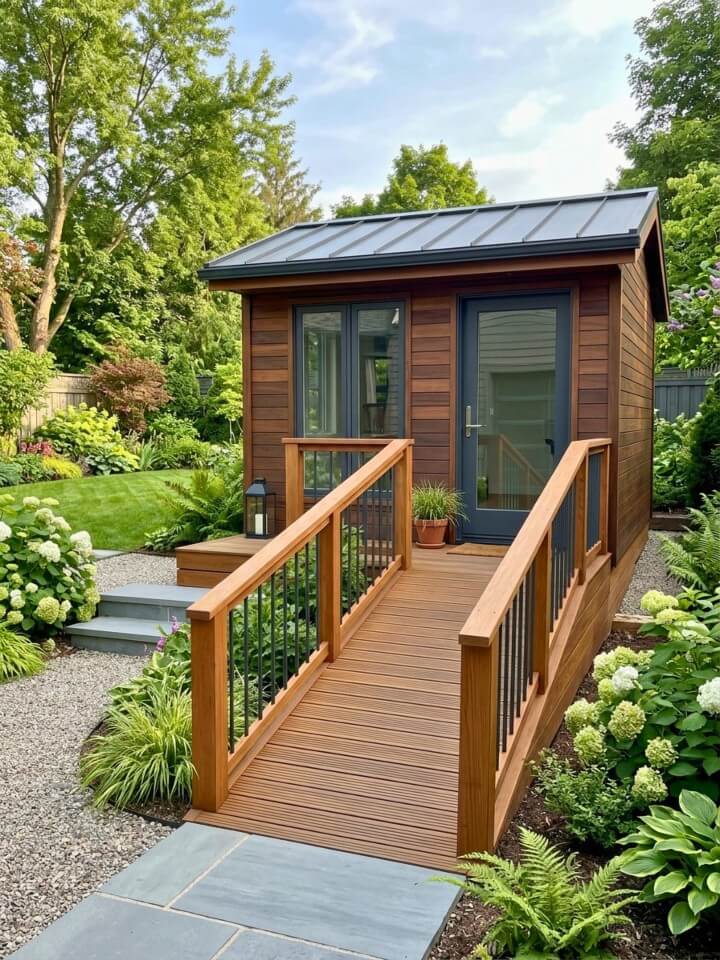
The best ramp is the one you planned before the shed went up.
Most people add a ramp as a fix after they’ve already struggled with the threshold for a season. But if you’re still in the planning stage — designing a new shed, ordering a kit, or sketching a custom build — the ramp can share framing with the shed floor, use the same siding and trim, and finish with the same stain or paint. The result looks intentional instead of patched on.
A few design choices to make early: ramp width (36 inches minimum, 48 inches if a riding mower or wheelchair is involved), surface material to match the shed (decking, plywood + roofing, or poured concrete pad), and whether the ramp tucks under an overhang to stay drier.
It costs nothing extra during the original build. Retrofitting the same look later costs two or three times more.
Quick Comparison: Which Shed Ramp Fits You?
| Ramp Type | Cost Range | Build Difficulty | Best For |
|---|---|---|---|
| Solid Wood Plank | $80–$140 | Easy | Classic look, push mowers |
| Concrete | $120–$600 | Hard | Heavy equipment, permanent |
| Metal Folding | $90–$200 | None | Small yards, occasional use |
| Gravel | $40–$90 | Easy | Budget, natural look |
| Pallet | $0–$30 | Easy | Temporary, ultra-budget |
| Paver/Brick | $5–$9/sq ft | Medium | Matching a patio |
| Steel Diamond-Plate | $150–$400 | Medium | Tractors, heavy loads |
| Composite Decking | $200–$350 | Medium | Low-maintenance modern |
| Rubber Threshold | $25–$60 | None | 2–4 inch thresholds only |
| Earth Berm + Stones | $20–$80 | Easy | Foot traffic only |
| Cinder Block + Plank | $30–$60 | Easy | Short-term fix |
| Switchback / L-Shaped | $300–$700 | Hard | Tight yards, accessibility |
| Hinged Fold-Down | $60–$140 | Medium | Narrow patios |
| Railroad Tie | $60–$150 | Hard | Rural, rugged look |
| Stamped Concrete | $600–$1,200 | Pro only | Visible from house |
| Modular Plastic | $80–$250 | None | Low maintenance, light use |
| Asphalt | $400–$900 | Pro only | Beside asphalt drive |
| Built-In Integrated | Varies | Plan stage | New shed builds |
Frequently Asked Questions About Shed Ramp
Before you grab the lumber or call a contractor, here are the shed ramp questions homeowners ask most often.
What’s the Safest Slope for A Shed Ramp?
1:8 (one inch of rise per eight inches of length) works for mowers, carts, and most yard equipment. If anyone in your home uses a wheelchair, walker, or mobility scooter, drop to 1:12 — that’s the slope required for accessibility in most building codes.
Do I Need a Permit to Build a Shed Ramp?
Usually no for ramps under 30 inches in height, but check with your local building department. Some jurisdictions require permits for any structural addition to a shed, especially if the shed itself was permitted. HOAs sometimes have their own rules about visible exterior changes too.
How Much Weight Should a Shed Ramp Hold?
For push mowers and hand tools, 300 lbs is plenty. Riding mowers need 800–1,000 lbs capacity. Small tractors or loaded equipment carts can push 1,500+ lbs — that’s where steel or thick concrete earn their cost.
How Long Does a Wood Shed Ramp Last?
Pressure-treated wood ramps last 10–15 years if sealed every 2–3 years and built with proper drainage underneath. Untreated wood rots in 3–5 years outdoors. Composite and concrete easily go 25–30+ years.
Can I Build a Shed Ramp on Grass?
Not directly. Grass compresses and rots underneath any ramp, creating an uneven, soft spot within a season. Always set ramps on a compacted gravel base, concrete pad, or pavers — even a 2-inch gravel layer makes a big difference.
What’s the Cheapest Shed Ramp Option?
Pallets are technically free, but they last 2–4 years at best. For a permanent budget option, a gravel ramp at $40–$90 is the best value — it drains itself, handles foot traffic and wheelbarrows fine, and lasts decades with a quick top-up of stone every few years.
Final Thoughts
The right shed ramp isn’t about picking the fanciest option — it’s about matching the build to what you actually move in and out of the shed. A weekend gardener with a wheelbarrow needs something totally different from a homeowner storing a riding mower and a generator.
Start with two questions: how heavy is the heaviest thing rolling up that ramp, and how often does it happen? Answer those honestly, and 15 of these 18 ideas will rule themselves out. The remaining few are your real shortlist.
Pick one, build it on a proper base, and you’ll wonder why you spent so many weekends lifting a mower over that threshold in the first place.