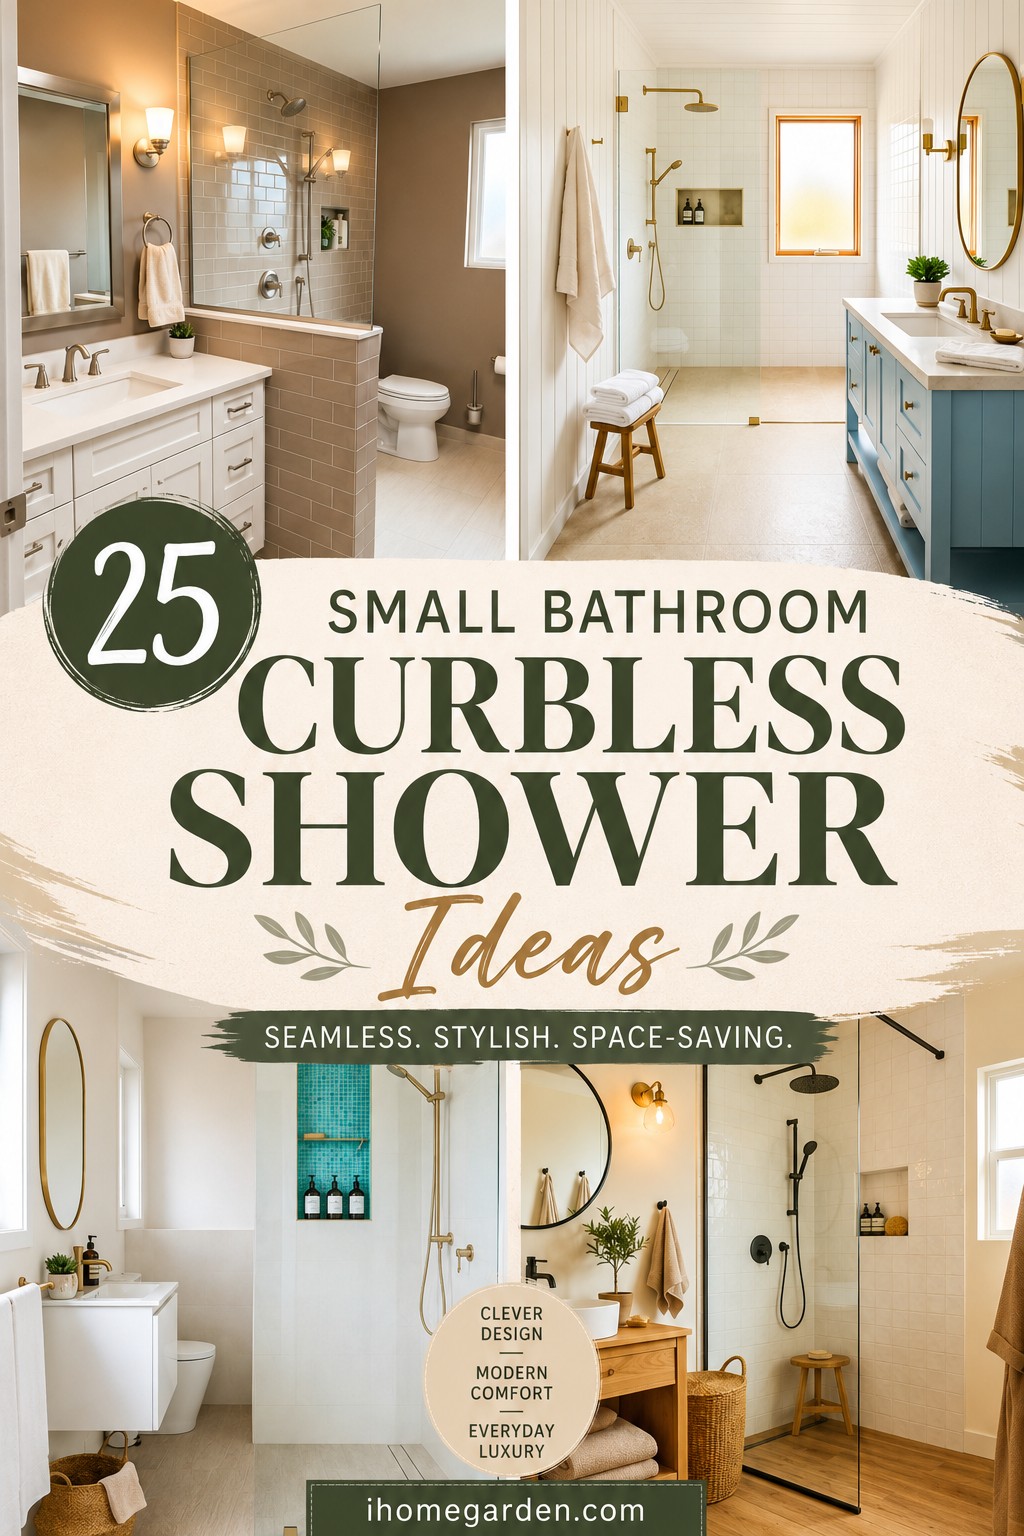
25 Small Bathroom Curbless Shower Ideas To Steal Right Now
A shower with no curb to step over sounds like a small detail. It is not. That one change affects how the room looks, how it cleans, how safe it feels underfoot, and whether the space reads as cramped or open. These 25 brilliant small bathroom curbless shower ideas are the result of looking closely at what actually works in tight floor plans — not just what looks good in a photo.
Small bathrooms punish bad decisions fast. A wrong tile size, a mismatched grout color, or a poorly placed drain can make a compact space feel even tighter. The good news is that the same square footage that makes mistakes obvious also makes thoughtful choices hit harder — one well-executed idea can shift the entire feel of the room.
1. Bring in Wood-Look Porcelain on the Floor
Wood-look porcelain adds more warmth and texture than neutral stone tile, especially when walls are white or light gray. A staggered pattern in medium brown, grey-brown, or walnut tone grounds the room visually and makes the ceiling feel higher. Before buying, check the wet COF rating — 0.60 or above is required for shower floors. The commercial wet floor minimum is 0.42; residential showers should exceed that significantly. If the supplier cannot provide the wet COF rating in writing, choose a different tile.
2. Design the Entire Bathroom as a Wet Room
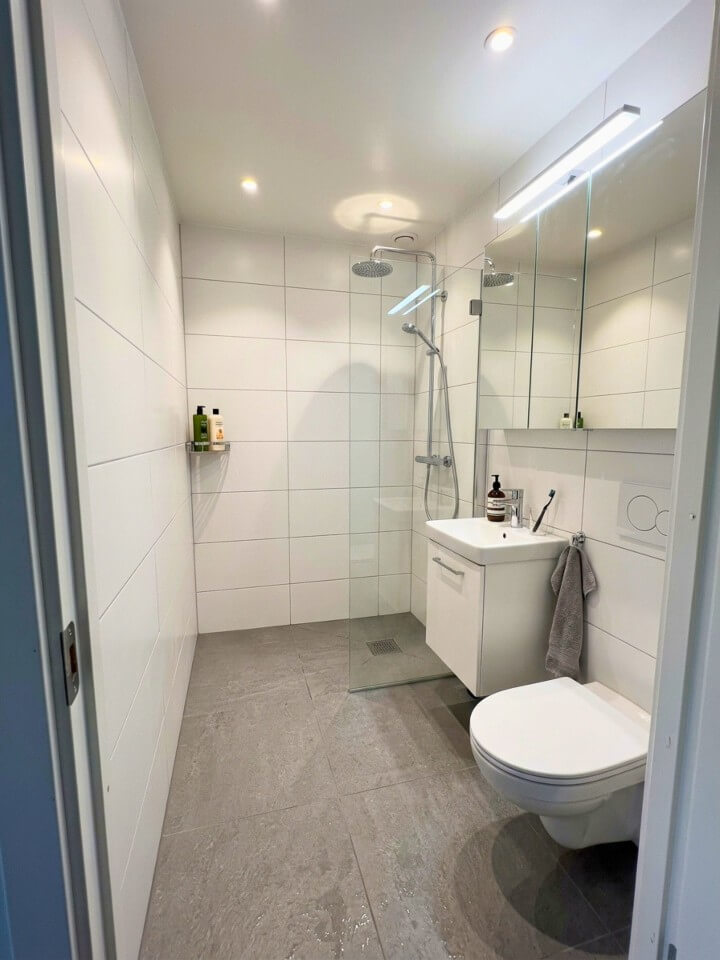
For bathrooms under 45 square feet, waterproofing the entire floor as a drainage surface is the most space-efficient approach. Tile runs continuously across every surface; a single glass panel can be added for optional splash control. Waterproofing is non-negotiable — a bonded membrane system across the full floor and at least 6 inches up every wall is required, not just backer board. Decide drain placement first: a center drain suits square bathrooms, a wall-side linear drain works better in narrow rectangular layouts. This decision affects tile layout and floor slope direction.
3. Use Pebble Tile for a Natural Texture
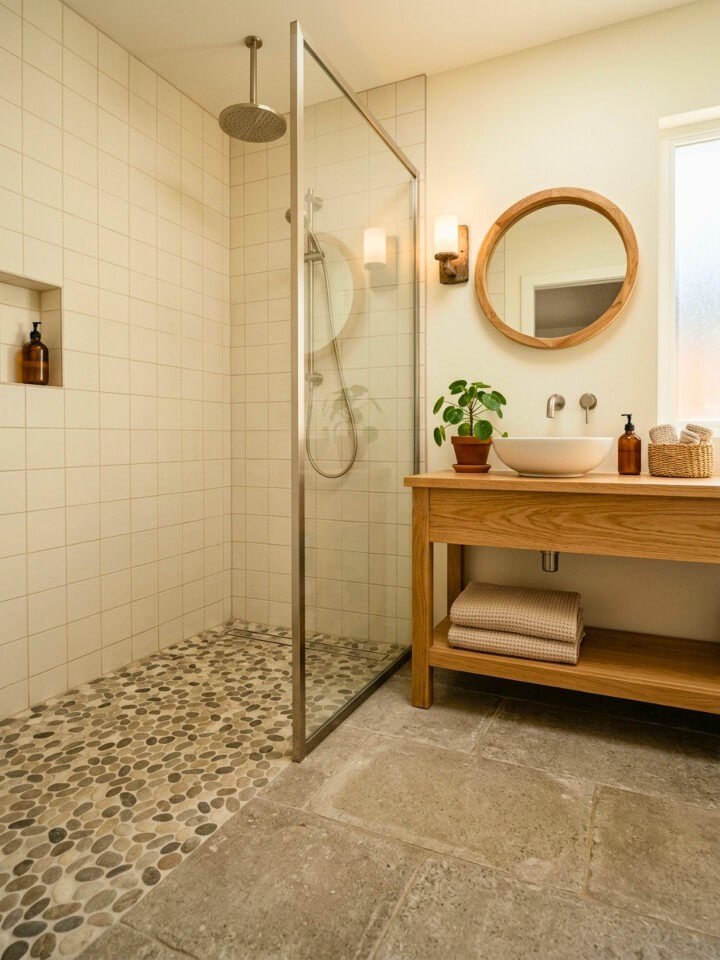
Pebble tile brings organic texture and warmth to a shower floor. Rounded pebbles are uncomfortable for daily use — flat river rock tile gives a similar look with a much better surface underfoot. Keep walls simple with white, beige, or large-format stone-look tile so the floor stays the focal point. Epoxy grout performs significantly better than cement-based grout on pebble floors because the grout surface area is much higher — the cleaning time difference shows within the first year. A squeegee won’t work on this surface, so factor occasional scrubbing into the maintenance routine.
4. Place the Shower in a Corner
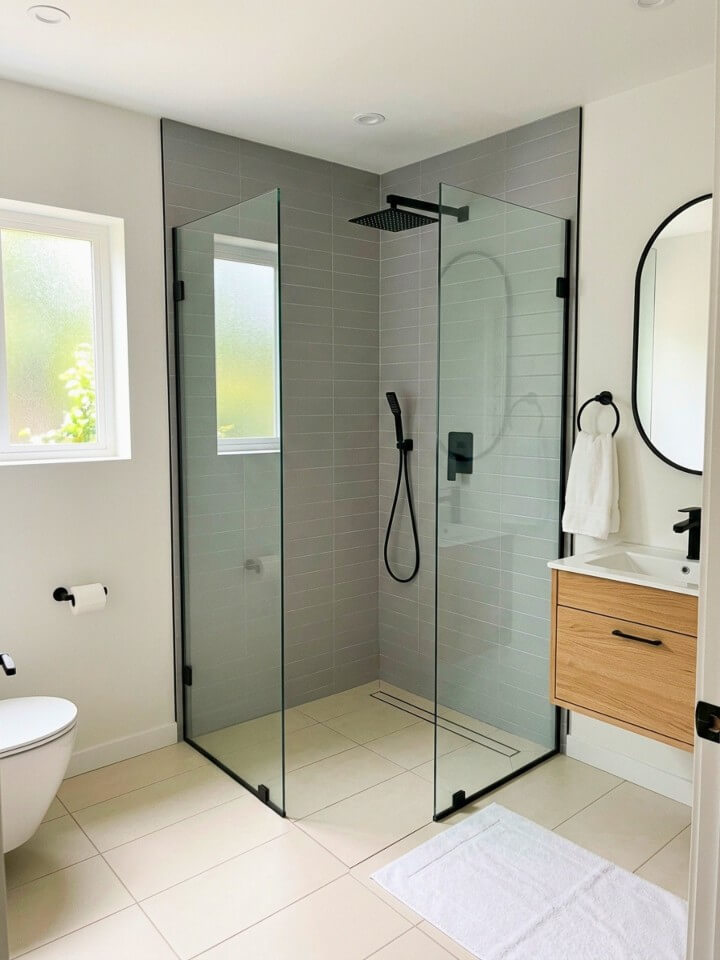
A corner location uses two existing walls as the enclosure, requiring glass or a half wall on only one or two open sides. This reduces both enclosure cost and visual complexity. The entry should face the bathroom door or open floor space — a poorly placed entry feels awkward every single day. A single glass panel is usually sufficient for splash control. If a window sits near the shower, keeping the glass option preserves natural light movement through the space; a solid return wall blocks it and makes the room feel slightly more closed.
5. Add a Half Wall for Separation Without Enclosure
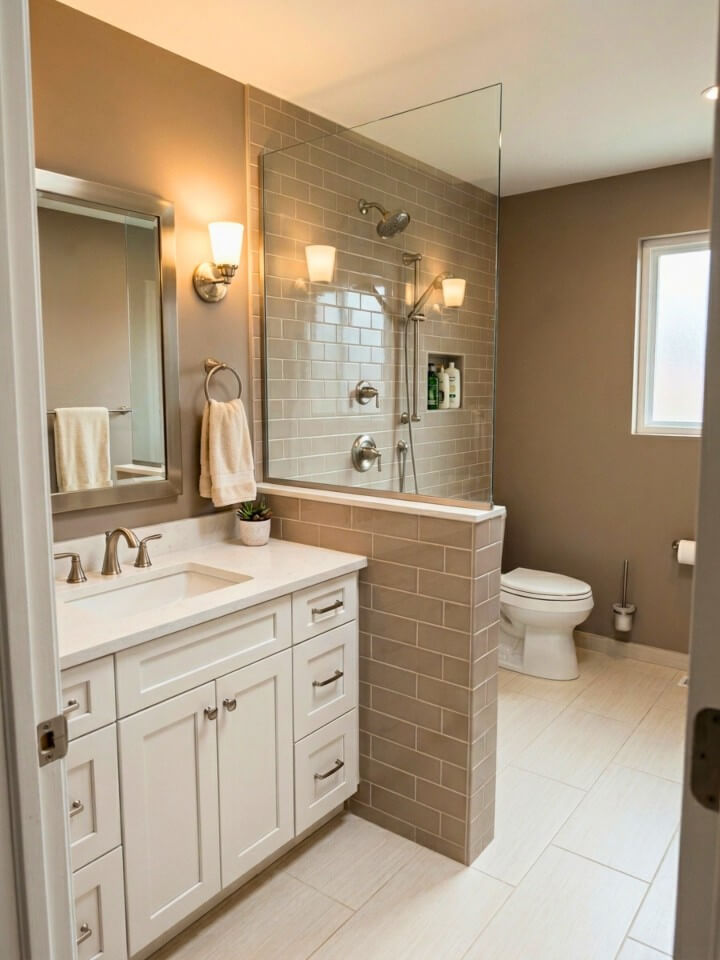
A 48-inch half wall blocks most splash while avoiding the clinical feel of a full glass enclosure. It works best when the shower sits adjacent to the toilet or vanity. For a standard wall-mounted shower head, 48 inches is sufficient; for a rain head or ceiling-mounted fixture, 36 inches may be enough since the spray pattern is more vertical. The top of the wall should not be a raw tiled edge — a 2-inch thick stone cap in marble, quartzite, or porcelain slab gives the wall a finished, furniture-like quality and creates a small usable ledge in a space with limited surfaces.
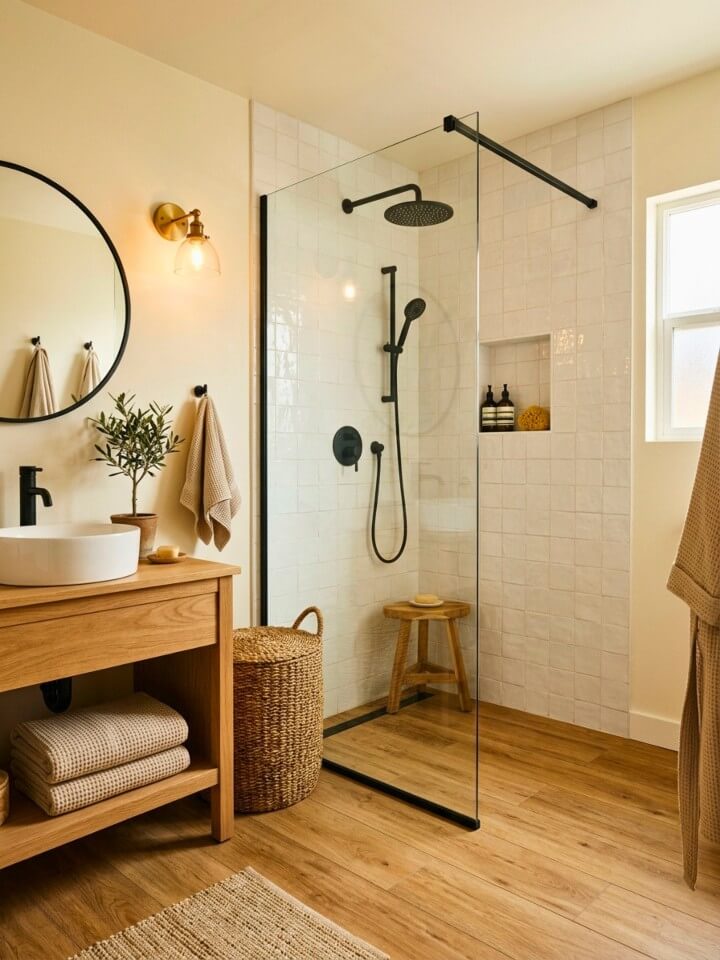
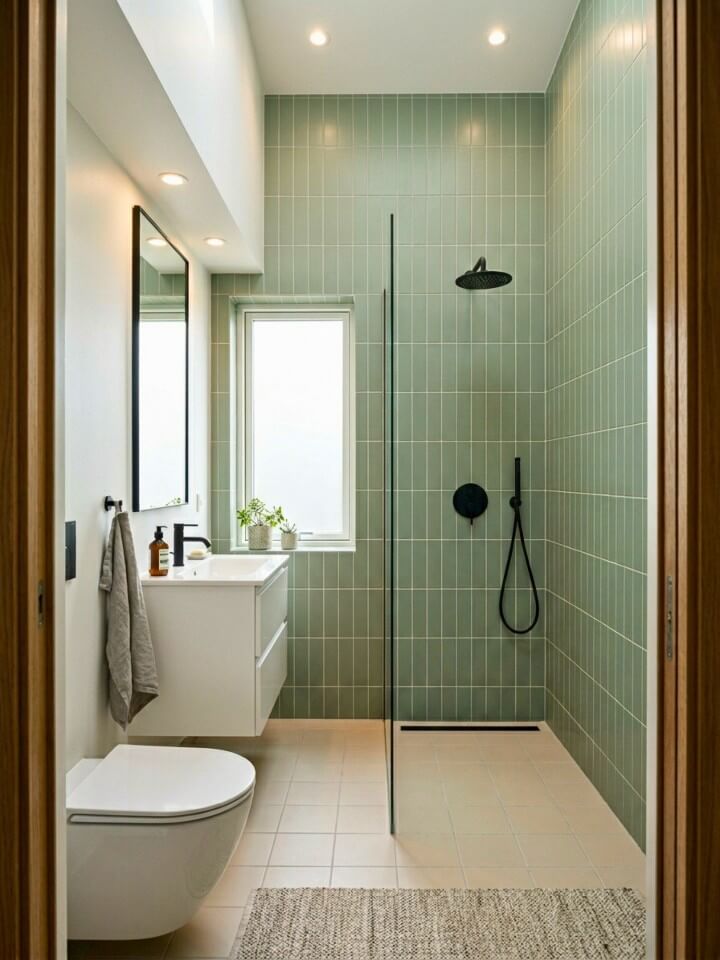
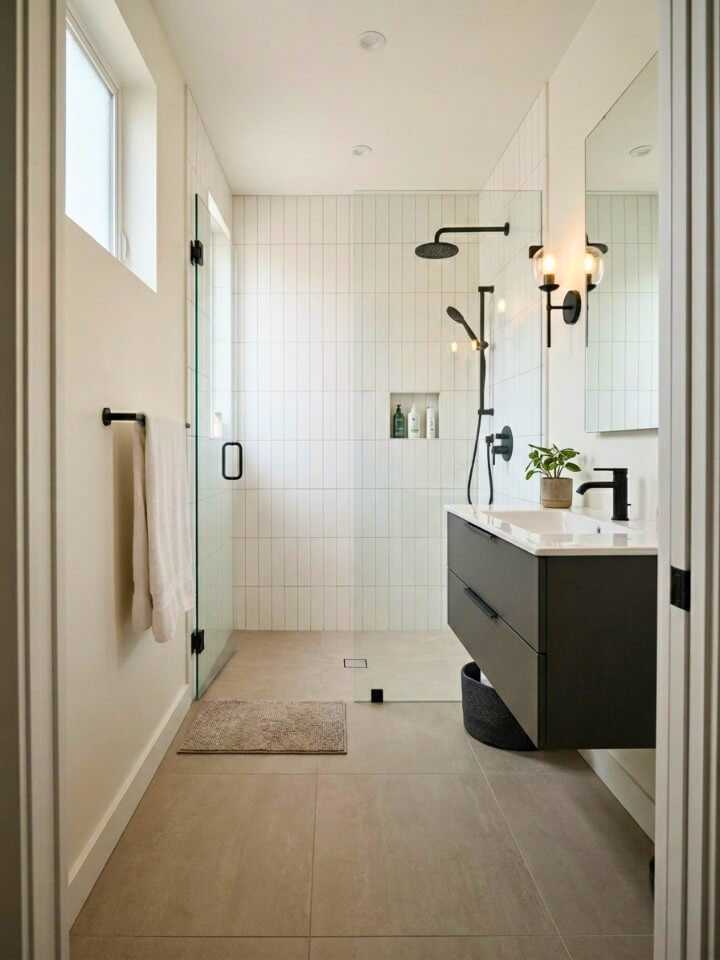
6. Use Matte Black Fixtures as the Design Anchor
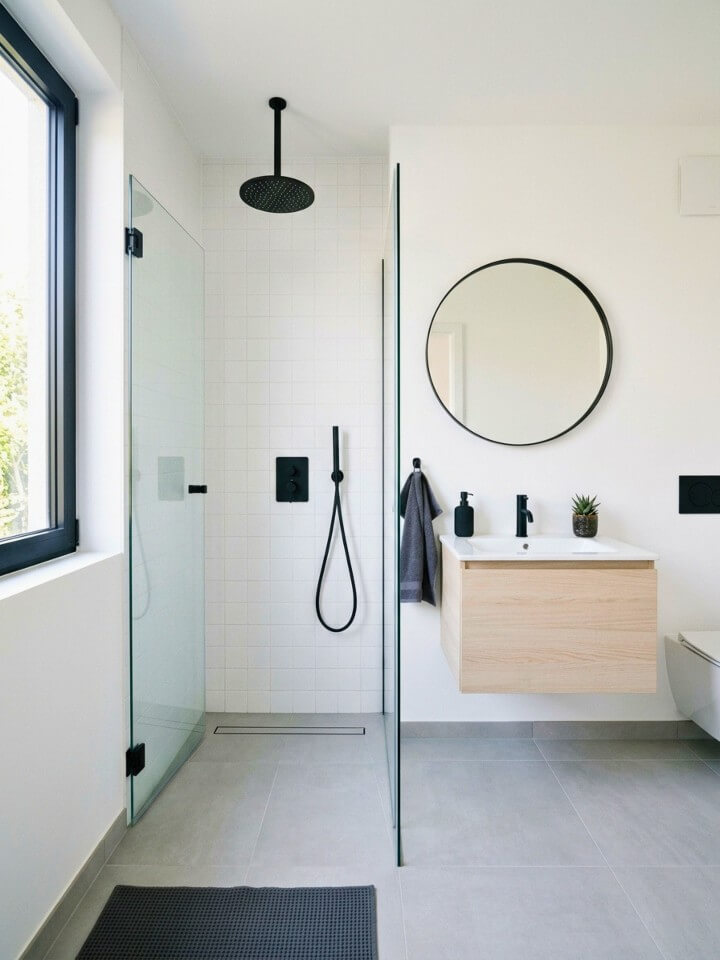
In a room with neutral tile and white or gray walls, matte black fixtures — shower head, valve trim, drain cover, towel hooks — pull every element into one coherent statement. Consistency is critical: mixing chrome or brushed nickel, even on minor items, breaks the visual logic. Matte black also hides water spots better than polished chrome in hard-water areas. PVD-coated finishes are significantly more durable than painted finishes, which show wear at edges and contact points within a few years. Buy all fixtures from the same manufacturer line — matte black varies between brands and can look noticeably different under bathroom lighting.
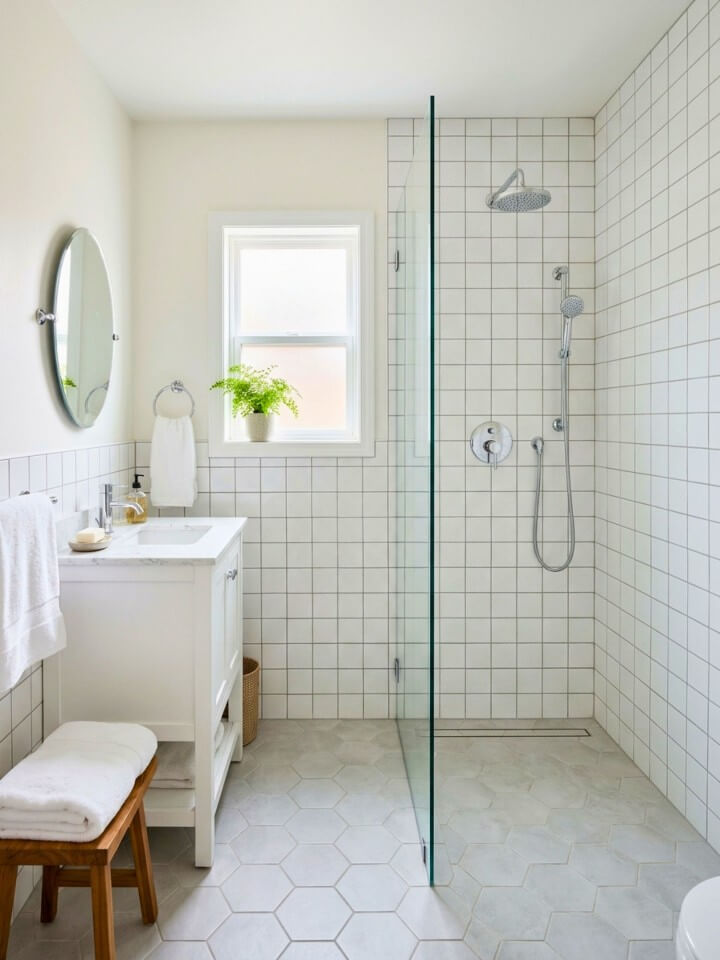
7. Use Large-Format Tiles to Reduce Visual Clutter
Small tile grid patterns draw attention to how small the room actually is. Large-format 24×24 or 24×48 porcelain dramatically reduces grout lines and lets the floor breathe. Running the same tile from the main bathroom floor straight into the curbless shower without interruption makes both zones read as one continuous surface — the room feels noticeably larger without any structural changes. Rectified 24×24 tiles handle corners and odd cuts better than 24×48 planks in narrow bathrooms. Use a 1/16-inch grout joint and match the grout color closely to the tile. Measure the longest uninterrupted floor run first and order 10–15% extra for cuts.
8. Install a Single Glass Panel on the Splash Side
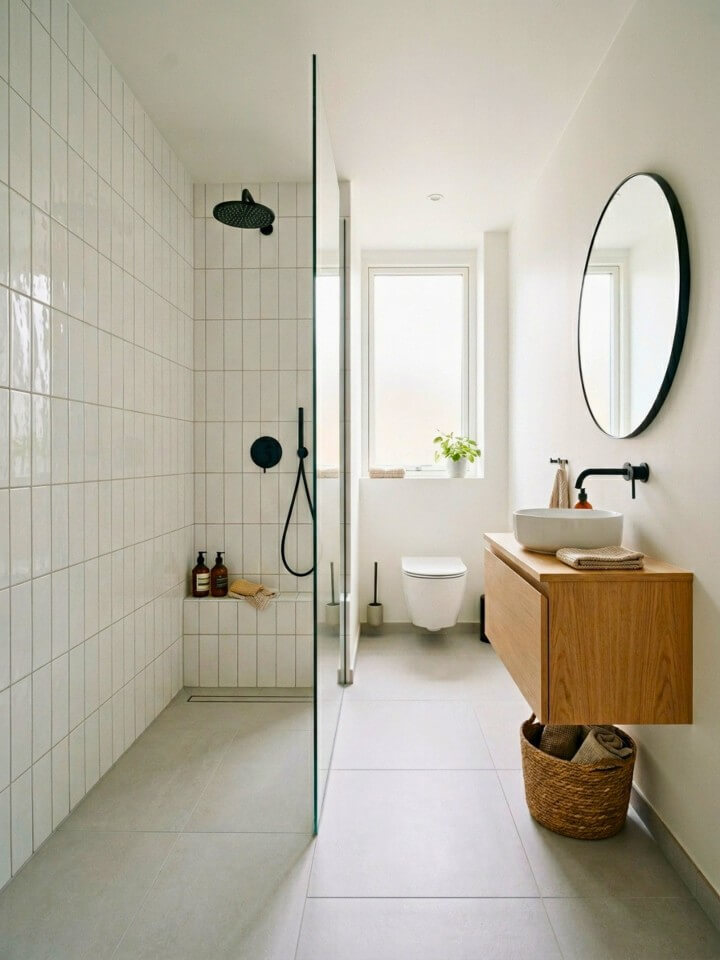
One fixed 3/8-inch tempered glass panel on the wet side of the shower stops splash without walling off the room. The entry stays open, which makes tight layouts easier to move through. Low-profile wall brackets keep hardware minimal. Mount the panel at least 36 inches wide, positioned directly across from the shower head — that is where most water goes. For privacy without losing light, fluted or reeded glass works well, though it costs roughly 20–30% more than clear and may have longer lead times. Decide on glass type early since panel width determines whether this approach controls splash effectively.
9. Fit a Linear Drain Along One Wall
A standard round drain requires the floor to slope from all four sides, creating an uneven surface that is uncomfortable underfoot and makes large tiles difficult to lay. A linear drain slopes the floor in one direction only, toward a narrow channel at the back wall or just inside the entry. The result is a flatter floor and cleaner tile work. For shower floors under 36 inches wide, a 24-inch channel handles water volume adequately; wider showers need a 32 to 48-inch channel. Drain placement must be decided before rough-in — moving it afterward means breaking open the floor. Back wall placement gives the flattest surface and works best when the shower head is on the opposite wall.
10. Run the Same Tile Through the Shower and the Main Floor
Two different floor materials at the shower entry create a visual stop that makes the room feel divided. Using the same porcelain tile across both zones with continuous grout joints removes that line entirely — the room reads as one space rather than two. This works best with a slightly textured tile surface: enough grip for the wet shower floor, polished enough for the dry zone. Choose a grout shade within one tone of the tile — lighter grout draws attention to every joint line, which works against the seamless effect. Discuss the floor angle transition with your tile setter before work begins, as the shower floor slopes toward the drain while the main floor stays flat.
Continue Reading: 26 Cozy Dark Brown Floor Living Room Ideas
11. Build a Recessed Bench Into the Shower

A built-in bench becomes part of the shower rather than something sitting in it. Standard height is 17 to 19 inches from the floor, matching a chair seat. Tile the top surface to match the walls for a quiet integrated look, or cap it with a stone slab for easier cleaning. Slope the surface slightly toward the drain so water does not pool. A bench depth of 15 inches works for most adults; anything under 12 inches feels unstable. In a narrow shower, a corner bench takes up less wall space while remaining functional. Bench placement must be decided before wall framing is complete — adding one afterward means opening the wall.
12. Choose Light Stone-Look Porcelain for the Walls
Stone-look porcelain eliminates the sealing and staining maintenance that natural stone requires while delivering the same visual warmth. In a small shower, keeping wall tile in a light value matters — dark stone-look tile makes a compact space feel cave-like. A 12×24 tile laid vertically on the walls paired with a smaller mosaic on the floor creates contrast while keeping the palette calm. Porcelain itself needs no sealing, but grout does — use epoxy grout for the most stain-resistant result, or apply a penetrating sealer to cement-based grout twice a year. Look for glazed porcelain with a water absorption rate under 0.5%; anything labeled ceramic rather than porcelain absorbs more water and is less suitable for wet walls.
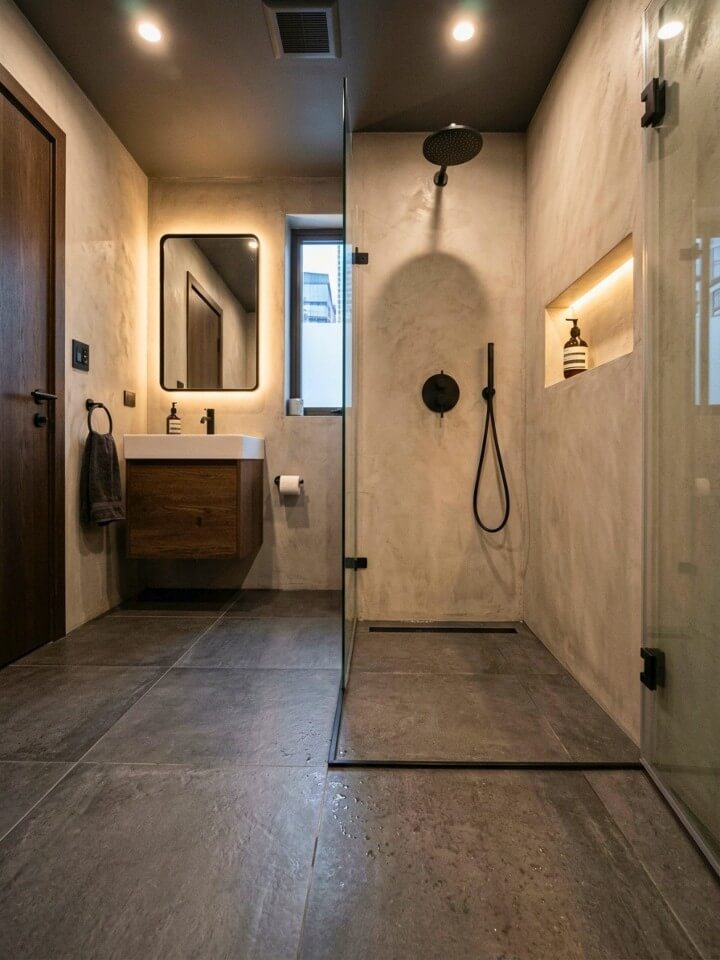
13. Cut a Niche Into the Wall for Shower Storage
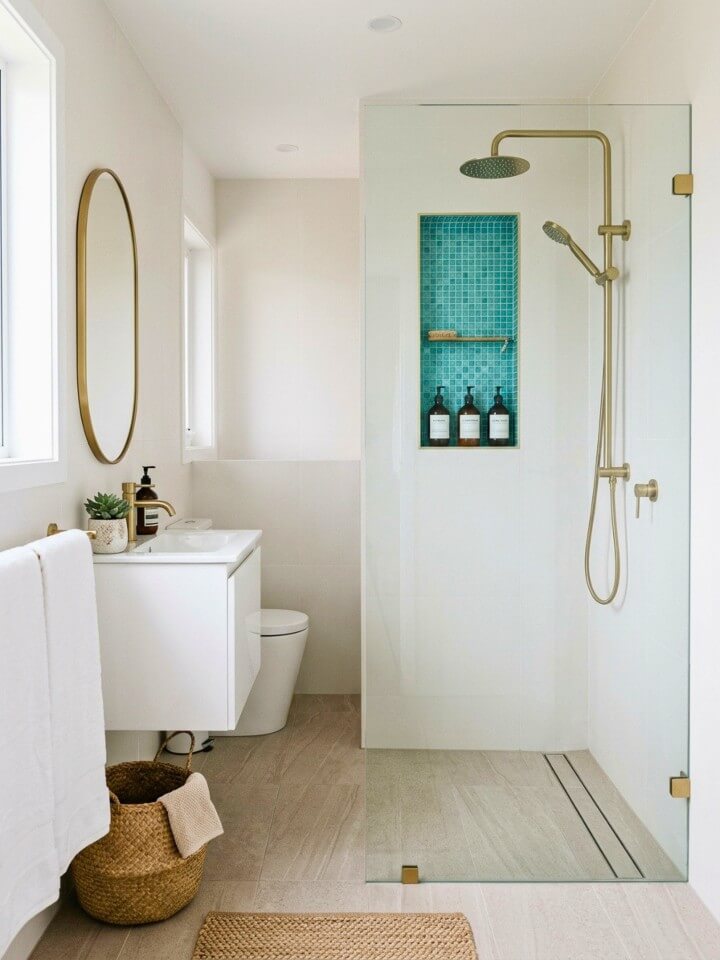
A recessed niche solves storage without adding depth to the room — it sits inside the wall cavity, flush with the tile surface. Standard dimensions are 12 inches wide, 24 inches tall, and 3.5 inches deep, fitting between standard wall studs without structural changes. Position it between shoulder and eye height on the wall opposite the shower head. Never cut a niche into an exterior wall in a cold climate — it interrupts insulation and creates a condensation point. Interior walls are always the safer choice. Confirm stud spacing before finalizing niche width; standard 16-inch on-center framing gives roughly 14.5 inches of clear space, which works for a single niche without removing a stud.
14. Lay Small Mosaic Tile on the Shower Floor
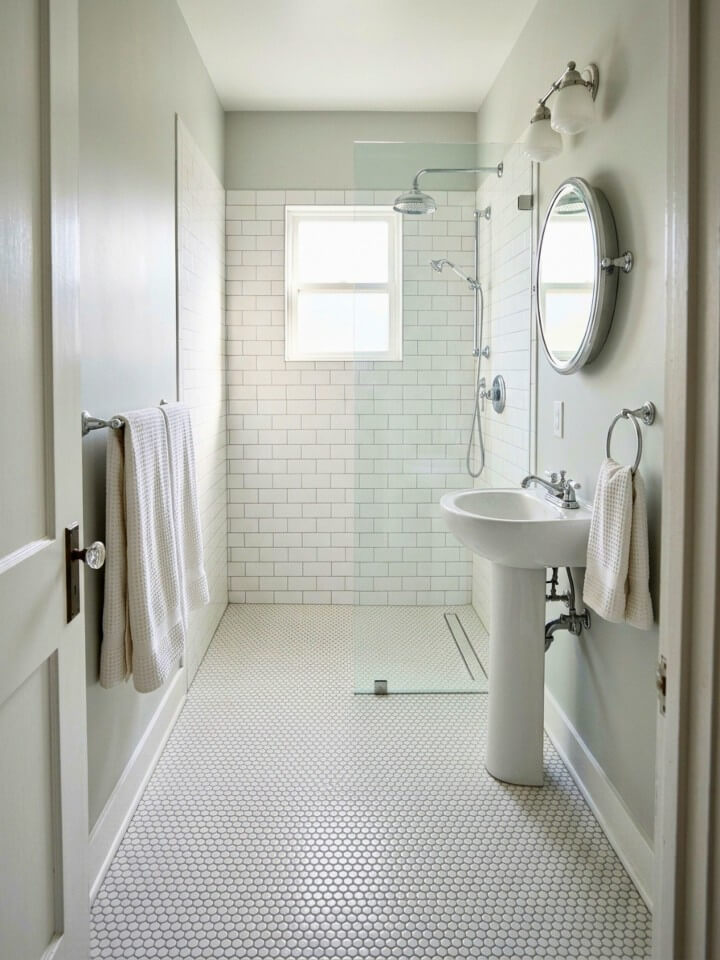
Mosaic tile — penny rounds, 2×2 squares, or small hex shapes — conforms more naturally to the floor slope than large tiles and provides better grip because of the higher grout-to-tile ratio. Large tiles require a very precise slope; any unevenness becomes visible across a wide flat surface. Use mosaic only on the shower floor and carry larger format tile up the walls so the room does not feel busy. For households with elderly adults or young children, mosaic floors offer meaningful safety improvement that larger tiles cannot replicate. Grout color choice is amplified on mosaic — light mosaic with dark grout reads as pattern; the same mosaic with matching grout reads as texture.
15. Pair White Tile With Soft Gray Grout
Bright white grout on white tile shows soap residue, mineral deposits, and discoloration within weeks — and it does not fully reverse with cleaning. Soft gray grout solves this practically while adding just enough contrast to make the tile layout readable. Subway tile, square format, and handmade-look ceramic all work well with this combination. There is a wide range between light gray and charcoal — test a grout sample against your actual tile under bathroom lighting before ordering. Light warm gray suits cream or off-white tile; cool medium gray works with bright white or pale blue. Even gray grout benefits from a penetrating sealer applied after installation and again every 12 to 18 months.
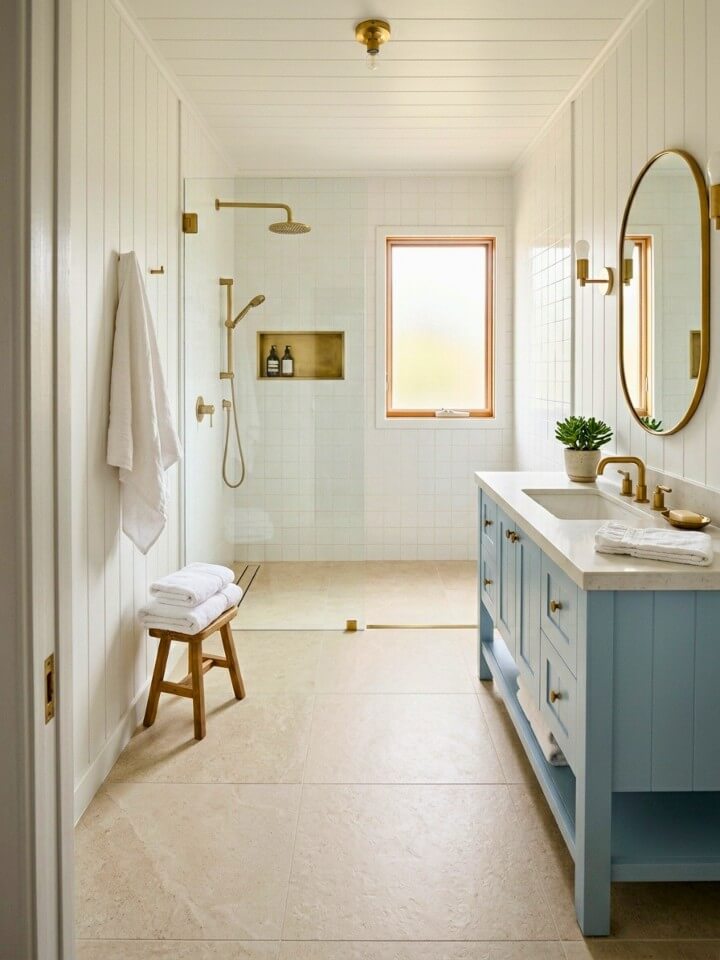
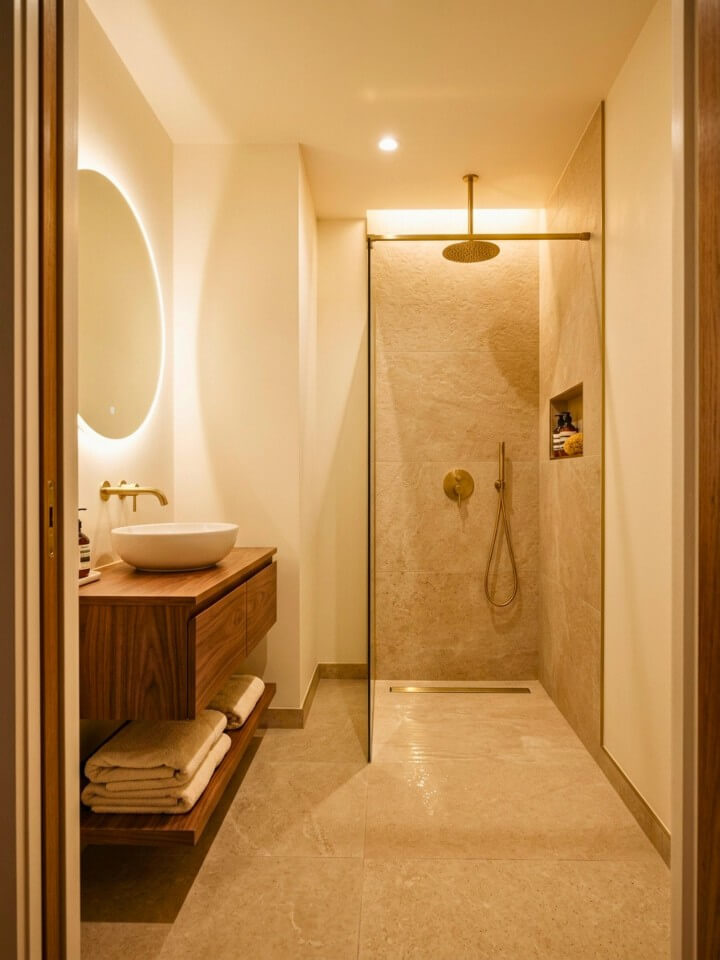
16. Add Brass Fixtures for Warmth
White and gray tile combinations can read as cold in bathrooms with limited natural light. Brass fixtures shift that immediately — the warm metallic tone pulls against cool tile without adding color to walls or floor. Use brass consistently across the shower head, valve trim, drain cover, and all towel and robe hardware. Unlacquered brass develops a natural patina over time; lacquered brass stays brighter longer but can chip if the coating is damaged. True brass has more orange-yellow depth than brushed gold, which reads flatter and cooler — manufacturers use both terms inconsistently, so check the actual finish photo. Order one fixture first and confirm the tone works under your bathroom lighting before purchasing the full set.
17. Stack Tiles Vertically to Add Height
Running slim rectangular tiles — 4×12, 3×12, or 4×16 — vertically from floor to ceiling pulls the eye upward and makes low ceilings feel farther away. The effect is strongest on the wall directly facing the entry. Bathrooms with ceilings under 8 feet benefit most; above 9 feet the ceiling is already doing the work and vertical stacking can make the room feel narrow rather than tall. Keep the floor simple with a neutral tile so the vertical wall movement is not competing with a busy floor pattern. Use a 1/16-inch grout joint for rectified tile — a wide joint emphasizes every horizontal line and partially cancels the height effect.
18. Install a Frameless Shower Door

When the layout is tight and an open entry allows water to reach surfaces it should not, a frameless hinged or pivot glass door solves the splash problem without the visual bulk of a framed enclosure. Clear tempered glass at 3/8 or 1/2 inch holds itself with only minimal hinge and handle hardware. Confirm at least 30 inches of clear floor space for the door swing before choosing this option — always specify outswing, as an inswing door leaves nowhere to step back in a small enclosure. Half-inch glass feels more substantial and closes more quietly but costs 25–35% more and adds weight to hinges. For doors under 30 inches wide, 3/8 inch is sufficient.
19. Add Recessed Lighting Directly Above the Shower
A single centered ceiling light often leaves the shower zone noticeably dimmer than the rest of the bathroom. Recessed fixtures positioned directly above the shower floor illuminate tile, niche, and fixtures without shadows from the user’s own body. Use damp-rated fixtures for most ceiling positions above a curbless shower; wet-rated is required only if the light sits directly in the water stream. Warm white at 2700K suits most bathroom tile palettes and avoids a clinical feel. One 4-inch fixture handles roughly 25 square feet; larger showers need two positioned parallel to the longest wall. If adding a dimmer, confirm the fixture is dimmer-compatible — LED fixtures sometimes require a specific dimmer model to avoid flickering.
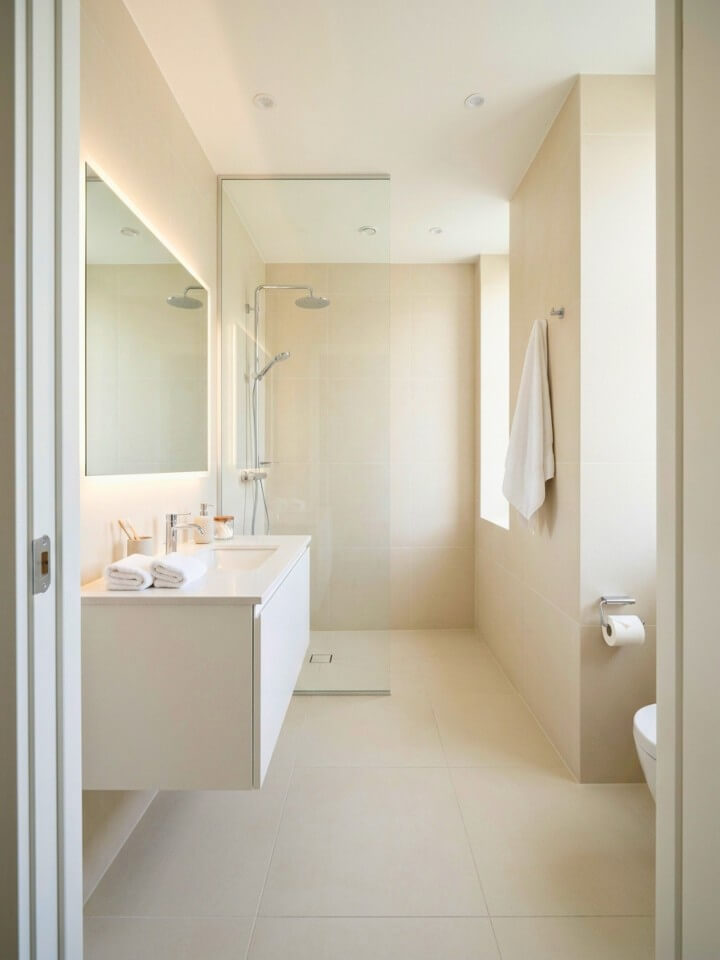
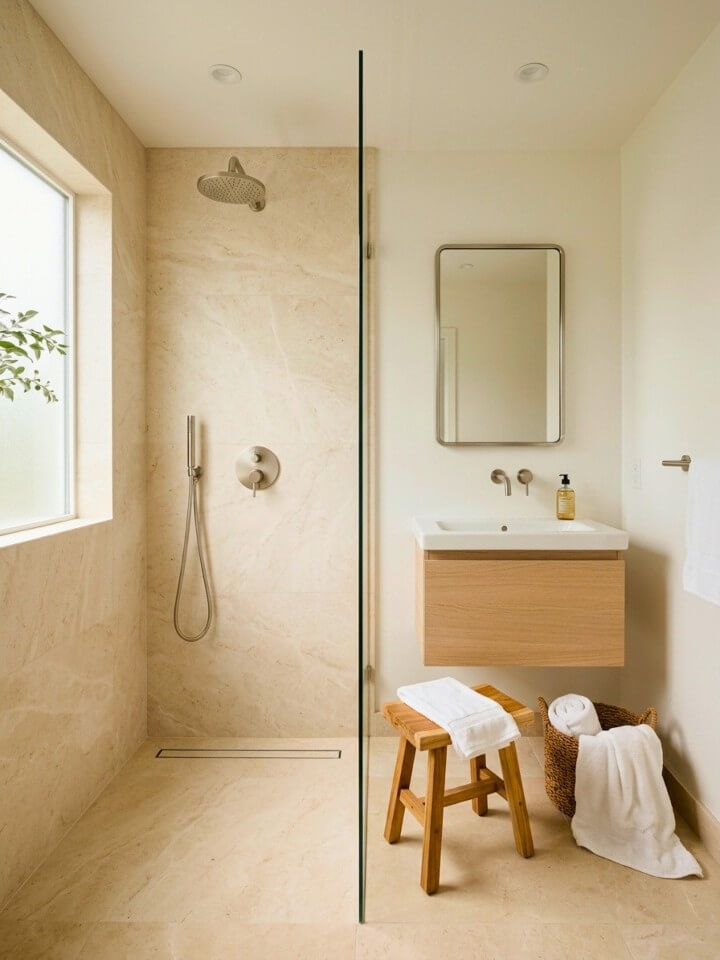
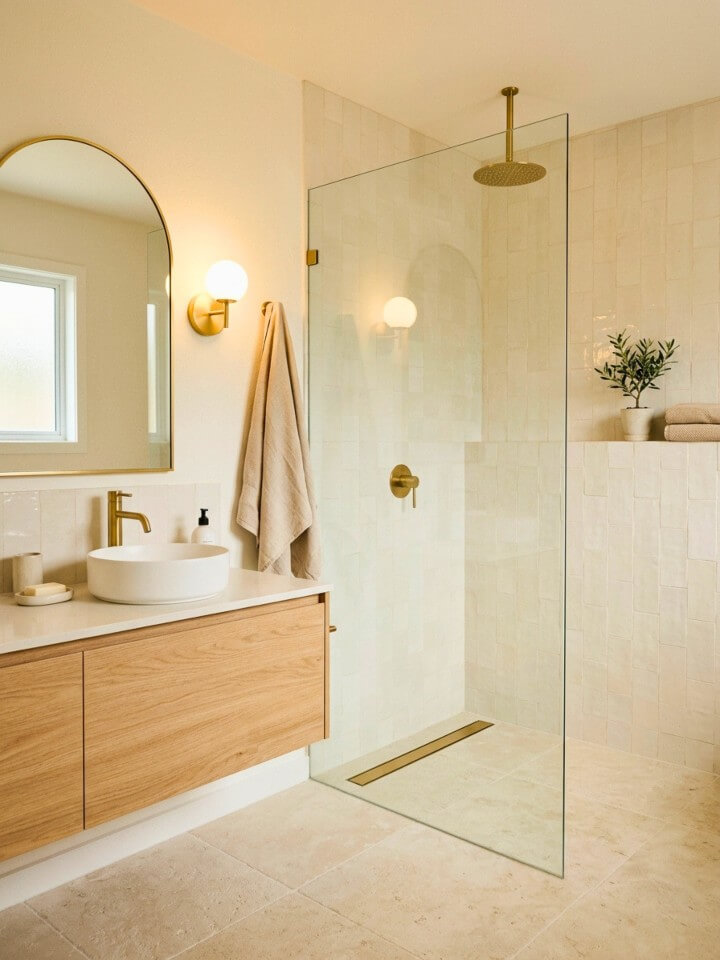
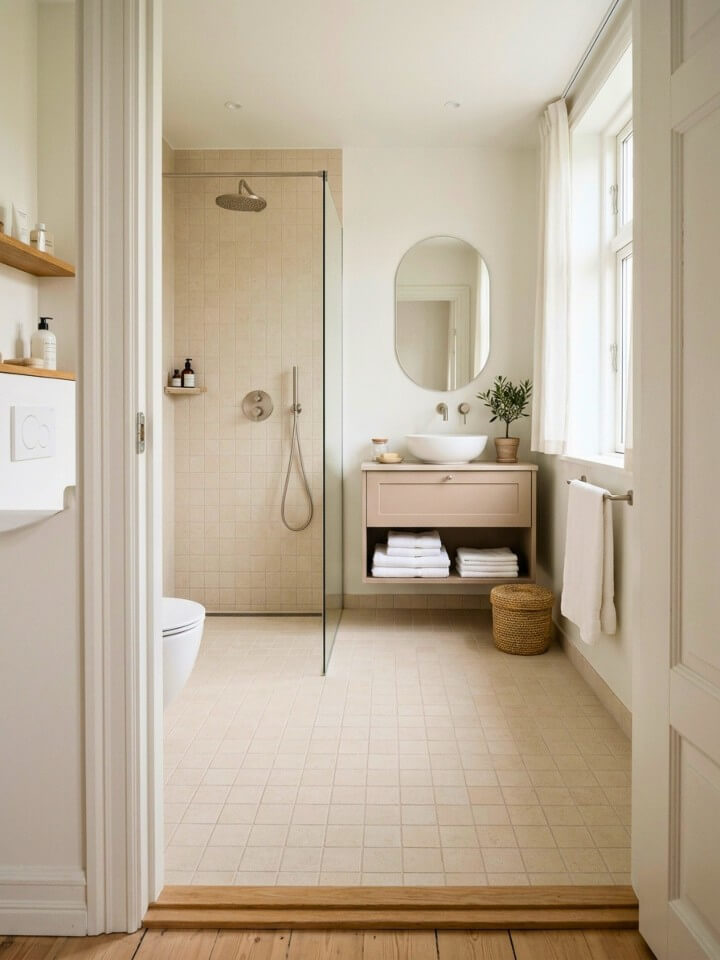
20. Build the Color Palette Around Soft Beige
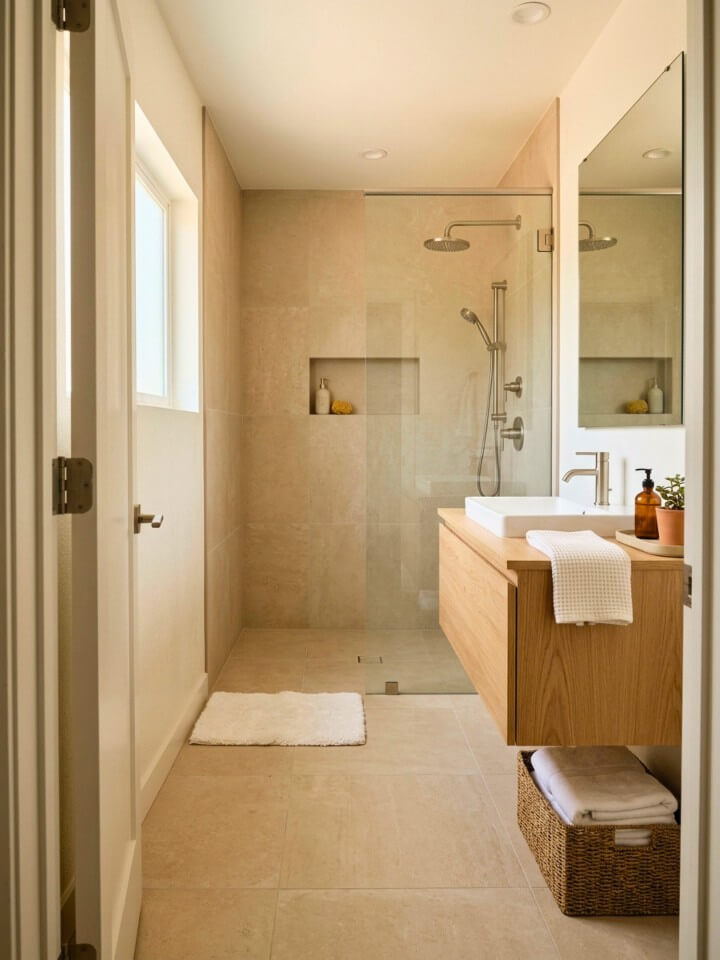
Beige carries warmth that white and gray do not, making a small shower feel more considered and less utilitarian. Use soft beige on shower walls and floor, then carry the same tone into the main bathroom through paint, towels, or vanity finish. Pair with brushed brass or warm brushed nickel — cool chrome fights against beige. Beige tile ranges from near-white greige to deep sand, and the undertone (pink, yellow, or gray) reads differently under morning versus evening light. Order samples and live with them in the bathroom for a full day before deciding. Introduce one textured element — a lightly hammered wall tile, woven-look mosaic floor, or stone bench cap — to keep a single-tone palette from feeling flat.
21. Make One Wall a Focal Point With Pattern Tile
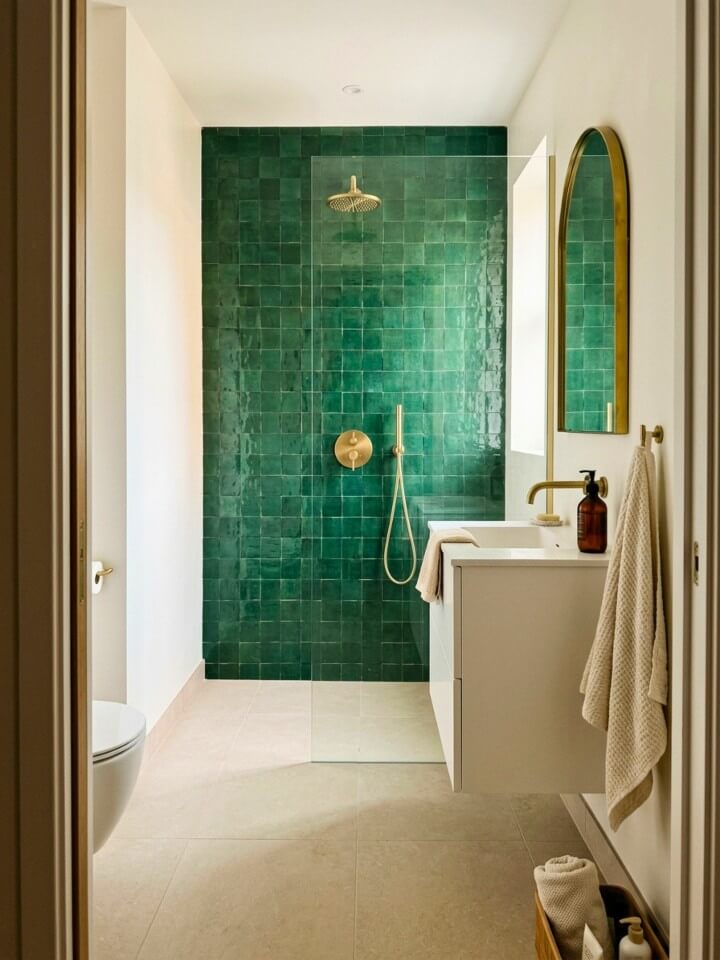
The back wall is the one surface that can carry visual weight without making a small shower feel smaller. A single wall in zellige tile, encaustic cement tile, or handmade ceramic gives the shower a clear focal point without filling the room with decoration. Keep the remaining walls in a plain coordinating color and use simple fixtures so nothing competes. Smaller repeating patterns or irregular textures like zellige work better in confined spaces than large geometric patterns — the eye reads them as texture rather than trying to follow a logic that does not complete itself across too few tiles. Zellige and handmade encaustic tiles vary in thickness, so confirm your tile installer has worked with handmade tile before committing.
22. Use Clear Glass to Keep Sightlines Open

Clear glass — whether a single panel or full enclosure — lets the eye travel through the shower zone without stopping, making the entire room read larger. It also keeps the tile work visible. The practical tradeoff is that clear glass shows water spots more readily than frosted alternatives; a 15-second squeegee after each shower handles most of this. A factory-applied hydrophobic coating causes water to bead and roll off rather than sheet and dry on the surface — ask whether the glass includes this coating. Frameless enclosures cost more but eliminate the metal channel at the floor where soap scum and mildew accumulate in framed systems. In a small shower used daily, that bottom track becomes a persistent cleaning problem.
23. Mount the Vanity on the Wall Instead of the Floor
A floor-mounted vanity breaks the floor plane and makes the eye stop at the cabinet base. A wall-mounted vanity lifts completely off the floor, letting tile run uninterrupted from the shower zone through the main bathroom. The open space underneath reads as floor area even though it is not usable, making the room feel larger than the actual square footage. Choose a depth of 18 to 20 inches — standard 21-inch vanities feel obstructive in tight spaces. Wall-mounted vanities require solid blocking inside the wall during the framing stage; adding it to a finished wall adds cost and patching work. Confirm the existing rough-in plumbing location with your plumber before selecting a specific vanity model.
24. Install a Rain Shower Head for a Spa-Quality Feel
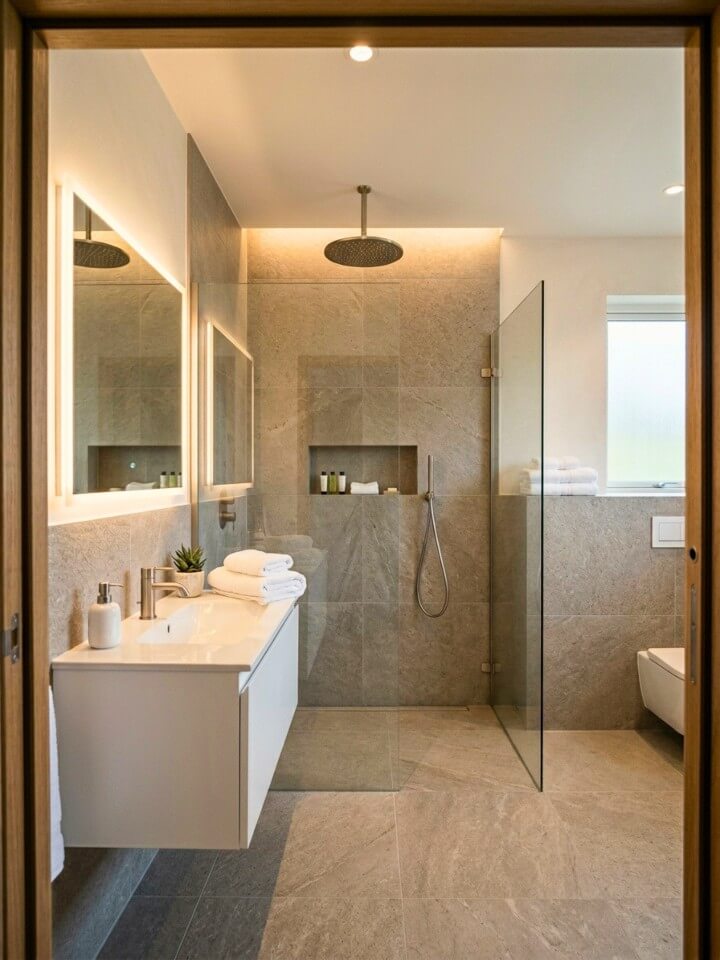
A ceiling-mounted rain head delivers water straight down across a wider area, which suits a curbless shower well — the vertical spray pattern keeps water more contained without a curb to define the wet zone. Mount it centered over the shower floor, not over the drain where most people stand. Add a handheld on a slide bar for rinsing the floor and walls. A wall-mounted extended arm projecting 12 to 15 inches positions the head over the shower center without ceiling plumbing work, at significantly lower installation cost. Rain heads use more water than standard heads — if home water pressure runs low, a pressure-compensating valve or a smaller head diameter (8 inches rather than 12) performs better
25. Commit to Two or Three Colors and Repeat Them
Bathrooms that feel calm and intentional share one common trait — a narrow, consistent palette. White walls, beige tile, and warm brass repeated across fixtures, mirror frame, and towel hooks reads as a considered design. The same elements chosen independently and used inconsistently read as unfinished. For a small curbless shower, a two-tone palette with a single metal finish across all fixtures is enough. The most common mistake is in accessories — a chrome towel bar, brushed nickel toilet paper holder, matte black robe hook, and brass mirror frame all bought separately because each seemed neutral. Decide on one metal finish before purchasing any accessory and apply it without exception. Match grout to the tile or paint rather than introducing a third tone.
FAQs About Small Bathroom Curbless Showers
Most bathroom guides focus on looks and skip the questions that come up once planning actually starts. These five cover the details that make the difference between a curbless shower that works well and one that causes problems within the first year.
What Is the Minimum Size for A Curbless Shower in A Small Bathroom?
The functional minimum is 36×36 inches, but 36×48 inches is more comfortable for daily use. Anything smaller creates water containment problems — the floor slope cannot direct water toward the drain effectively without the shower feeling awkwardly pitched underfoot. Most contractors recommend 36×48 as the realistic starting point.
Does a Curbless Shower Cause More Water Leakage onto The Bathroom Floor?
Not when the floor slope and drain placement are done correctly. The shower floor needs a slope of at least 1/4 inch per foot toward the drain. A glass panel on the splash side handles the rest. Poor installation causes leakage — the curbless design itself does not.
How Much Does a Curbless Shower Cost Compared to A Standard Shower?
Expect to pay 15 to 25 percent more than a standard curbed shower. The extra cost comes from the mud bed work needed to create the correct floor slope, waterproof membrane installation, and linear drain pricing. Material choices — tile type, drain finish, glass panel — affect the final number significantly.
Can a Curbless Shower Be Added to An Existing Bathroom without Major Renovation?
Rarely without some floor work. The existing subfloor usually needs modification to accommodate the slope toward the drain and the waterproof membrane. If the current shower already has a pan, converting it to curbless requires removing the pan, rebuilding the floor bed, and repositioning or replacing the drain.
Is a Curbless Shower Safe for Elderly Users or People with Mobility Issues?
It is one of the safest shower configurations available for this reason — no curb means no step to catch a foot on entering or exiting. Pair it with a built-in bench at 17 to 19 inches height, a handheld shower head, and mosaic floor tile for grip, and the shower becomes genuinely accessible for daily independent use.
Conclusion:
A curbless shower does more for a small bathroom than almost any other single change — it removes a physical barrier, opens the floor visually, and makes the space easier to clean and safer to use every day. Some of what is covered here costs almost nothing to change: a grout shade, a fixture finish, a tile orientation. Other decisions — drain placement, bench framing, wet room waterproofing — have to happen early or they become expensive to fix later. Pick two or three ideas that match the actual layout and budget, execute them carefully, and a compact bathroom stops feeling like a